Creating Linear Gradient in React Native
Before delving into the exciting world of creating linear gradients in React Native, it’s essential to have a solid foundation. To embark on this journey, you’ll need a basic understanding of React Native and JavaScript programming. Familiarity with CSS and styling concepts will also prove beneficial. Also, ensure you have the latest version of Node.js and the React Native CLI installed on your machine. With these prerequisites in place, you’re all set to unleash the magic of linear gradients in your React Native projects.
Table of Content:
- What are Gradients in React-Native?
- What is Linear Gradient in React-Native?
- Types of Gradients in React-Native
- Advantages of Linear Gradient in React-Native
- Conclusion
Check out our Full Stack Web Developer Course on YouTube:
{
“@context”: “https://schema.org”,
“@type”: “VideoObject”,
“name”: “Full Stack Web Development Course 2023 | Full Stack Developer Course | Intellipaat”,
“description”: “Creating Linear Gradient in React Native”,
“thumbnailUrl”: “https://img.youtube.com/vi/b92T8aCOwS0/hqdefault.jpg”,
“uploadDate”: “2023-07-27T08:00:00+08:00”,
“publisher”: {
“@type”: “Organization”,
“name”: “Intellipaat Software Solutions Pvt Ltd”,
“logo”: {
“@type”: “ImageObject”,
“url”: “https://intellipaat.com/blog/wp-content/themes/intellipaat-blog-new/images/logo.png”,
“width”: 124,
“height”: 43
}
},
“embedUrl”: “https://www.youtube.com/embed/b92T8aCOwS0”
}
What are Gradients in React-Native?
A Gradient in react-native is a gradual transition between two or more colors, creating a smooth blend that adds depth, dimension, and visual interest to UI elements. Gradients are powerful tools in the domain of user interface (UI) design, and React Native provides the capability to incorporate gradients seamlessly into mobile applications.
There are different approaches to implementing gradients, ranging from using third-party libraries to leveraging the built-in capabilities of the platform. One popular library is ‘react-native-linear-gradient,’ which offers a straightforward and flexible solution for incorporating gradients into your React Native projects.
Initial Steps to Follow for Utilizing Gradients in React-Native:
- To utilize gradients in React Native, you first need to set up the necessary dependencies.
- It involves installing the ‘react-native-linear-gradient’ package and any additional dependencies the library requires.
- Once your installation is complete, you can import the library into your project and start your development with its gradient components.
The ‘LinearGradient’ component offered by the ‘react-native-linear-gradient’ library in React Native acts as a container for generating linear gradients. It allows developers to specify their preferred colors, locations, and start and end points, enabling the creation of personalized gradients that align with specific UI design needs.
To generate a gradient with the ‘LinearGradient’ component in React Native, you can specify it within the render method of your React Native component. The resulting gradient can be rendered as a background or an overlay depending on the chosen application method. By integrating the ‘LinearGradient’ component into your component’s structure, you can attain a visually appealing outcome that elevates your application’s overall aesthetics and user experience.
To learn more about React JS check out Intellipaat’s React certification course.
What is Linear Gradient in React-Native?
In React, a linear gradient is a graphical effect that allows developers to create smooth color transitions along a straight line. It is a powerful tool for enhancing a React application’s visual appeal and user experience by adding depth and dimension to UI elements such as backgrounds, text, borders, and shadows.
To incorporate a linear gradient in React, React Native offers CSS properties that can be utilized. Among these properties, backgroundImage is frequently employed to apply a linear gradient as the background of an element. The syntax for defining a linear gradient using backgroundImage is as follows:
Code:
import React from 'react';
import { View, StyleSheet, ImageBackground } from 'react-native';
const App = () => {
  return (


  );
};
const styles = StyleSheet.create({
  container: {
    flex: 1,
    justifyContent: 'center',
    alignItems: 'center',
  },
  gradient: {
    flex: 1,
    width: '100%',
  },
});
export default App;
In this example, we import the ImageBackground component from React Native to render an image as the background. The source prop of the ImageBackground component specifies the image file that contains the pre-generated linear gradient.
You can use various image editing tools or online gradient generators to generate the image with the desired linear gradient. Save and include the generated image in your React Native project’s assets.
To get in-depth knowledge of Reactjs check out our ReactJS Tutorial!
Types of Gradients in React-Native
Gradients in React Native offer diverse visual effects, allowing developers to create captivating and dynamic user interfaces. By smoothly blending colors, gradients can enhance UI elements’ visual appeal, depth, and dimension.
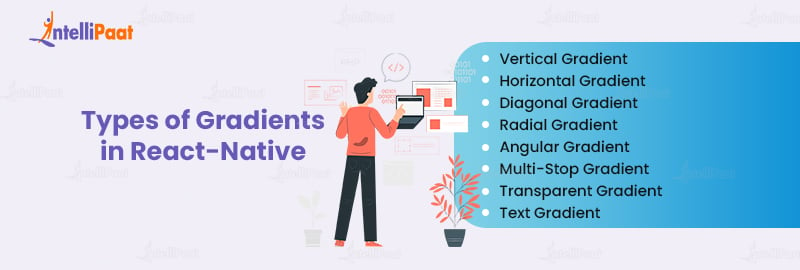
Vertical Gradient:
A vertical gradient transitions smoothly from one color to another vertically. It creates a top-to-bottom color progression, providing a sense of depth and elegance to your UI elements. To implement a vertical gradient in React Native, you can use the CSS background Image property.
Code:
import React from 'react';
import { View, StyleSheet } from 'react-native';
const App = () => {
  return (


  );
};
const styles = StyleSheet.create({
  container: {
    flex: 1,
    justifyContent: 'center',
    alignItems: 'center',
  },
  gradient: {
    flex: 1,
    width: '100%',
    backgroundImage: 'linear-gradient(to bottom, #ff0000, #0000ff)',
  },
});
export default App;
Explanation:
In the above example, the backgroundImage property is used to create a vertical gradient. The gradient progresses from red (#ff0000) at the top to blue (#0000ff) at the bottom. Adjust the color values to create your desired vertical gradient effect.
Horizontal Gradient:
A horizontal gradient transitions smoothly from one color to another horizontally. It creates a left-to-right color progression, adding visual interest and guiding the user’s attention. Similar to the vertical gradient, you can use the backgroundImage property to implement a horizontal gradient.
Code:
import React from 'react';
import { View, StyleSheet } from 'react-native';
const App = () => {
  return (


  );
};
const styles = StyleSheet.create({
  container: {
    flex: 1,
    justifyContent: 'center',
    alignItems: 'center',
  },
  gradient: {
    flex: 1,
    width: '100%',
    backgroundImage: 'linear-gradient(to right, #ff0000, #0000ff)',
  },
});
export default App;
Explanation:
The backgroundImage property creates a horizontal gradient. The gradient progresses from red (#ff0000) on the left to blue (#0000ff) on the right. Modify the color values to achieve your desired horizontal gradient effect.
Diagonal Gradient:
A diagonal gradient transitions smoothly from one color to another along a diagonal line. It adds dynamic and energetic visual appeal to your UI elements. To implement a diagonal gradient in React Native, you can use the backgroundImage property with specific angles.
Code:
import React from 'react';
import { View, StyleSheet } from 'react-native';
const App = () => {
  return (


  );
};
const styles = StyleSheet.create({
  container: {
    flex: 1,
    justifyContent: 'center',
    alignItems: 'center',
  },
  gradient: {
    flex: 1,
    width: '100%',
    backgroundImage: 'linear-gradient(45deg, #ff0000, #0000ff)',
  },
});
export default App;
Explanation:
In the above example, the backgroundImage property creates a diagonal gradient at a 45-degree angle. The gradient progresses from red (#ff0000) to blue (`
In the previous example, the backgroundImage property created a diagonal gradient at a 45-degree angle. The gradient progresses from red (#ff0000) to blue (#0000ff). Adjust the angle and color values to achieve your desired diagonal gradient effect.
Radial Gradients:
Radial gradients emanate from a central point and spread outward in a circular pattern. React Native doesn’t have built-in support for radial gradients, but they can be achieved using custom styling or third-party libraries like react-native-radial-gradient. Here’s a basic example:
Code:
import RadialGradient from 'react-native-radial-gradient';
import React from 'react';
import { View } from 'react-native';
const MyComponent = () => {
  return (

      {/* Content of the component */}

  );
};
export default MyComponent;
Explanation:
The color prop defines the colors used in the radial gradient. The center prop specifies the center point of the gradient, while the radius prop determines the size of the gradient.
Angular Gradients:
Angular gradients create a circular gradient that radiates from the center to the outer edges. They are not natively supported in React Native but can be achieved using custom styling techniques. Here’s a basic example:
Code:
import React from 'react';
import { View } from 'react-native';
const MyComponent = () => {
  return (

      {/* Content of the component */}

  );
};
export default MyComponent;
Explanation:
A component is styled to have a circular shape using the border-radius property. The background property applies a linear gradient at a 45-degree angle.
Multi-Stop Gradients:
Multi-stop gradients allow for more complex color transitions by defining multiple color stops along the gradient line. They can be implemented using the Linear Gradient component in React Native.
Code:
import LinearGradient from 'react-native-linear-gradient';
import React from 'react';
import { View } from 'react-native';
const MyComponent = () => {
  return (

      {/* Content of the component */}

  );
};
export default MyComponent;
Explanation:
In this example, the colors prop defines an array of colors, and the locations prop determines the position of each color stop along the gradient line. The start and end props specify the starting and ending positions, as seen in the linear gradient example.
Transparent Gradients:
Transparent gradients allow for a smooth transition from opaque to transparent or vice versa. React Native supports transparent gradients by adjusting the opacity of the colors in the gradient.
Code:
import LinearGradient from 'react-native-linear-gradient';
import React from 'react';
import { View } from 'react-native';
const MyComponent = () => {
  return (

      {/* Content of the component */}

  );
};
export default MyComponent;
Explanation:
The colors prop defines the starting color as fully opaque (rgba(255, 0, 0, 1)) and the ending color as fully transparent (rgba(255, 0, 0, 0)).
Text Gradients:
Text gradients allow developers to apply gradient effects directly to text elements in React Native. While React Native doesn’t have native support for text gradients, they can be achieved using third-party libraries like react-native-text-gradient or custom styling techniques. Here’s an example using the react-native-text-gradient library:
Code:
import React from 'react';
import { Text, View } from 'react-native';
import TextGradient from 'react-native-text-gradient';
const MyComponent = () => {
  return (


        Hello, React Native!


  );
};
export default MyComponent;
Explanation:
The TextGradient component from the react-native-text-gradient library is used. The colors prop defines the gradient colors, while the start and end props determine the direction of the gradient. The text content is wrapped within the TextGradient component, which applies the gradient effect.
Applying for a Front End Developer job? Read our blog on React JS Interview Questions and get yourself prepared!
Career Transition


Advantages of Linear Gradient in React-Native
Linear gradients in React Native offer several advantages that contribute to the visual appeal and user experience of applications. Let’s explore the top seven benefits of utilizing linear gradients in React Native:

- Enhanced Visual Hierarchy: Linear gradients help establish a clear visual hierarchy in UI design. By applying gradients to elements such as buttons or headers, you can draw attention and guide users toward important areas of the screen. It improves usability and ensures that essential information is easily discoverable.
- Depth and Dimension: Linear gradients enable the creation of depth and dimension in user interfaces. By carefully selecting and blending colors, gradients can simulate lighting effects, shadows, and three-dimensional elements. This technique enhances the overall visual experience, making the interface more realistic and engaging.
- Emotional Impact: Colors can evoke emotions and influence users’ perceptions. Linear gradients allow designers to leverage this power to create specific moods or atmospheres within an application. Choosing appropriate color combinations and gradients can evoke emotions such as tranquility, excitement, or even urgency, enhancing user engagement.
- Unique and Engaging Designs: Linear gradients offer many creative possibilities. Designers can create unique and visually captivating designs by combining different colors, angles, and stops. Gradients enable the development of interfaces that stand out from the competition, leaving a memorable impression on users.
- Branding and Recognition: Consistency in branding is crucial for brand recognition. Linear gradients provide an effective way to incorporate brand colors and identity into UI elements. By integrating brand-specific gradients, designers can reinforce brand recognition, creating a cohesive user experience across different touchpoints and platforms.
- Accessibility and Contrast: Linear gradients can improve accessibility by enhancing the contrast between elements and their backgrounds. By carefully selecting colors with appropriate contrast ratios, designers can ensure that content remains readable for users with varying visual abilities. Gradients help mitigate issues related to low contrast and ensure a more inclusive user experience.
- Dynamic UI Effects: Linear gradients allow for dynamic UI effects that respond to user interactions. By animating gradients, designers can create engaging transitions or visual feedback, making the interface more interactive and responsive. These dynamic effects enhance user engagement and provide a delightful user experience.
Conclusion
Incorporating linear gradients in your React Native applications can elevate their visual appeal and user experience to new heights. By leveraging the power of smooth color transitions, you can create depth, dimension, and captivating designs that leave a lasting impression on users. Through careful selection and blending of colors, linear gradients help enhance visual hierarchy, evoke emotions, and promote brand identity. By exploring and experimenting with linear gradients, you can unlock endless creative possibilities and create stunning interfaces that stand out from the crowd.
Solve your queries related to the topic, visit our community, and catch up with other learners.
The post Creating Linear Gradient in React Native appeared first on Intellipaat Blog.
Blog: Intellipaat - Blog
Leave a Comment
You must be logged in to post a comment.