
Walk-Through: Understanding Bizagi RPA Integration
Blog: Bizagi Blog
98% of IT business leaders say that automating processes is essential to driving business value. For enterprise-wide automation of your business processes, you need to integrate any Robotic Process Automation (RPA) initiatives into your wider Intelligent Process Automation (IPA) strategy.
Bizagi 11.2 enables native integration with robots from your chosen RPA vendor, including our partners UiPath and Blue Prism. This makes it easier than ever to integrate RPA with your processes. This way, robots can take care of the repetitive, administrative tasks and Bizagi can orchestrate automation enterprise wide.
Bizagi & RPA in
action
Bizagi lives alongside RPA to optimize business processes and easily integrates using the drag and drop UX found in Bizagi Studio. To show you how easy it is to integrate robots with your Bizagi processes, we’ve created a walk through for you.
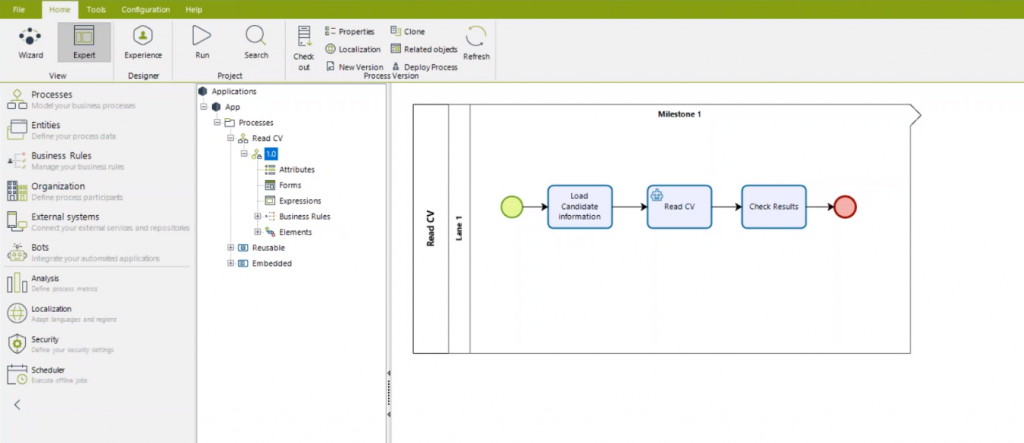
This example shows how your HR department can boost the productivity of its team by automating the recruitment process. The robot can read a PDF that has been uploaded to Bizagi and extract the data. This saves staff the manual task of re-keying candidate information into Bizagi, giving them time to focus on more strategic activities.
1. Configuring a connection with your RPA Orchestrator
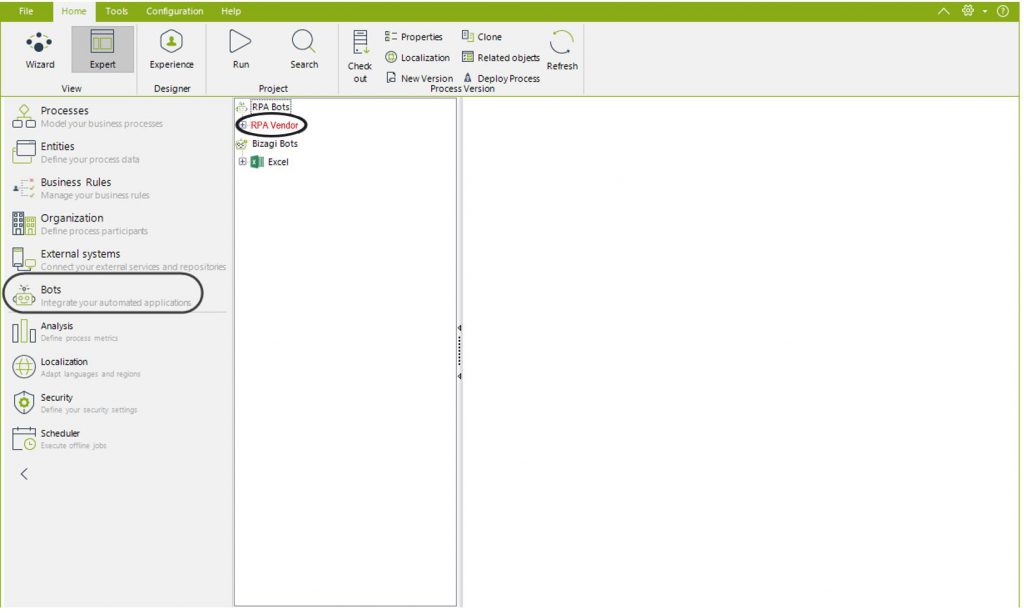
Once you have configured your robot with your RPA provider, head to Bizagi Studio and go to the Expert view (top right corner). This will give you an advanced view to integrate the robots with your process. Click the ‘Bots’ option in the navigations bar on the left and locate your providers’ branch, which is located under ‘RPA Bots’.
Next, you need to click the connection and select the ‘Add Process’ button from the top bar. If you want Bizagi to trigger the robot, you need to fill in the forms and successfully configure the connection on the pop-up window.
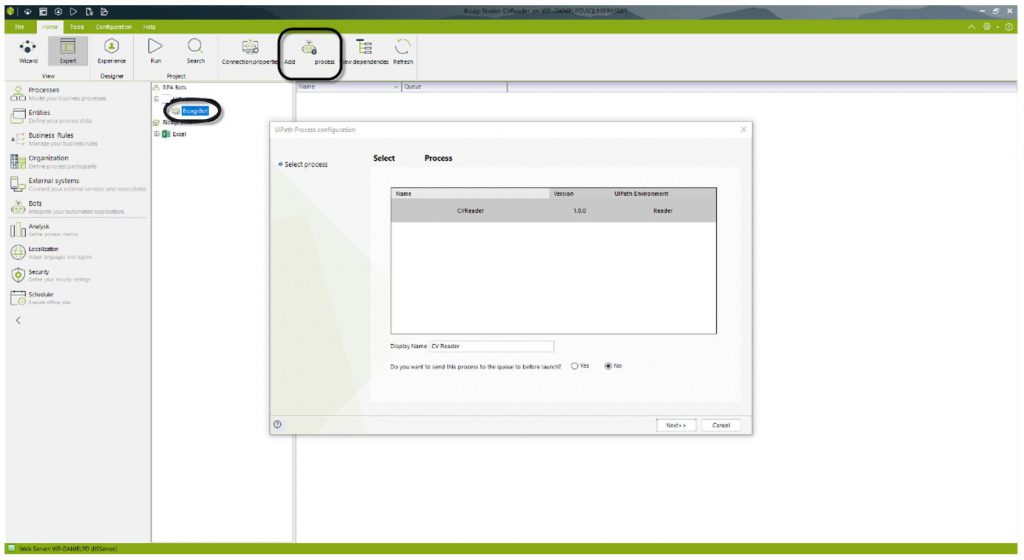
Here you can see all the processes available from your Orchestrator. Depending on the way your robot is configured and the Studio version you are using, you may be presented with different options.
2. Triggering the execution of an RPA robot from a Bot Task
So now you have configured a connection to your RPA
Orchestrator, you need to configure the launch of the process execution.
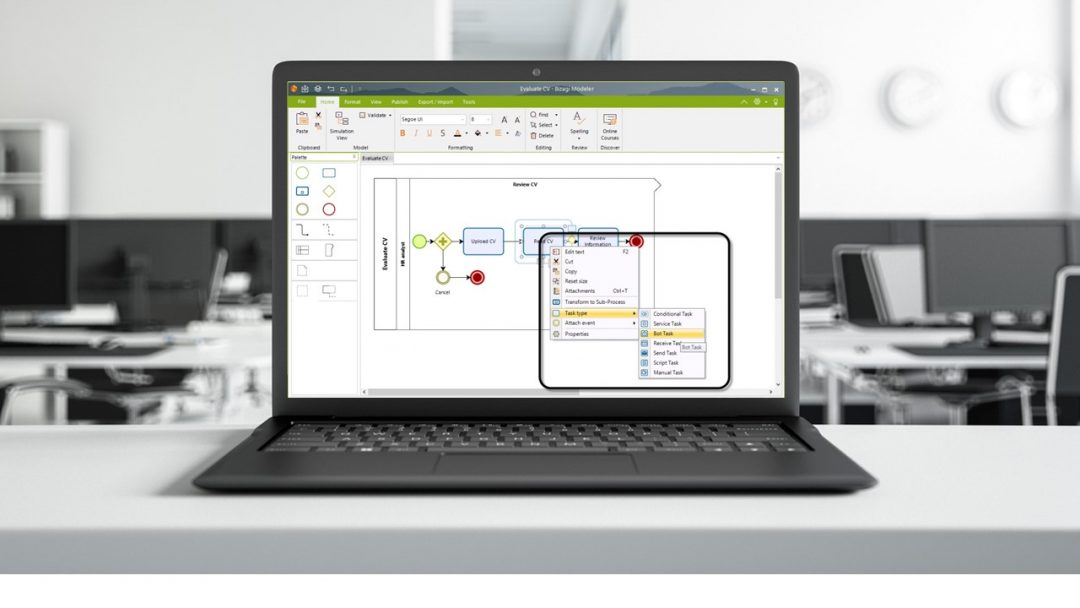
First, configure the task that is going to be executed by a robot on your model. You do this by changing its Task Type to a ‘Bot Task’ in the drop-down menu.

A robot face icon in the top corner of the task identifies it as a ‘Bot Task’.
Then, in change your view from Expert to Wizard. Go to the sixth step – Define Integration Interfaces – this will allow you to configure the execution of the robot within the process.
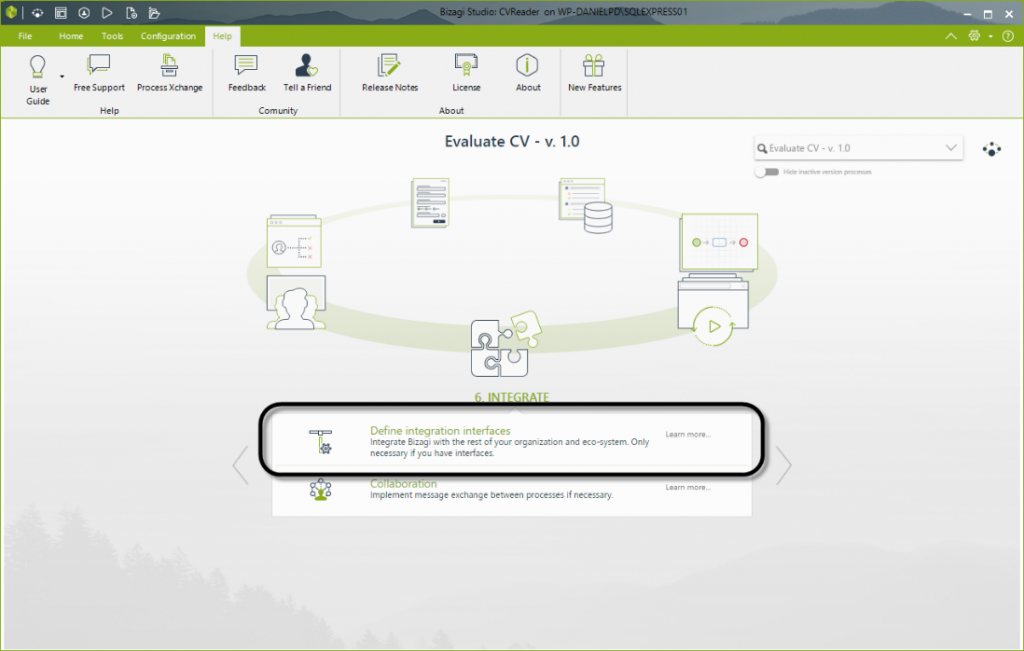
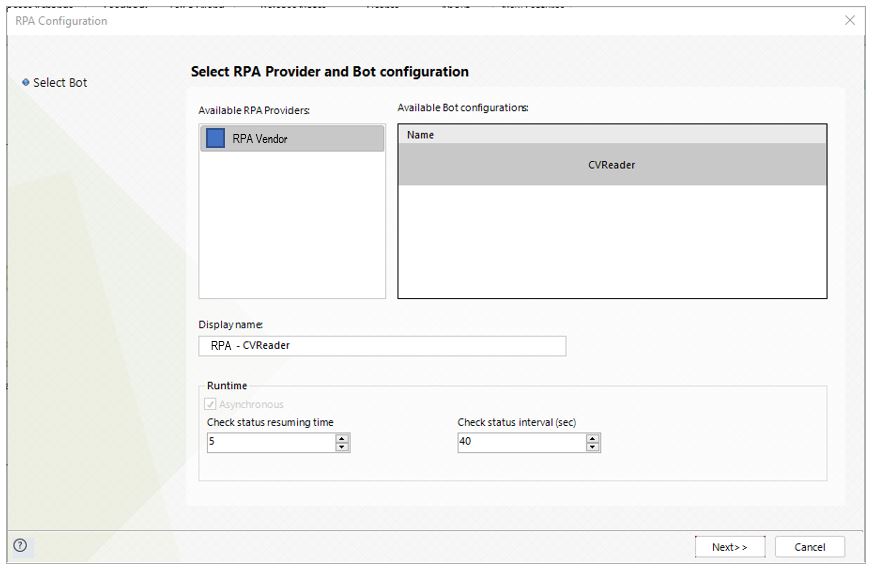
After selecting your vendor, on the main panel you can see the list of available robot configurations. This list corresponds to vendors you have previously configured on the Expert View. Select the robot you want to be executed at this point of your process.
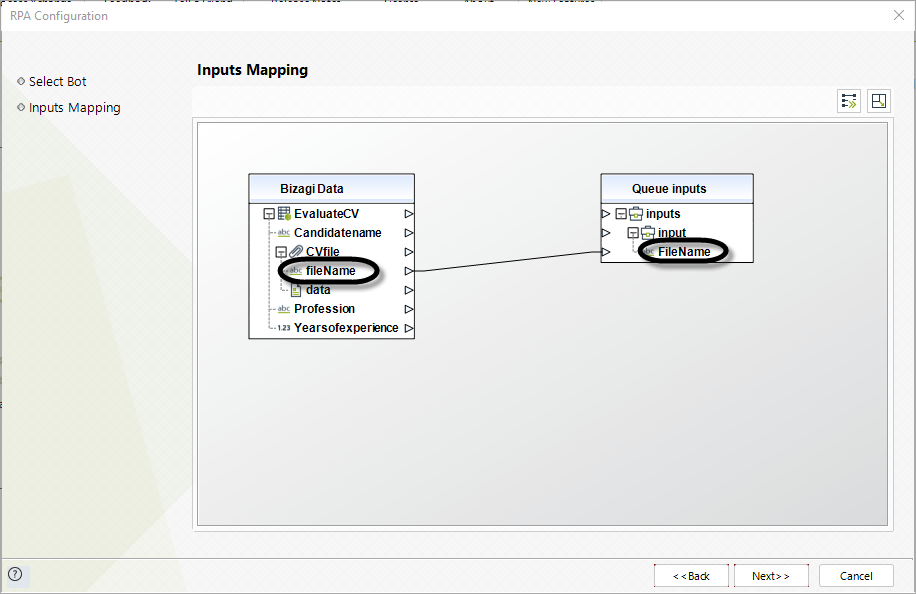
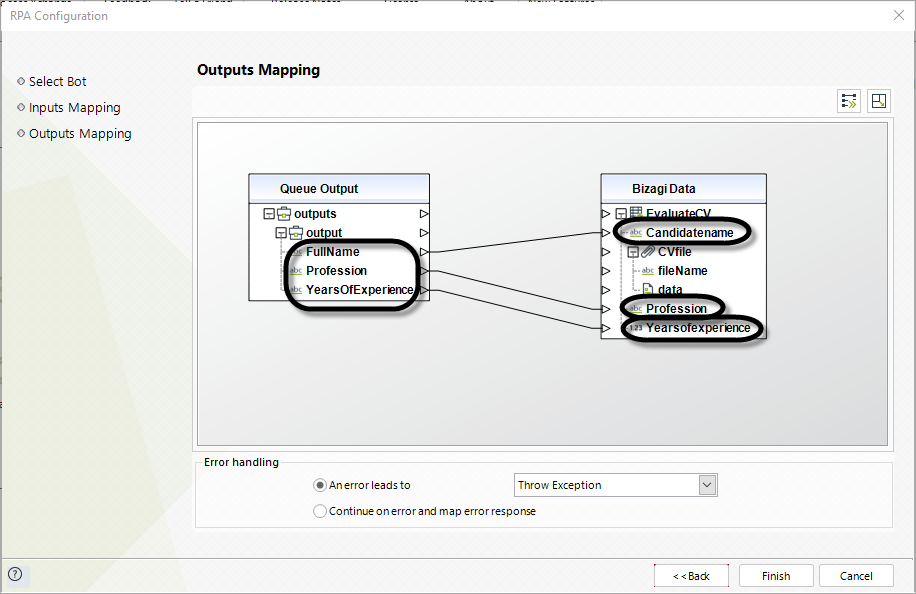
3. Mapping inputs and outputs
As you usually do when configuring your integrations, you can then use the mapping interface to select attributes of your data model and configure input/output parameters. This is how you define which data and information will be taken from the CV and re-keyed into the various fields in Bizagi.
Once you have clicked ‘Finish’ on the window, you have configured the robot to be executed each time the process flow gets to that specific task.
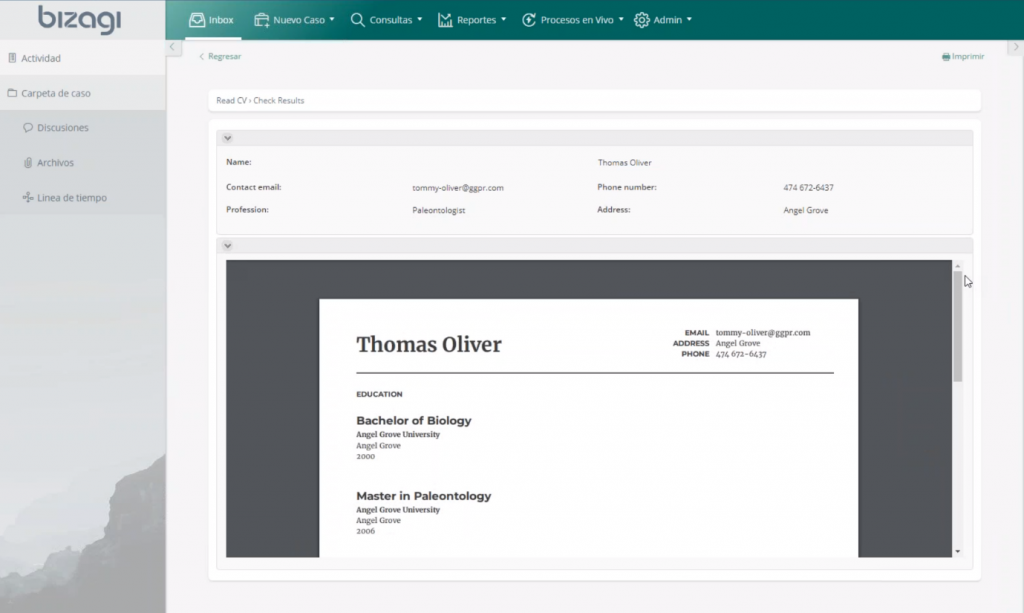
4. The outcome
Now you’re all set! When a CV is uploaded, it will pull the
selected input data to give you’re the below view.
If you’d like more details before you start integrating your robots with your Bizagi process applications, you can use our help section or the e-learning site, which features videos explaining all of Bizagi’s features:
ENG: http://elearning.bizagi.com/my/whatsnew112.php?lang=en
ESP: http://elearning.bizagi.com/my/whatsnew112.php?lang=es
The post Walk-Through: Understanding Bizagi RPA Integration appeared first on Bizagi Blog – Ideas for Delivering Digital Transformation.
Leave a Comment
You must be logged in to post a comment.