Tips & Tricks: Adding Your GPS Location to Spotfire Map Visualizations
Blog: The Tibco Blog
It seems that every day, I am receiving more requests for information regarding TIBCO Spotfire support for mobile devices. A frequent topic in those conversations is incorporating GPS coordinate information into those mobile applications. This topic has been previously discussed in a TIBCO Community article. However, many of the Spotfire users I speak with are unaware of the GPS capabilities of the mobile platform. For this reason, I will give an overview and some step-by-step instructions for how any user can add GPS location data to a Spotfire mobile application.
The objective
Here is a map that shows all of the federal, state, and local parks within the state of Texas.
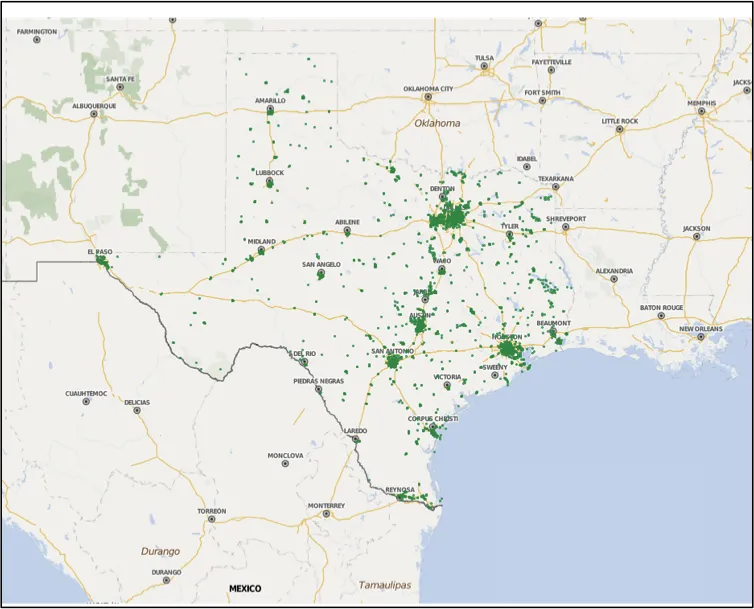
I want to produce a map like this, where my current GPS location is displayed on the map and the map automatically zooms in to show the parks that are nearby.
Enabling GPS pin locator tool in mobile devices
Step 1: Create a map visualization in Spotfire.
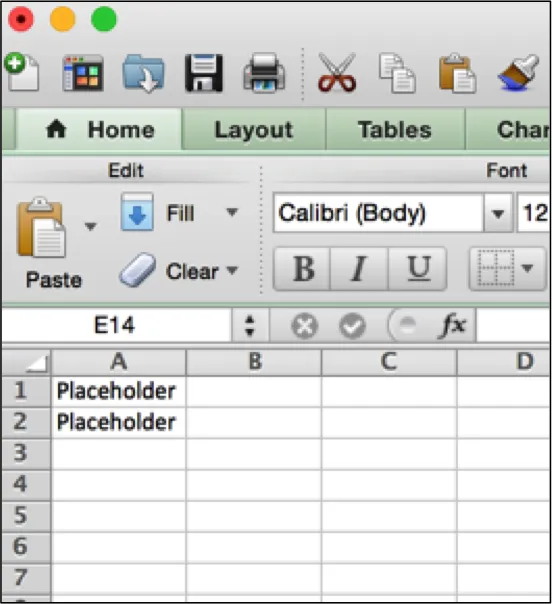
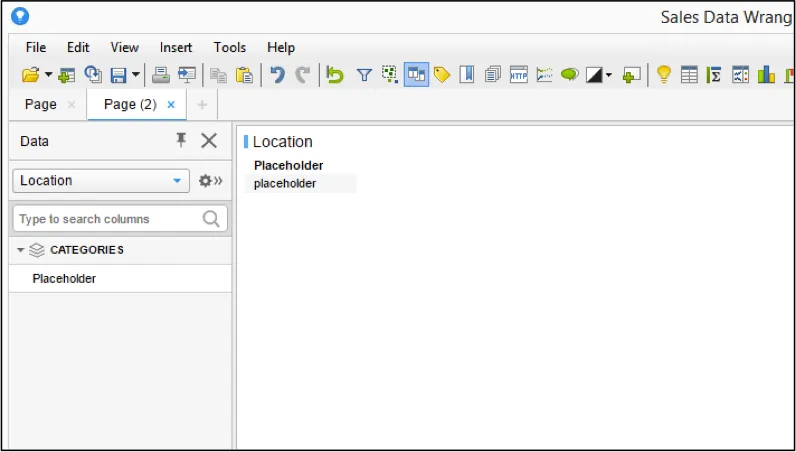
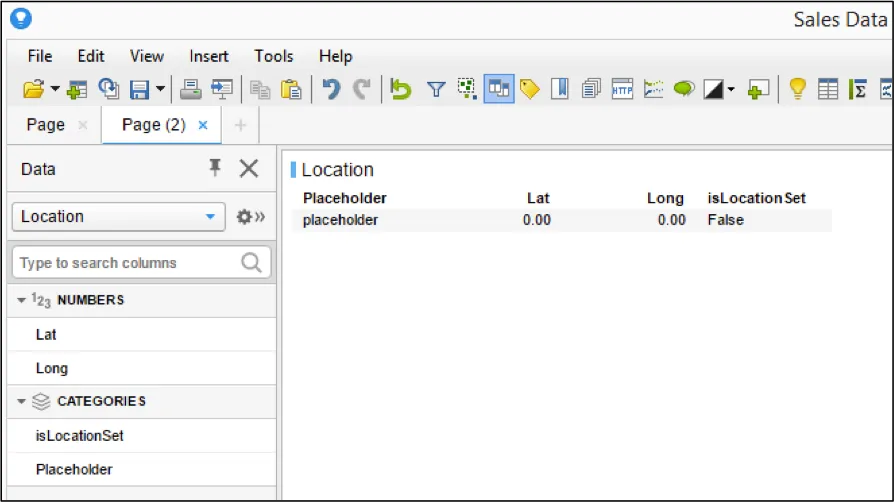
Step 2: Open Microsoft Excel, or your favorite text editor. Create two rows in that file with the word “Placeholder” in the two top cells as shown below. Save this simple file under the name “Location”.
Step 3: Return to Spotfire and add the new “Location” file as a second data table in your Spotfire project.
A: From the “File” menu select “Add Data Table”.
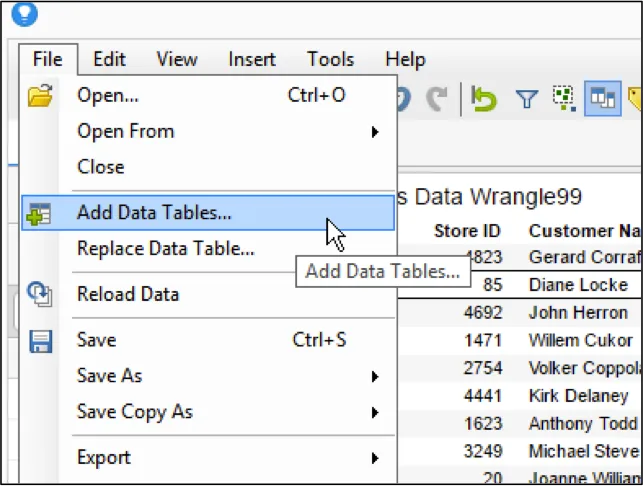
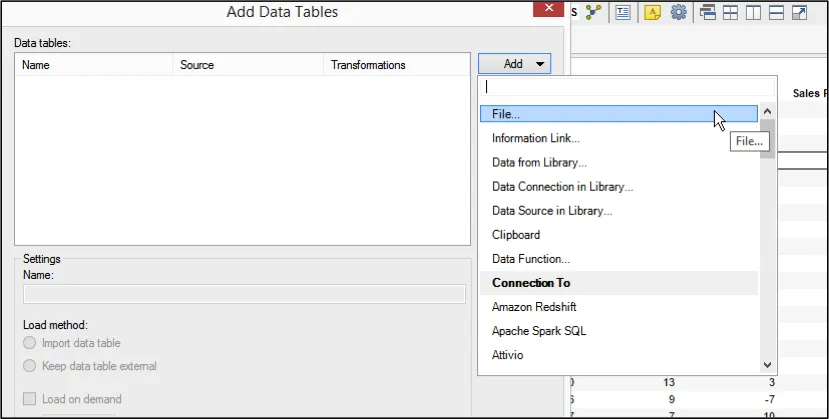
B: Click the “Add” button and select “File”.
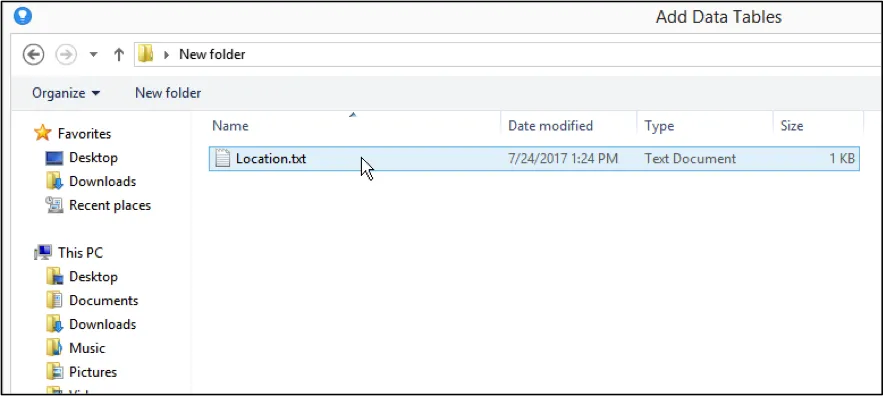
C: Navigate to the “Location” file and select it.
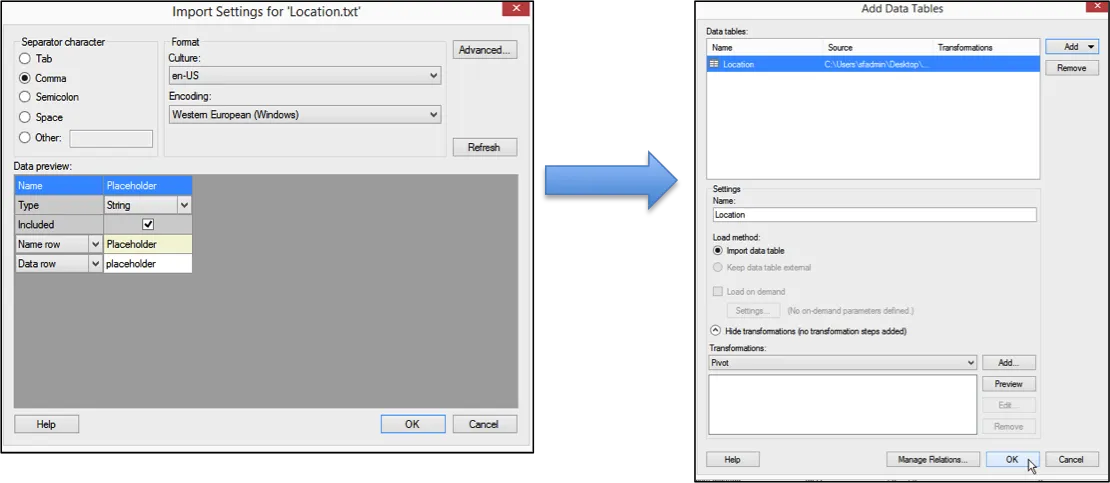
D: Hit the “OK” button twice.
E: You should now see a new table in Spotfire with only two values, as shown below.
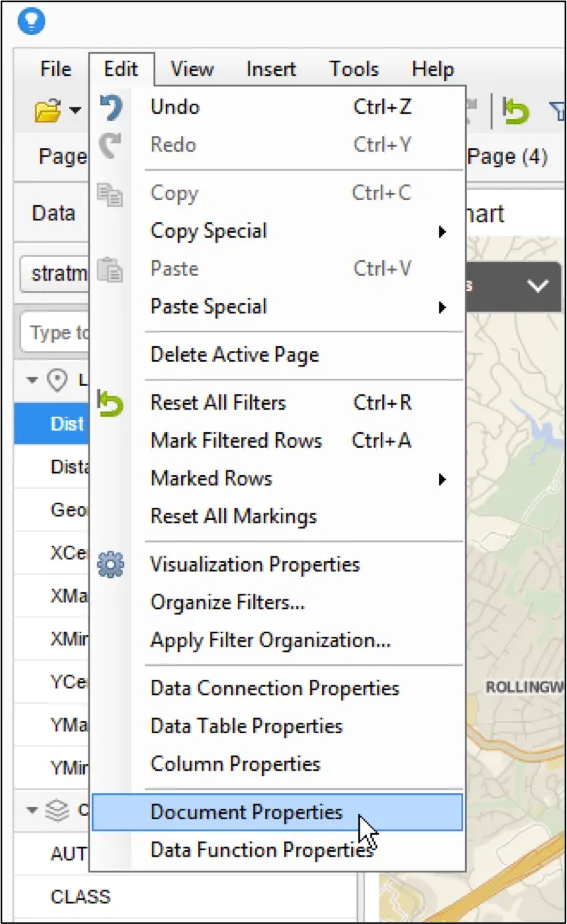
Step 4: Add two new document properties named “AppGeoLongitude” and “AppGeoLatitude”, as shown below.
A: From the “Edit” menu, select “Document Properties”.
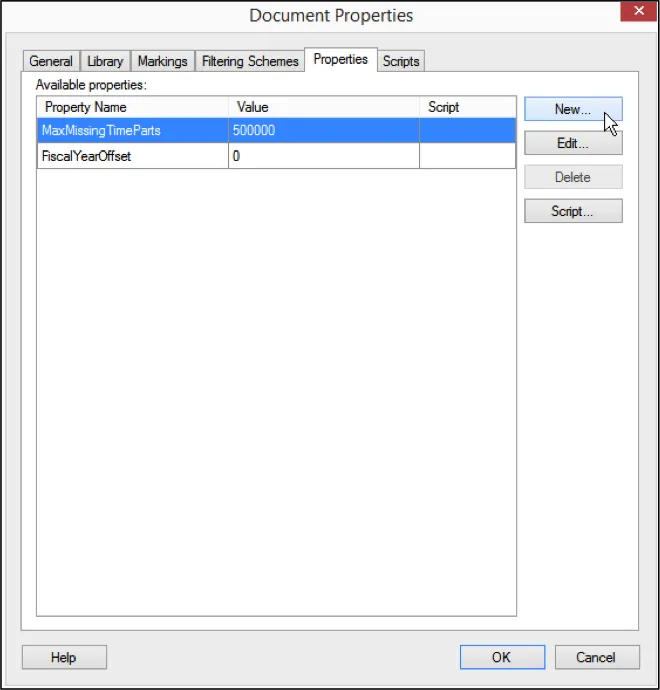
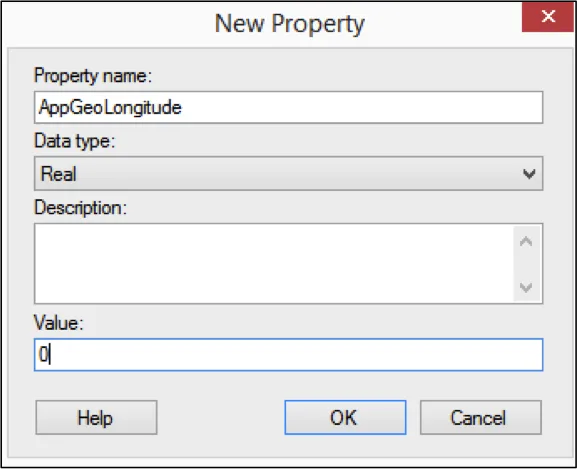
B: Create a new document property by clicking the “New” button.
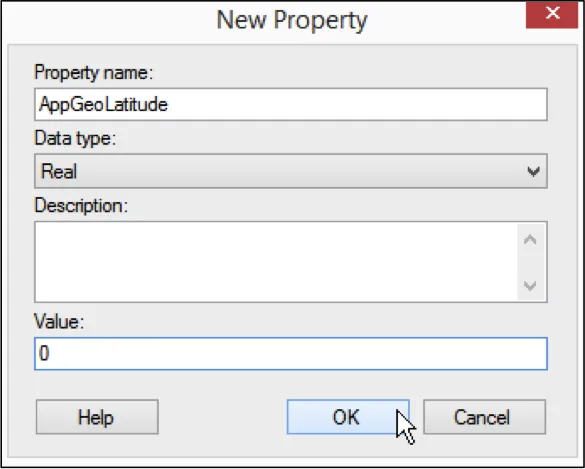
C: Name the new document property “AppGeoLatitude”. Assign it to be a “Real” number type. Enter a value “0.0”. This will be used to assign an initial location latitude of “0.0”. If you want to have another default location you can enter another value here. However, if you do this when the mobile app initially presents the map visualization, it will be automatically zoomed in to the location you assign as a default. If you want to start from a zoomed out view, always set the initial value to be “0.0”. It is also important to note that “AppGeoLatitude” is a reserved name that has special functionality and meaning, so it is important that you always name this property “AppGeoLatitude”.
D: Create a second new document property named “AppGeoLongitude”. Assign it to be type “Real” with an initial value of “0.0”. If you want another initial starting value you can enter it here. The name “AppGeoLongitude” is also a reserved name that must always be used in this situation.
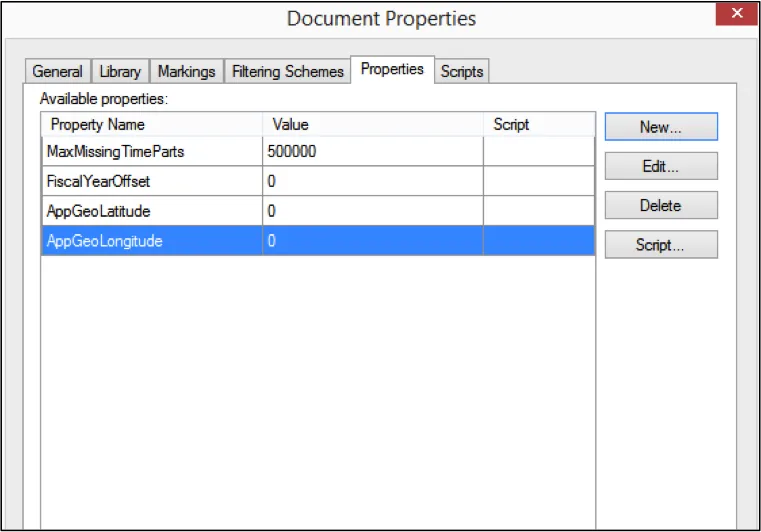
E: You should now see these two new document properties displayed as shown.
Step 5: Add a new calculated column named “Lat”. Select the “AppGeoLatitude” document property as shown and click the “Insert Property” button.

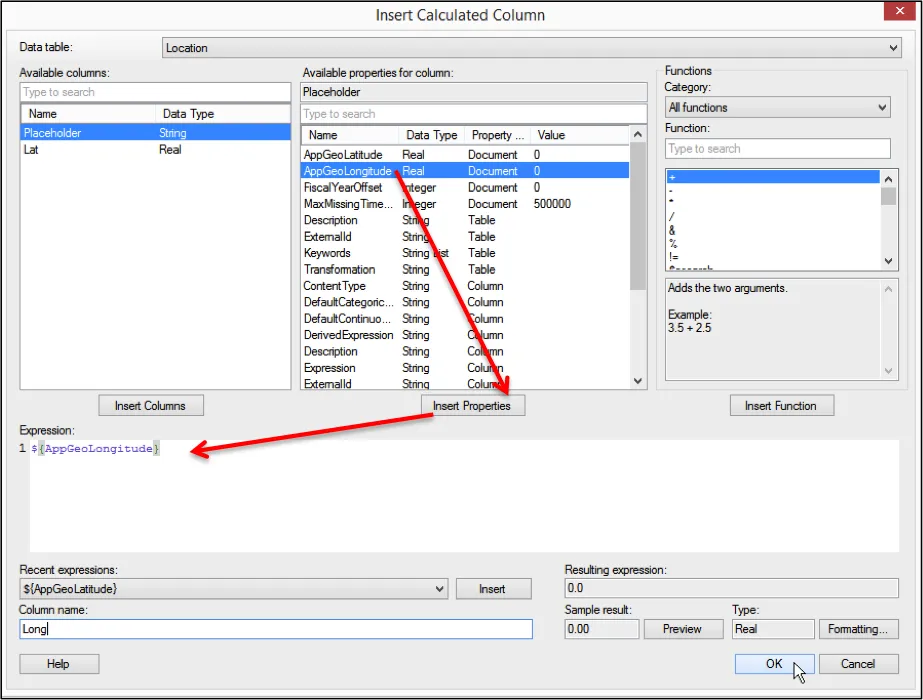
Step 6: Add a new calculated column named “Long”. Select the “AppGeoLongitude” document property as shown and click the “Insert Property” button.
Step 7: Create a third new calculated column name “isLocationSet”. Enter the following formula. Not(${AppGeoLatitude} = 0.0 and ${AppGeoLongitude} =0.0)
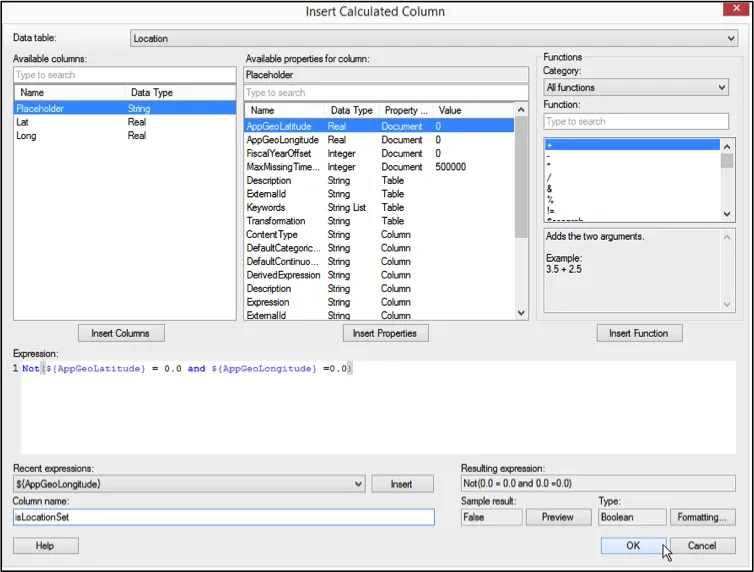
You should now see these new columns displayed in the “Location” data table, as shown.
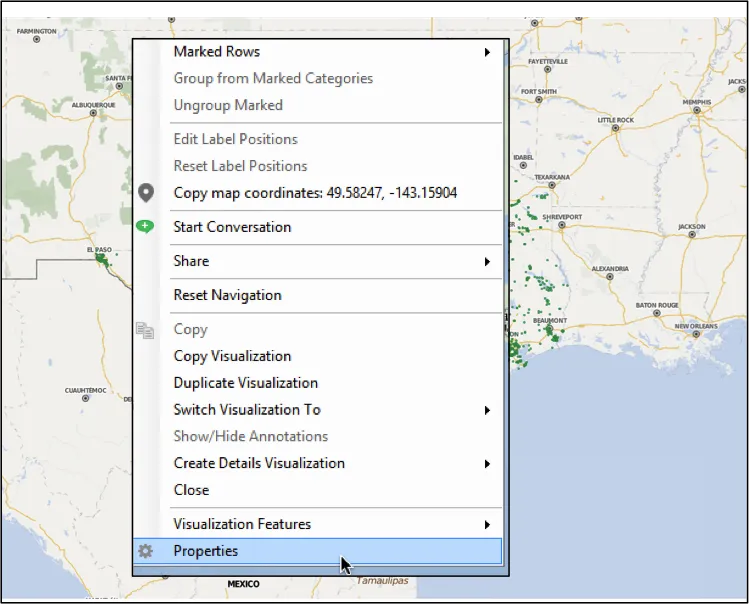
Step 8: We will now enable the Map Visualization to display a marker at your current GPS location. Begin by returning to the Map you created in Step 1.
A: Right click on the map and choose “Properties”.
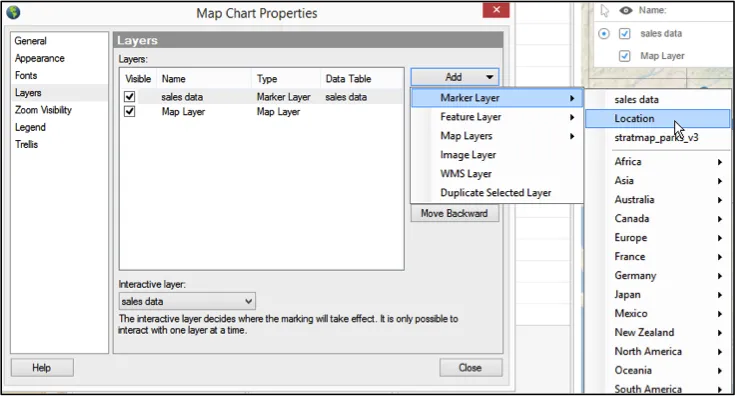
B: Select “Layers” and then click the “Add” button. Select “Marker Layer” and then choose the “Location” data table, as shown below.
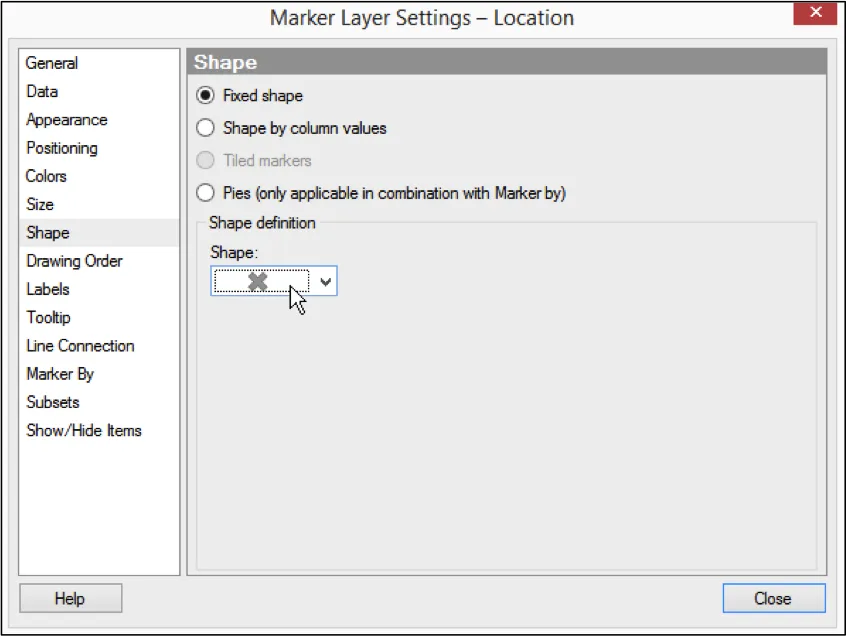
C: You need to choose a color and marker type for the GPS pin so that it will stand out on your map. In this example, click the “Color” menu option and change the marker color to “Red”.
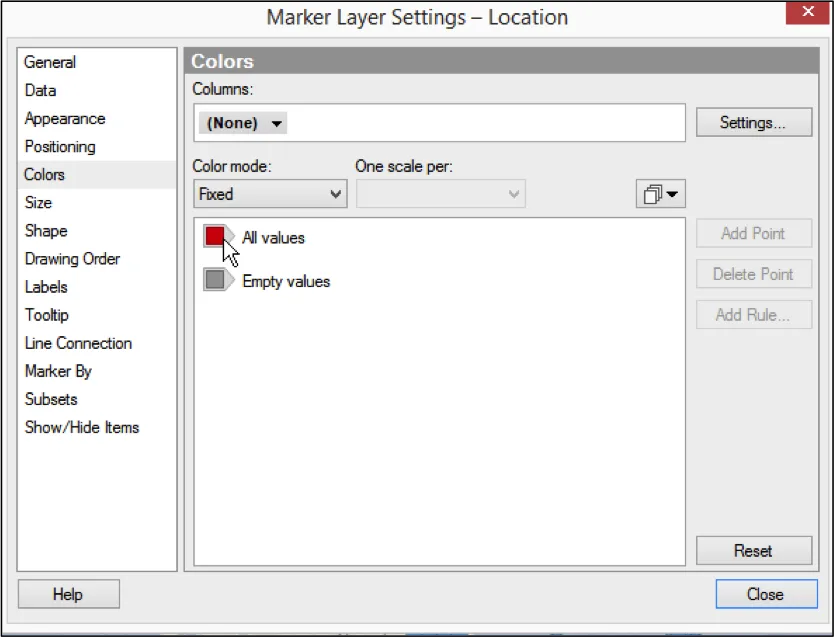
D: Choose the “X” type marker from the “Shape” menu.
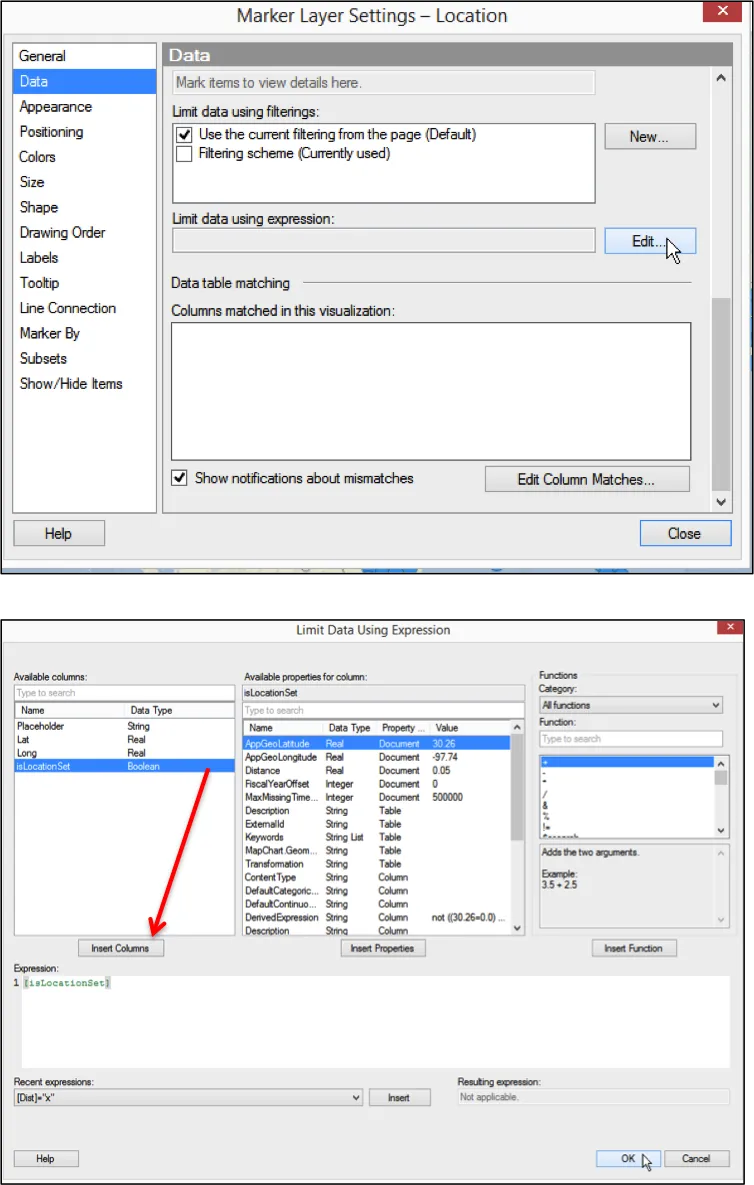
E: Lastly, add a custom expression to limit the data being shown on the map by going to the “Data” menu option. Scroll down to the “Limit Data by Expression” option. Click “Edit” and enter the expression “isLocationSet” by selecting “isLocationSet” from the available columns and click the “Insert Column” button, as shown.
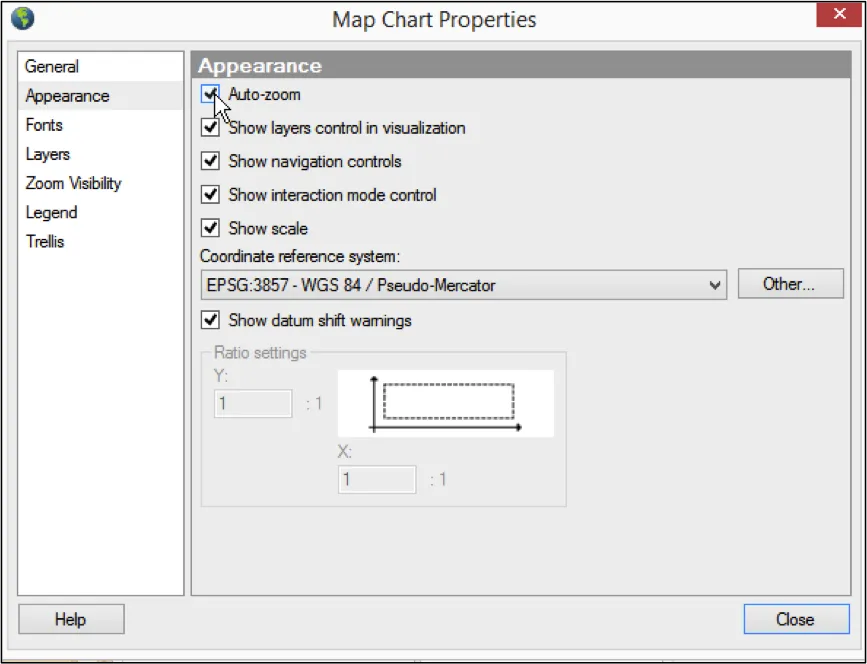
F: Finally, activate the “Auto Zoom” feature. From the “Appearance” menu option click “Auto-zoom”.
Step 9: You’re done! Upload your file to the server that supports your mobile device for Spotfire applications.
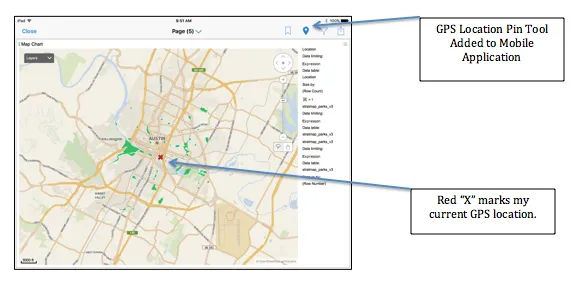
When you open the file in a GPS enabled mobile device, you will see a new GPS pin tool as shown below. Recall from our conversation above, that I entered an initial GPS starting location of Latitude =0.0, Longitude = 0.0. For this reason, my initial view of the map is zoomed out to show the entire world. If you chose to enter another starting location, it would be zoomed into that location.
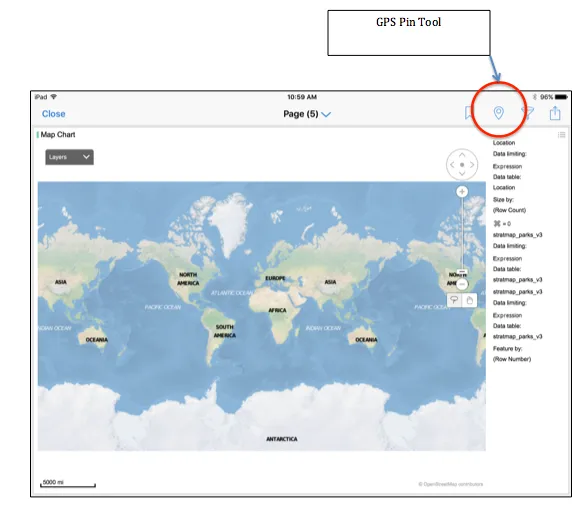
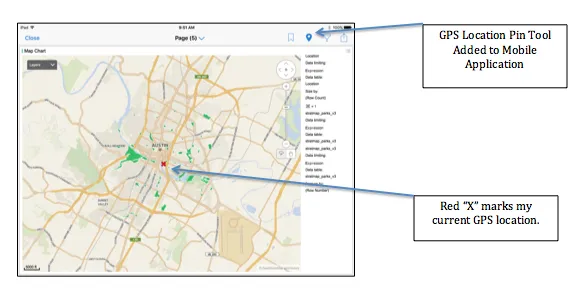
Step 10: Touch the “GPS Pin Tool” and observe that your map automatically zooms into your current GPS location and places a “Red X” at that location. You can see the other map features that are near the location where you are currently standing.
You can read more about Spotfire Mobile functionality and other embellishments you can add to the GPS functionality by visiting these existing pages on the TIBCO Community and the TIBCO Documents pages. I highly recommend you visit these sites and learn more about how you can bring GPS features to your Spotfire Mobile Applications. Learn more about other Spotfire analytics capabilities and test out a Spotfire free trial.