🚀 Streamline Your Model Sharing Process – Automate the Flow Effortlessly!
Blog: ARIS BPM Community - Recent forum posts
A couple of days ago, my colleague Martin introduced ARIS Flows, showing how it integrates low-code workflow automation and governance within ARIS.
Now, let’s take it a step further! Today, we’ll show you how ARIS Flows can simplify one of the most common tasks: sharing models with colleagues. With this approach, you can move from manual copy-paste and email chaos to a fully automated, traceable process.
💡 Today’s Challenge: How to Share Models with Your Colleagues
Instead of manually sending model links, ARIS Flows allows you to automate the entire process:
- Define the trigger – Start the flow whenever you select a model and want to share it.
- Create a form to select a user – Pick a colleague or group and optionally add comments or notes for context.
- Get the model link – Automatically retrieve the direct link to the selected model.
- Send a notification – Automate personalized emails with the model link and notes, ensuring your colleague has all the information needed.
🚀 Here’s the Full Step-by-Step Solution
Create a new flow called Share model, for this you select Create from scratch and enter a name and description. Afterwards, the flow builder will open.
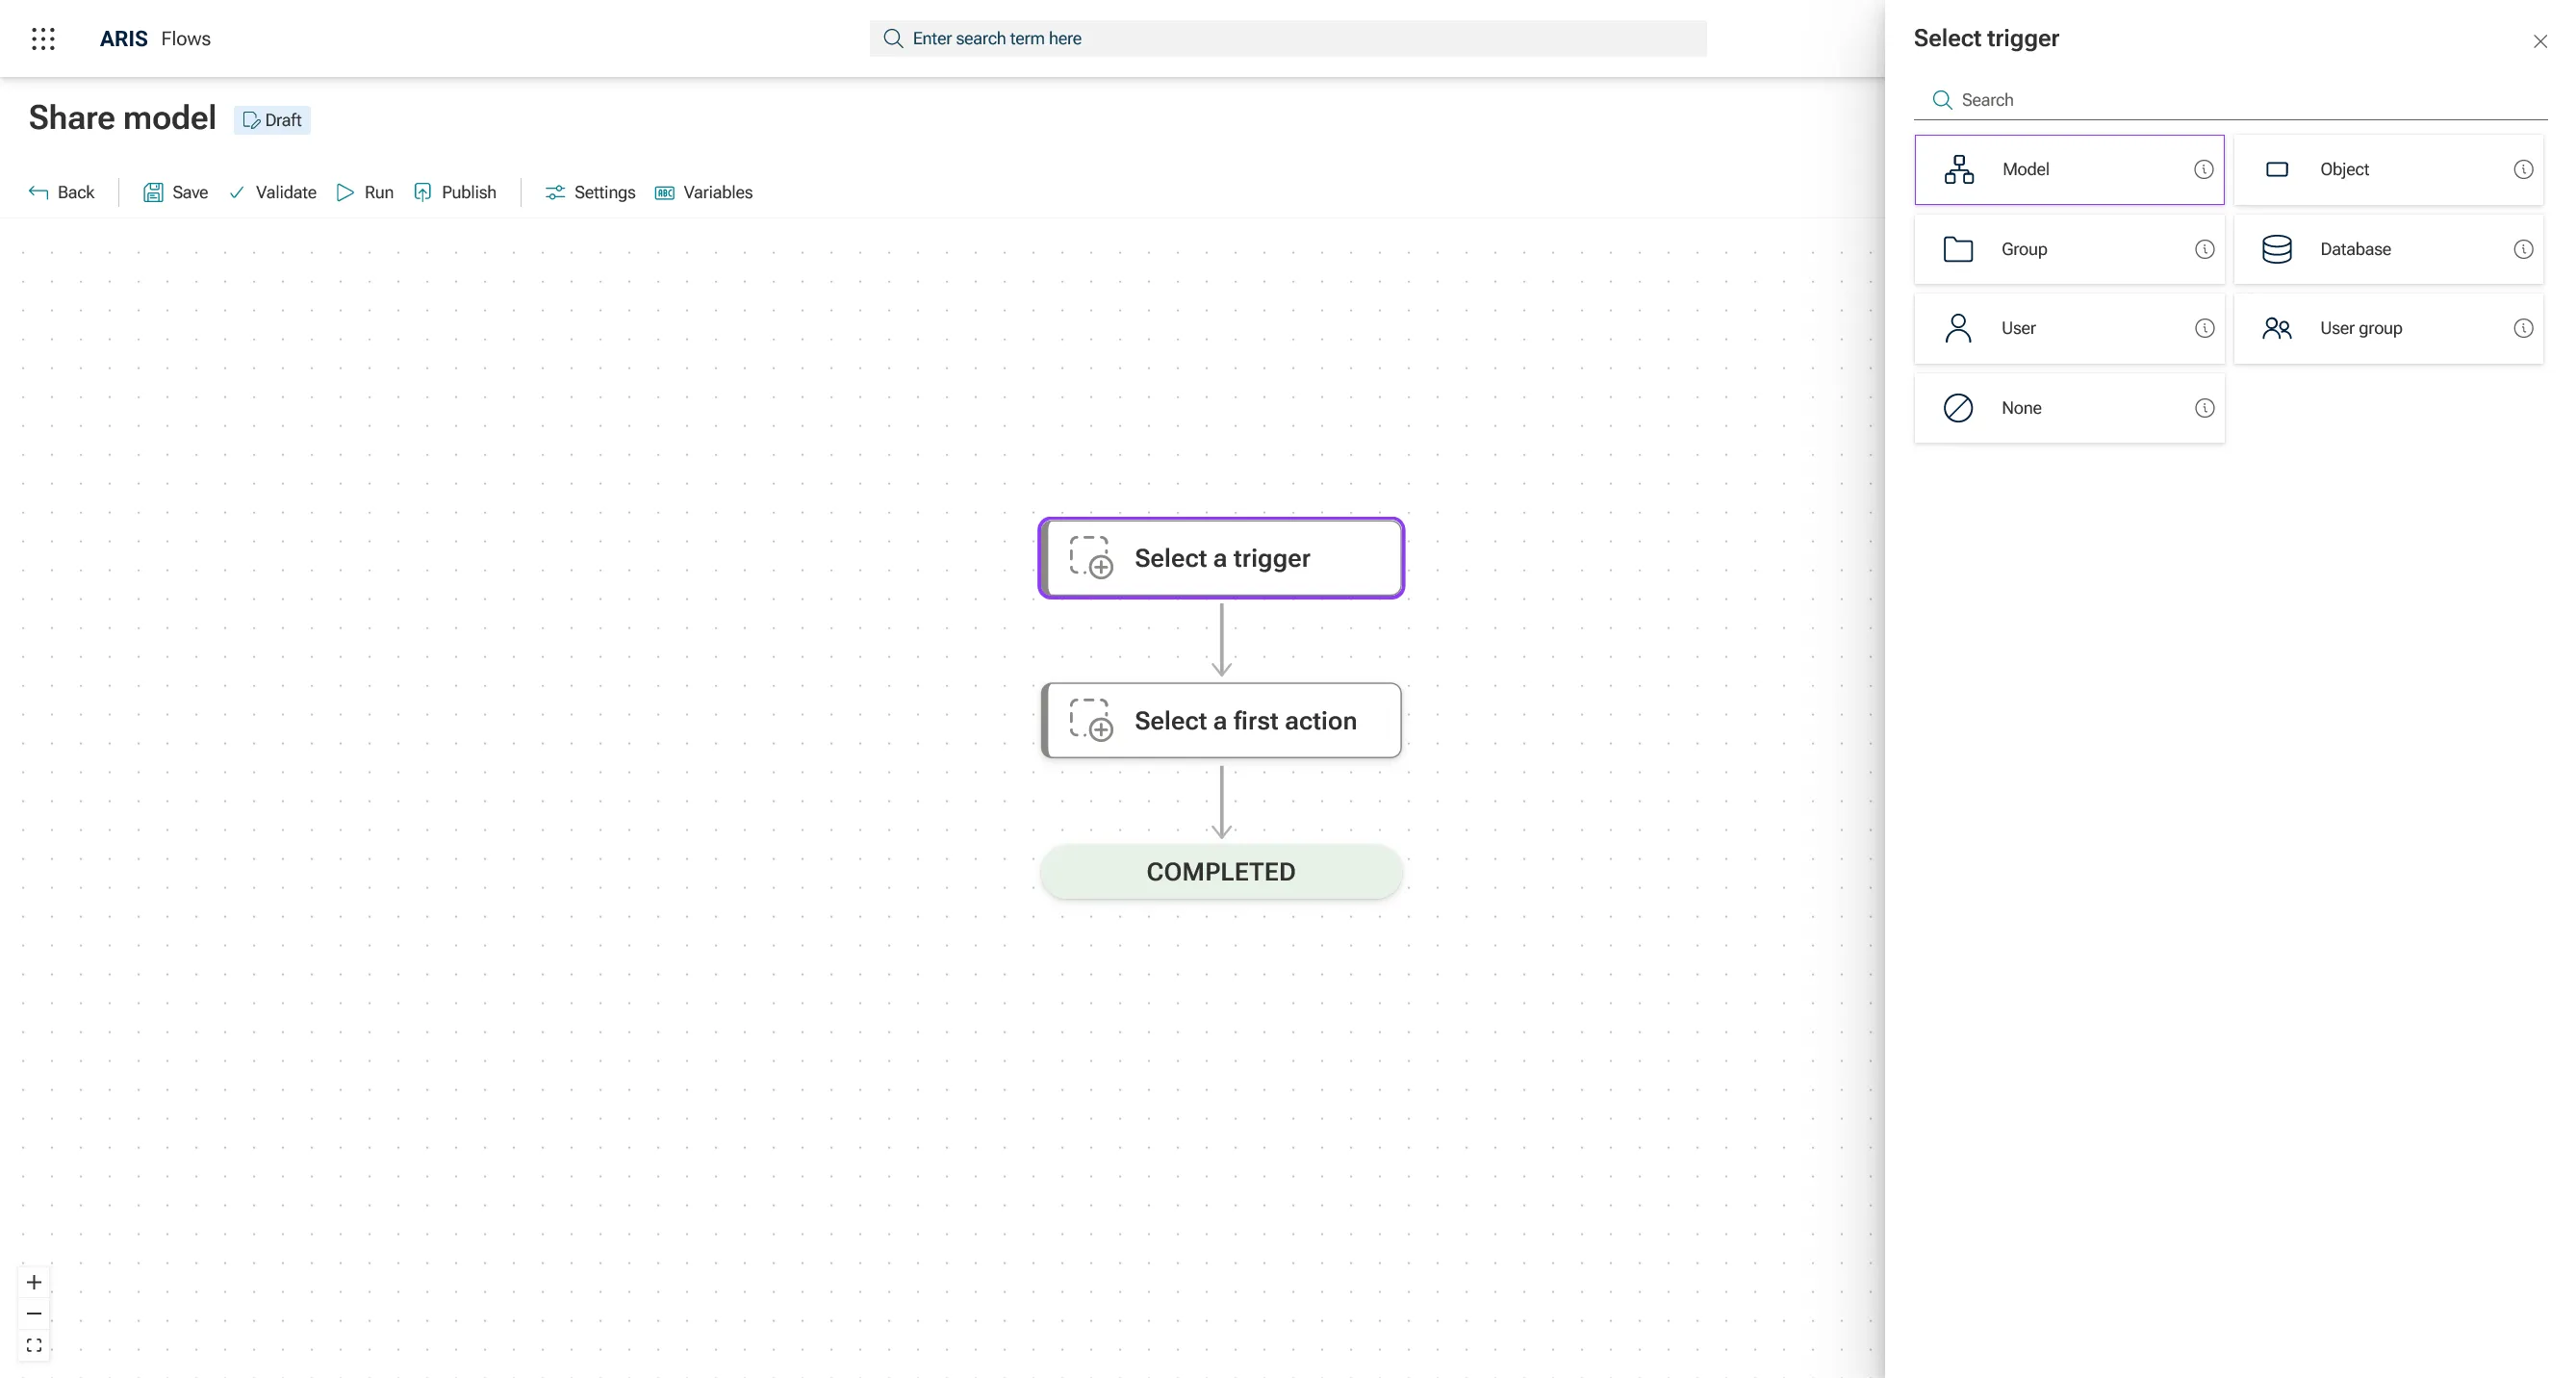
1. Start with a model as the trigger and add a form to it.

As soon as you have selected the Model trigger from the Select trigger panel, the trigger will be added to the canvas, and the corresponding property panel will open.
Here, you have several configuration options to define your trigger, such as Allow multiple items, which determines whether the flow can be triggered by one or multiple selected context items.
For this use case, you now need to add a form. You have two options:
- Select a template (if you already created one), or
- Open the form builder to design a new form from scratch.

In the form, you can define what will be shown as soon as a user triggers the Share model flow.
The form builder offers you a wide range of different widgets and the option to select if the form should open as panel or dialog. In this example, you have to add the following widgets:
- 👥 User and groups – to select the colleague or group to share with
- 📨 Text field – for the subject line
- 💬 Text area – for additional comments or notes

Every widget has different properties; in this use case we will change the label (like Subject) for every widget and mark them as required.
2. Use the Get Model Links action to automatically retrieve the link for the selected model
Now you have to map some data that you receive during the execution — in this case the Database name and Model identifiers.
Click on the mapping icon next to the Database name field in the property panel and select Database in the section Model (Trigger). For the Model identifiers you have to repeat this but instead of Database you select this time Identifiers of the selected models.
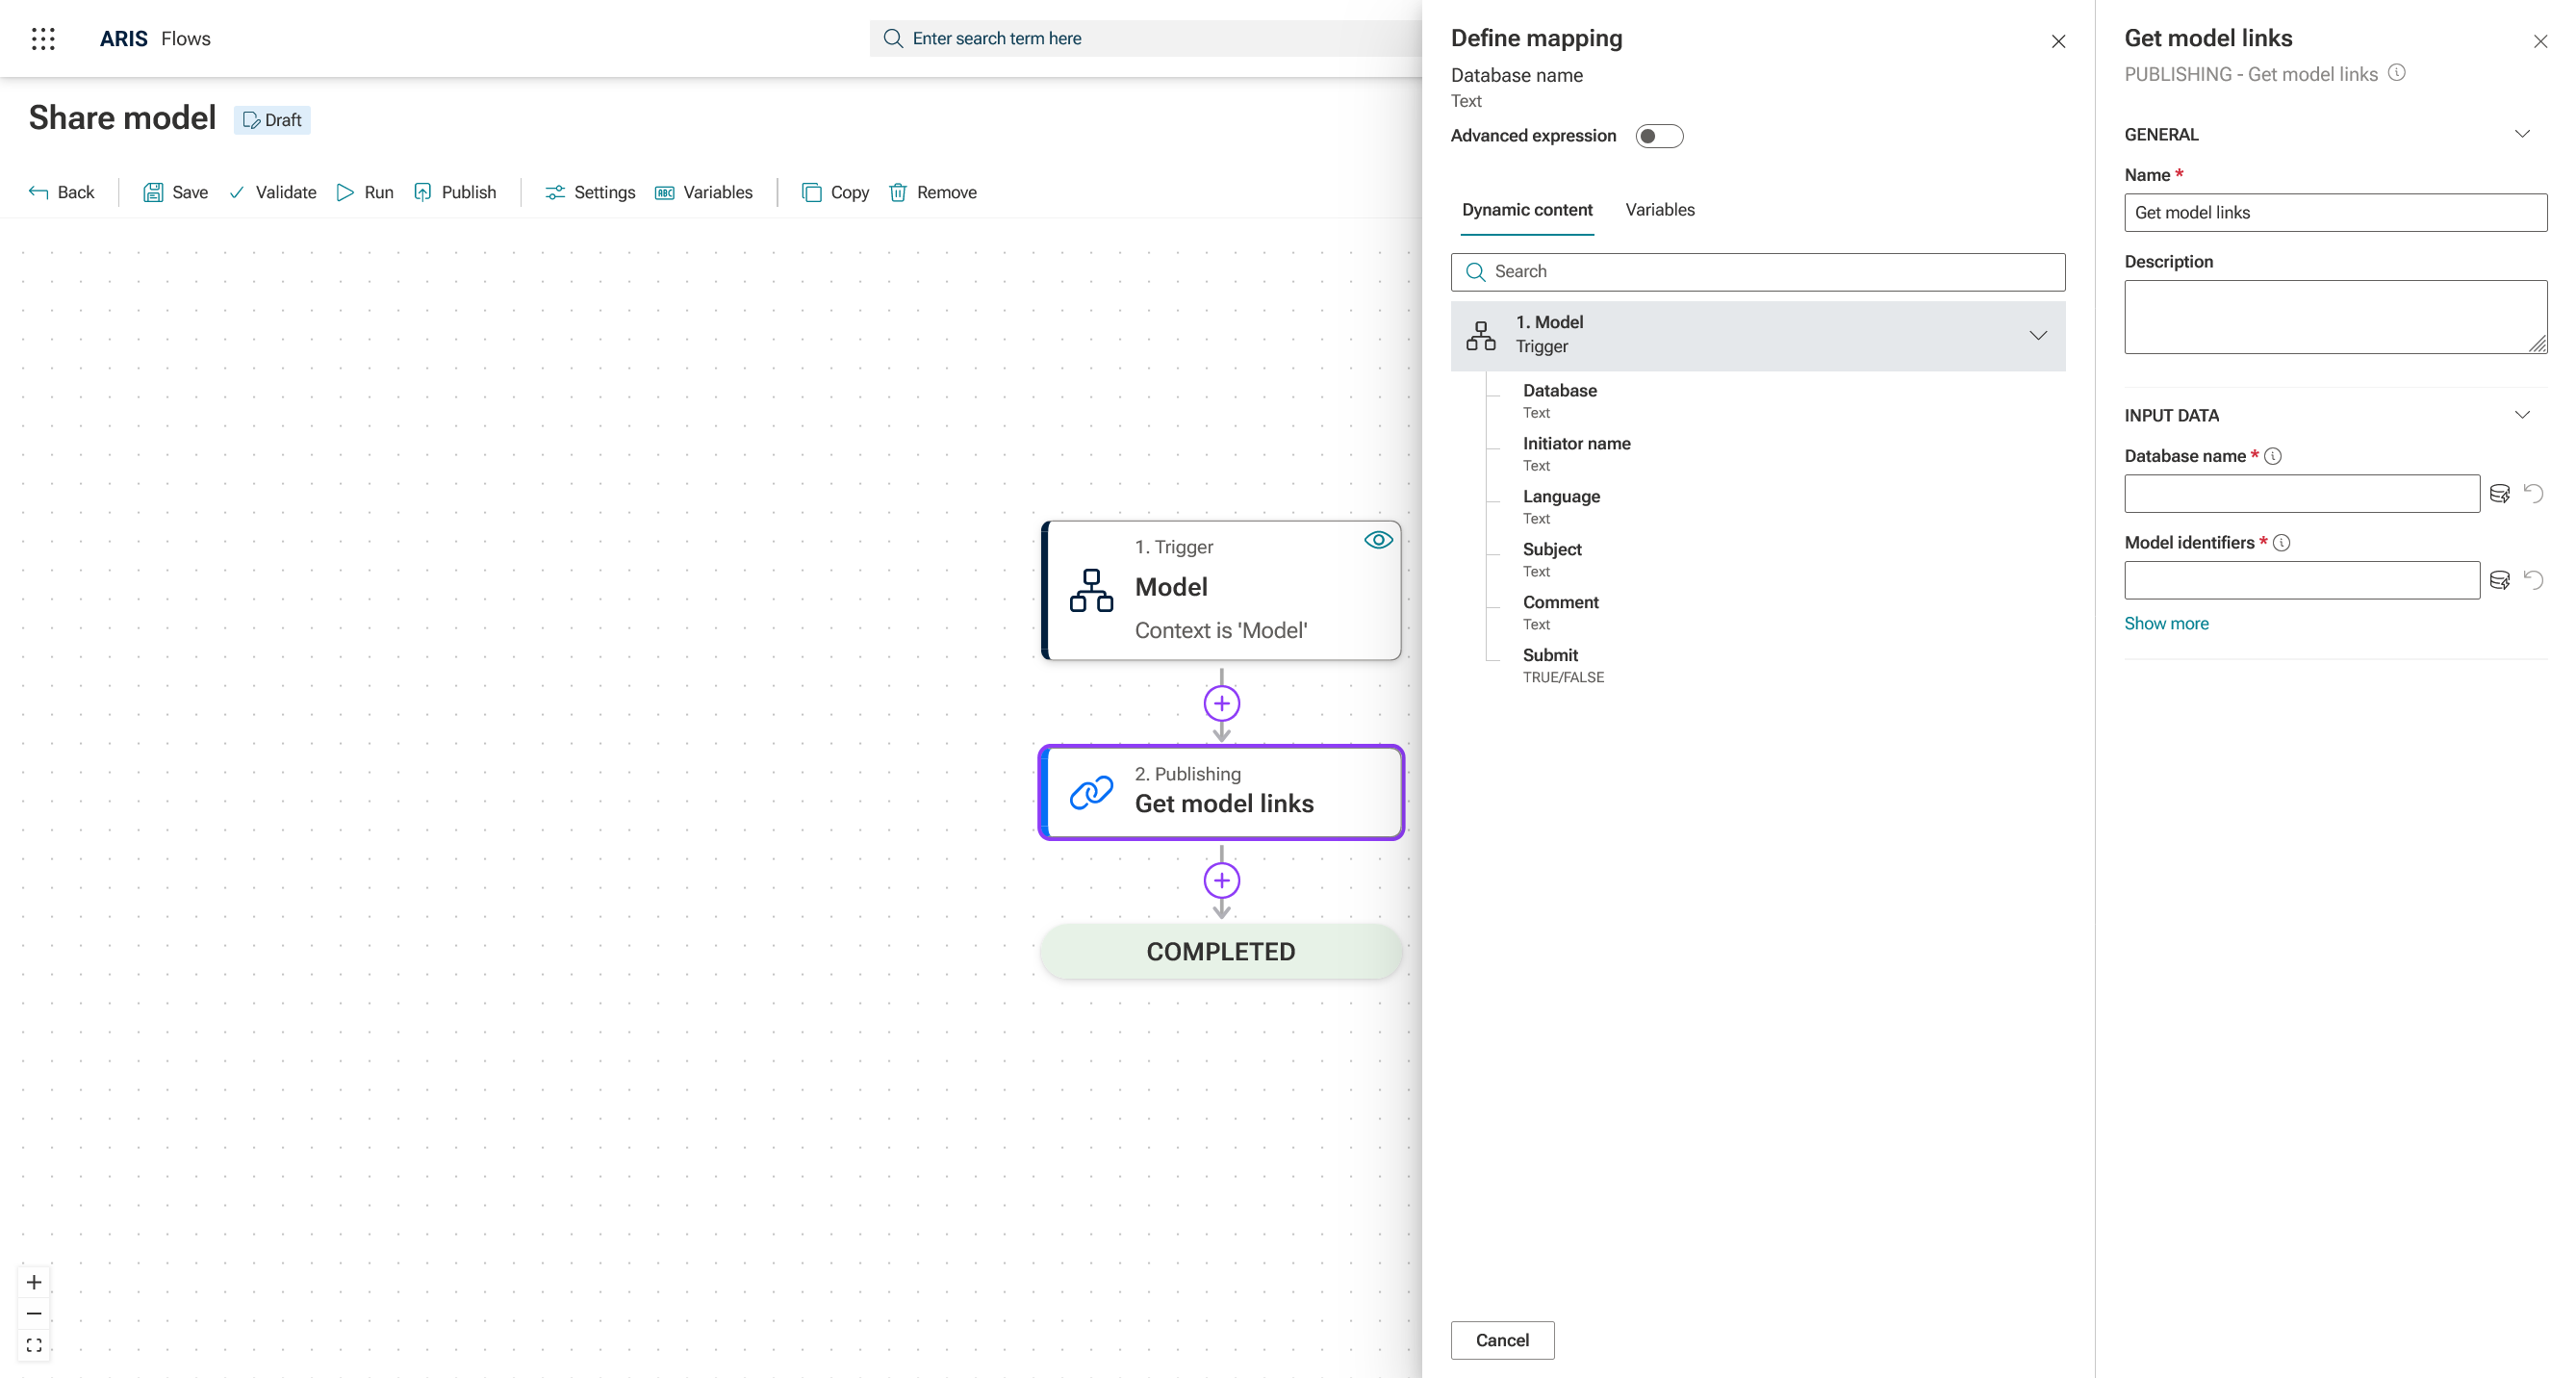
For the mapping, it’s important to know that you can only map data of the same data type. This ensures your flow executes correctly and all context information is passed seamlessly between actions.
3. E-mail Notification action – Configure the email:
As a next step you have to add the Send an e-mail action. Under notification you have to specify the following data:
- To: The user selected in the form

Click on Open mail builder to create the mail that should be sent out when you share a model.
In Placeholders panel you can define placeholders that you can add to your mail, and which can be later mapped with data in the flow builder. In our example we add placeholders for:
- Subject
- Initiator
- Comment, and
- Link.

As soon as you have finalized your mail, the placeholders will be available in the property panel and are ready to map.
Comment, subject, identifier and subject can be easily mapped by selecting the corresponding entries from the Dynamic content tab of the mapping panel.
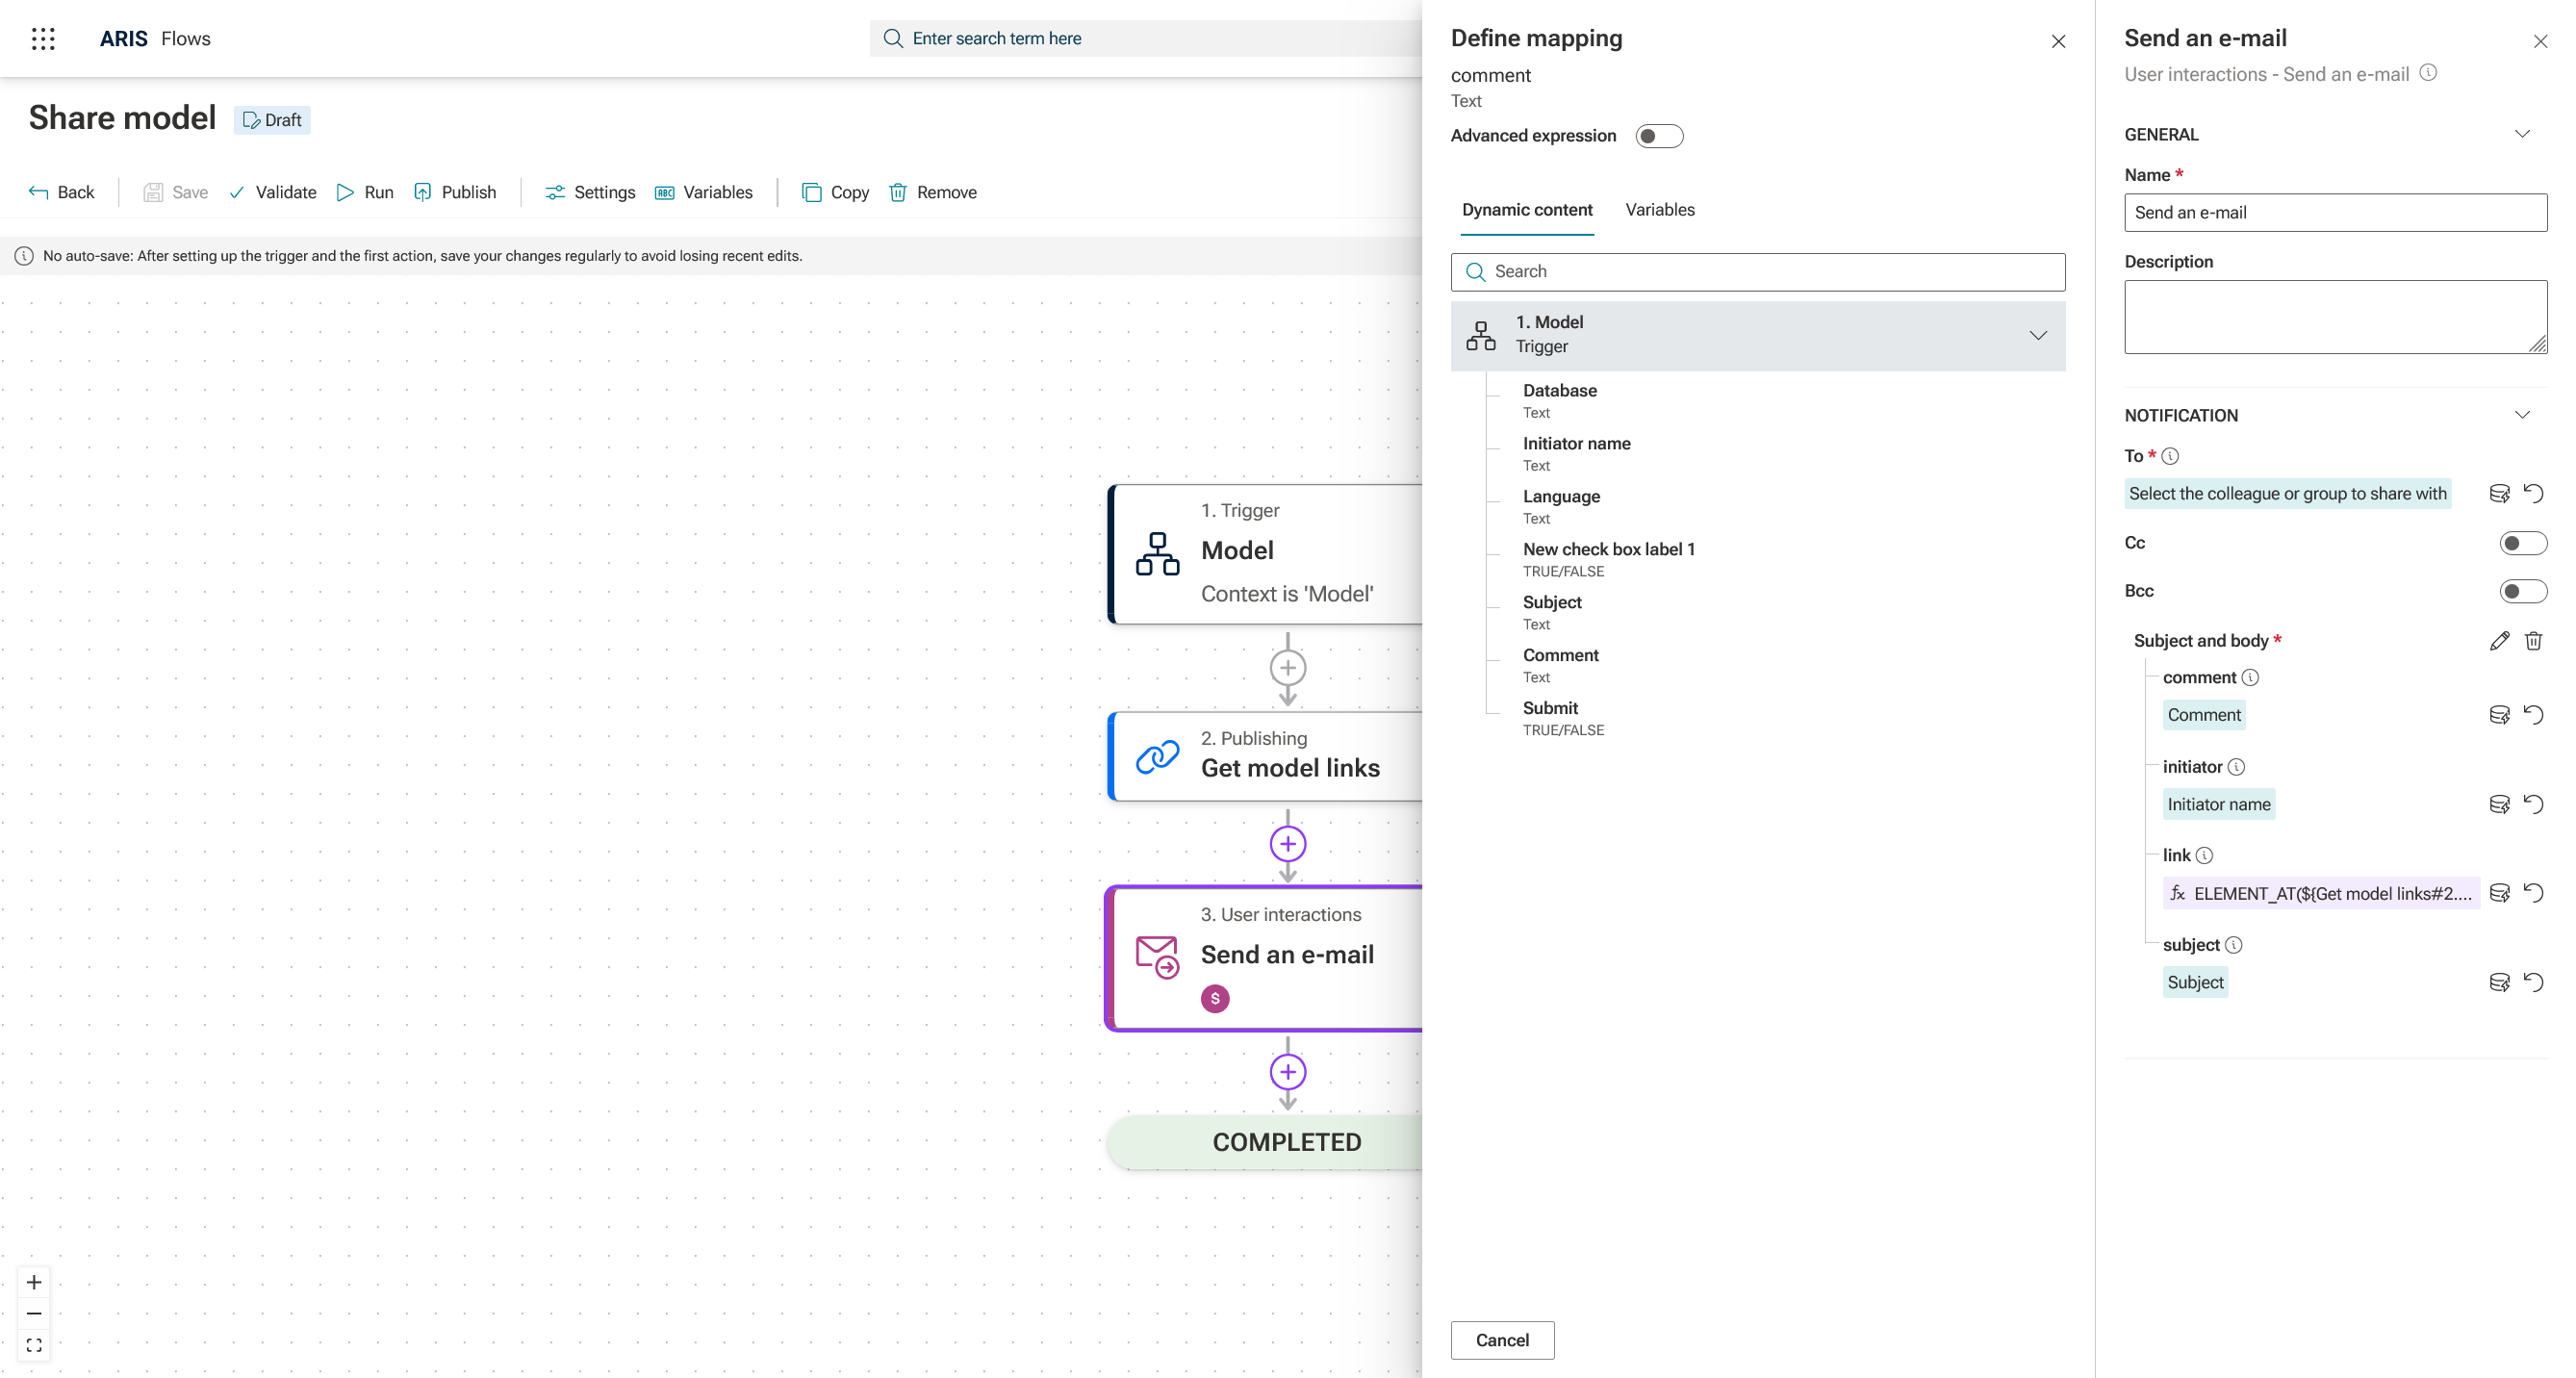
To specify the link, you have to click again on the mapping icon next to the link field. Afterwards you have to enable the Advanced Expression. Go to Operator tab → Select Get Element at position → Position the mouse cursor inside the brackets → Go back to Dynamic content tab → Select Model Links in the section Get Model Links → Since this expression is an array and you have only linked one model, write ",1" after the closing curly bracket.

With this setup, sharing models becomes fast, consistent, and fully traceable, giving your team more time to focus on what really matters — improving your processes.
A similar flow called Share model is available as a ready-to-use template in ARIS Flows, which you can use as-is or adapt to your organization’s needs.
👉 Let us know if you have specific questions or flows you want to define! 😊