Guide to Azure CLI
The Azure CLI is a cross-platform, open-source command-line tool that we may use to build and manage resources in the Azure Portal. This application allows us to issue commands and manage Azure resources directly from the Windows command prompt. Since this application is cross-platform, users can easily install it on Windows, Linux, or Mac OS X.
In this blog we will learn about Azure CLI in the following order:
- Azure CLI Overview
- What can Azure CLI do?
- Using Azure CLI without Installing
- How to Install Azure CLI?
- How to Install Azure CLI on Windows
- Installing Azure CLI on MacOS
- Installing Azure CLI on Linux
- Using Azure Command Line Interface
- Interactive Mode
- Azure Login
- Tenants and Subscription
- Creating a Resource Group
- Querying
- Debugging
- Conclusion
Check out this YouTube video to learn more about Azure:
Azure CLI Overview
Microsoft Azure CLI is a cross-platform command-line tool for managing and administering Microsoft Azure. It doesn’t replace PowerShell, but it does provide an alternative to using the command line to manage Azure. The program allows you to use the terminal to query, create, and administer cloud resources. It is available on a variety of platforms, including Windows, macOS, Linux, and, most recently, a web browser.
Users may use this platform to automate a variety of operations in the Azure portal, such as creating or deleting Azure resources including Virtual Machines or backing up SQL Databases.
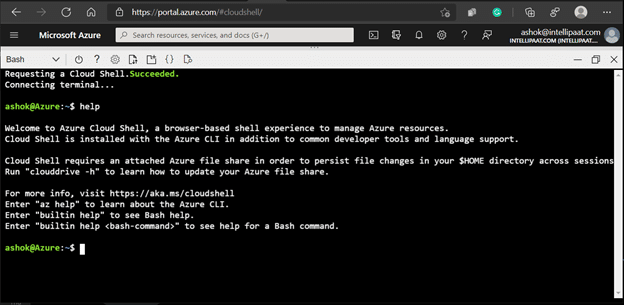
The Azure CLI can also be accessed using a web browser, otherwise known as the cloud shell. After logging into the Azure portal from any browser, the user can access the cloud shell. Both the CLI and the cloud shell have the same set of commands.
What can Azure CLI do?
Azure CLI provides an alternate method of accessing the various Azure resources through commands rather than clicking on the UI elements. This can prove to be essential for users in automating the tasks. It can do all the tasks that can be done through the portal including:
- Logging in and out of the Azure portal
- View or change subscription type
- Fetch resource groups
- Create, query, update or delete resources
- Automate any and all of the above
Click and be ready for the Industry with Microsoft Azure Certification Training with Intellipaat!
Using Azure CLI without Installing
One of the best features of this cross platform is its ability to be run on a web browser. So users don’t really need to install it on their devices. Just opening the browser and typing in https://shell.azure.com/ will land you right into Azure CLI.
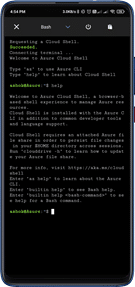
It can also be accessed from the Microsoft Azure mobile app. After logging in using the Azure account in the app, users can click on cloud shell to launch the CLI.
How to Install Azure CLI?
This CLI is available on a variety of platforms, including macOS, Linux, and Docker containers. Azure CLI being cross-platform has the huge advantage of collaboration with users who are accustomed to different platforms. The user can install CLI on the OS of his/her own choice.
How to Install Azure CLI on Windows
You can download Azure CLI on Windows in two ways – using a standard Windows MSI installer or through Windows PowerShell.
Using MSI Installer
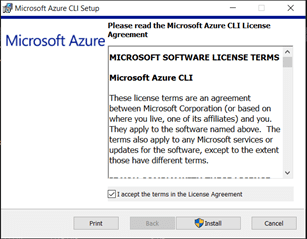
- Download the MSI installer and save it to your preferred folder.
- Then, accept all of the settings in the MSI installation wizard.
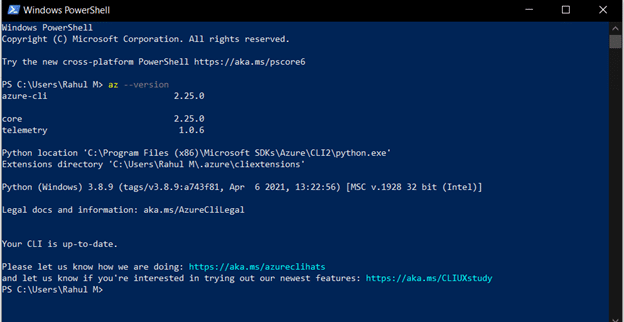
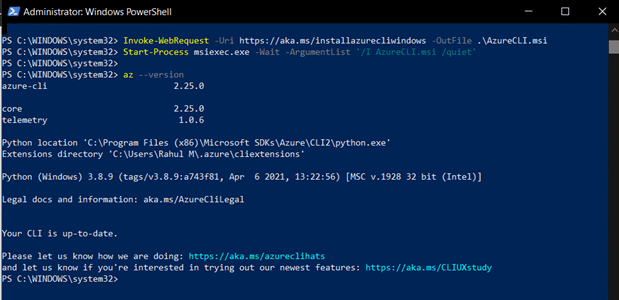
- Make sure that the Azure CLI is operational after you’ve installed it. To do so, run Windows PowerShell and use the az –version parameter to check the version
Earlier versions required the users to install python before installing CLI but newer versions do it themselves if python is not already installed.
Using PowerShell
Windows PowerShell can be used to download and install the Azure CLKi MSi.
- Run the Windows PowerShell as Administrator.
- Copy and paste the following commands in the PowerShell terminal.
## Download the MSI
 Invoke-WebRequest -Uri https://aka.ms/installazurecliwindows -OutFile .AzureCLI.msi
## Invoke the MSI installer suppressing all output
 Start-Process msiexec.exe -Wait -ArgumentList '/I AzureCLI.msi /quiet'
Running this command downloads the CLI installer and installs it. If you have it already installed, this command updates it.
- .After installation make sure it is operational. To do so, in the Windows PowerShell terminal, use the az –version parameter to check the version.
You can also install it via PowerShell using the chocolatey package manager as well. Assuming you have already installed chocolatey, use the command choco install azure-cli.
Installing Azure CLI on MacOS
Using the Homebrew package management system is the easiest way to install Azure CLI on MacOS.
- As a first step, to install Homebrew, run the following command on the Apple terminal.
/bin/bash -c "$(curl -fsSL https://raw.githubusercontent.com/Homebrew/install/master/install.sh)"
- Ensure that the Homebrew Is updated using the following command.
brew update
- Then invoke the brew command to install Azure CLI.
brew install azure-cli
If this returns an error about python not being installed, use brew install python 3 to first install python and brew upgrade python3 && brew link –overwrite python3 to overwrite existing python with the newer version.
Click here to know various aspects of Azure with the Azure tutorial!
Installing Azure CLI on Linux
Now it is available for various Linux distributions as well.
On Ubuntu
Installation on Ubuntu is very easy with a single line of command.
curl -sL https://aka.ms/InstallAzureCLIDeb | sudo bash
Running this command on Terminal will download a Microsoft script and execute all the necessary actions to install this interface on Ubuntu.
On CentOS or Fedora
- First, open the terminal in your CentOS or Fedora machine.
- Create an entry for the Azure CLI package in the local Yum repository using the following commands.
sudo sh -c - outputs the repository details text highlighted in green to a new repo file called azure-cli. repo. This file is written to a folder that holds all repositories.
 - baseurl  is the location of the packages available.
 - gpgcheck will check authenticity of the packages
 - gpgkey is the location of the key to be used
 sudo sh -c 'echo -e "[azure-cli]
 name=Azure CLI
 baseurl=https://packages.microsoft.com/yumrepos/azure-cli
 enabled=1
 gpgcheck=1
 gpgkey=https://packages.microsoft.com/keys/microsoft.asc" > /etc/yum.repos.d/azure-cli.repo'
- Invoke dnf to download and install
sudo dnf install azure-cli
Using Azure Command Line Interface
After installing it on the machine of your choice, the rest is consistent among all the different operating systems. This consistency is what makes this cross-platform really useful. As already mentioned It can be used for executing all the tasks that are usually done through the Azure portal.
Preparing for Azure Interview? Check our Top 50 Azure Interview Questions now!
Interactive Mode
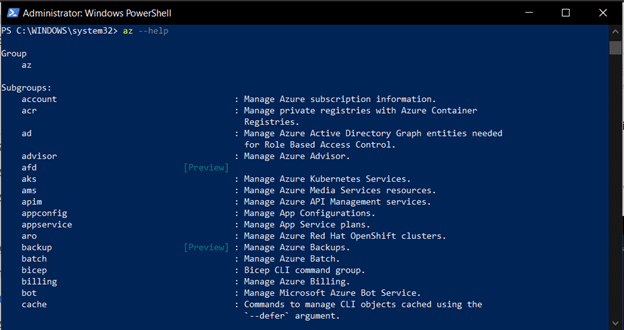
You can use the –help command to know more about the platform. Using –help or the shorthand -h after any command gives you the information about what you can do with the command.
But there is also an interactive mode that can be invoked using the command:
az interactive
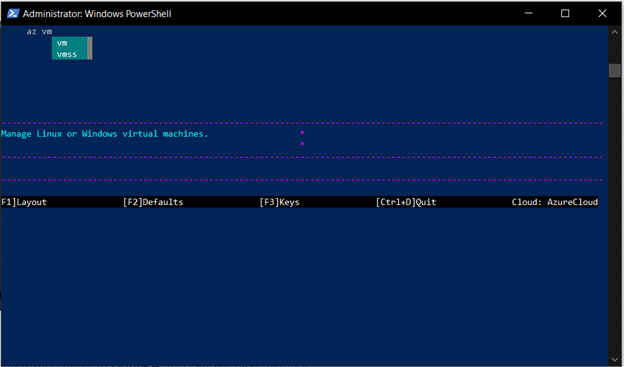
You may get basic help for the Azure CLI commands and arguments you’re using, and IntelliSense will even show you examples as you construct your command. It’s an excellent approach, to begin.
Azure Login
The first thing to do before using the various commands that CLI provides would be to log in.
az login
Running this command invokes the browser and from there the user has to input the login credentials to the Azure portal.
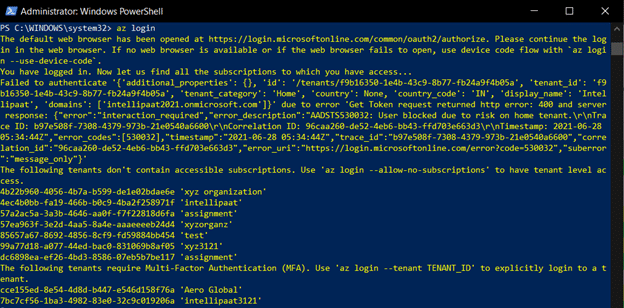
But if you don’t have the flexibility to launch the browser, the following command can be used to log in with an alternate authentication mechanism known as device code flow.
az login --use-device-code
The log in as a service principle can also be used with the following command for authentication.
az login --service-principal -u -p -t
This is particularly useful when automating the processes for DevOps pipelines or unattended tasks.
If you have a docker container, a virtual machine, or an app service that has an Azure identity, this can be used to login with managed identity.
az login --identity
Tenants and Subscription
The hierarchy in Azure is each tenant tied to an Azure Active Directory and the various subscriptions come under the tenants.
The following command can be used to see the various subscriptions attached to your account.
az account list
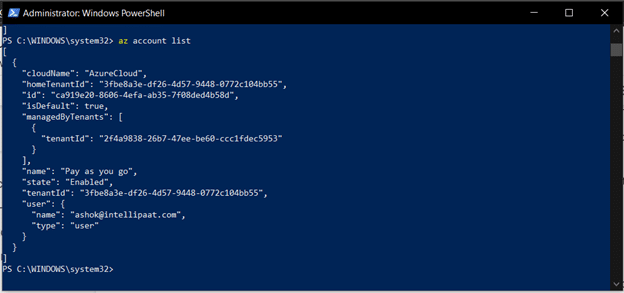
Like every other command, the following can be used to identify how to manage the subscriptions.
az account -h
Creating a Resource Group
Creating a resource group is quite easy using the command az group create.
az group create --location northeurope --resource-group Rsrcgrouptest --verbose
This command creates a resource group with the name Rsrcgrouptest in the location North Europe and will return all verbose output.
Querying
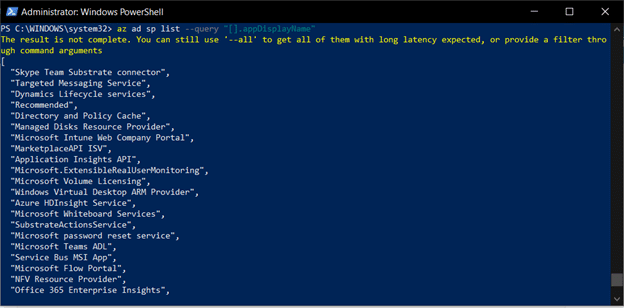
Running certain commands will frequently give us large JSON files like the command for showing subscriptions.
It Supports the use of query input flags that can allow the basic filtering of the incoming JSON files.
az ad sp list --query "[].appDisplayName"
Running this command will display the app display name property of all apps in our subscription.
Debugging
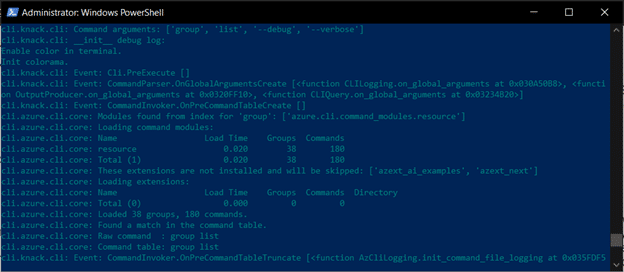
az group list --debug --verbose
This command scrolls a lot of text, but it clearly reveals the REST URL to which a request was made within that content. It displays the request’s data as well as the response received. All you have to do now is copy and paste that URL into your app, verify that it has a valid access token and the required permissions, then execute the identical REST call that Azure CLI demonstrated
Conclusion
These sets of commands make the experience of using the resources that Azure provides much snappier. Typing through the various commands makes it easier and faster for automating for the purpose of use in DevOps pipelines or for unattended processes. This was just a basic introduction to the service, Azure CLi in itself is very vast and is an extremely useful tool for managing the Azure resources.
If you are having any doubts. You can resolve your Azure Queries on Intellipaat’s Azure community!
The post Guide to Azure CLI appeared first on Intellipaat Blog.
Blog: Intellipaat - Blog
Leave a Comment
You must be logged in to post a comment.