Flowable orchestration of Microsoft Power Automate Desktop – RPA for free
Blog: Flowable Blog
In this post, I’m going to show you how to run Microsoft’s RPA product from Flowable. The full and complete way of doing this is by using Microsoft Power Automate Cloud to remotely drive Microsoft Power Automate Desktop, but that requires fees and complexity. I’m going to show a way of directly driving their free desktop RPA as a proof of concept. Microsoft has made RPA a commodity, so let’s take full advantage of that!
Microsoft Power Automate Desktop (I’ll use MPAD from now on) is free for Windows 10 and will be built into Windows 11. It allows you to do all the RPA tasks that you might expect, including opening and manipulating documents or websites. The example I’m going to use will just take a given website, open a browser for the site, grab the page title and close the browser. Like any good how-to, you can take it further to make it do more!
The first challenge is that there is no way to invoke a bot created with MPAD standalone other than click a button from within the MPAD app. There’s no API (except from Microsoft Power Automate Cloud) or command line interface. This means we’ll need to have a bot constantly running, waiting to get some trigger and input to run. An MPAD bot can make web service calls, so it would be possible to have a bot polling Flowable periodically for work (e.g. using the external worker feature of Flowable), but polling doesn’t feel very 21st Century. There’s no event-based API either, however, a bot can wait for a file in a given location to be created. We can use this as our trigger for the bot.
Once triggered by a file being created, we could have our bot use Flowable’s external worker approach, but again to keep it simple, I’m just going to use file contents as the input and output for the bot. Also, to make it a bit flexible, I’m going to have one bot that waits and triggers on the file contents, which then calls a second bot (or more) to do the actual work, returning its output that the first bot then writes to file again.
Getting started with Microsoft Power Automation Desktop
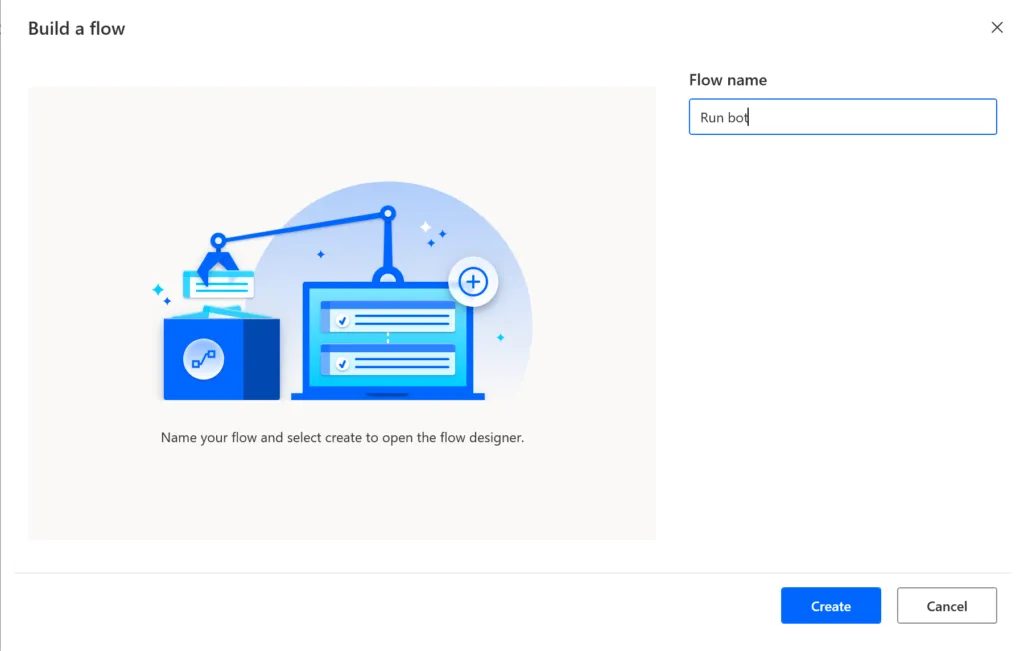
Let’s get that part running first. You can download and install MPAD on Windows 10 from here (button near the bottom of the page). Once installed, you can create the bots. There isn’t an import feature in MPAD, but you can copy and paste bot content. First, create the “trigger” bot:

Then copy and paste the following into the newly opened bot editor:
LOOP LoopIndex FROM 1 TO 2 STEP 0
    WAIT (File.Created File: $'''C:flowabledatarpabot1-in.txt''')
    File.ReadTextAsList File: $'''C:flowabledatarpabot1-in.txt''' Encoding: File.TextFileEncoding.UTF8 Contents=> FileContents
    File.RenameAddText Files: $'''C:flowabledatarpabot1-in.txt''' TextToAdd: $'''-last''' KeepExtension: True TextPosition: File.AddTextPosition.AfterName IfFileExists: File.IfExists.Overwrite RenamedFiles=> RenamedFiles
    SET NewOutput TO $'''No bot run.'''
    SWITCH FileContents[0]
        CASE = $'''webbot'''
            @@flowname: 'Bot get webpage title'
            External.RunFlow FlowId: 'b301680b-b12f-4ef0-a633-e9d383b2b12a' @NewInput: FileContents[1] @NewOutput=> NewOutput
    END
    File.WriteText File: $'''C:flowabledatarpabot1-out.txt''' TextToWrite: NewOutput AppendNewLine: True IfFileExists: File.IfFileExists.Overwrite Encoding: File.FileEncoding.Unicode
END
This will magically convert to the visual representation:
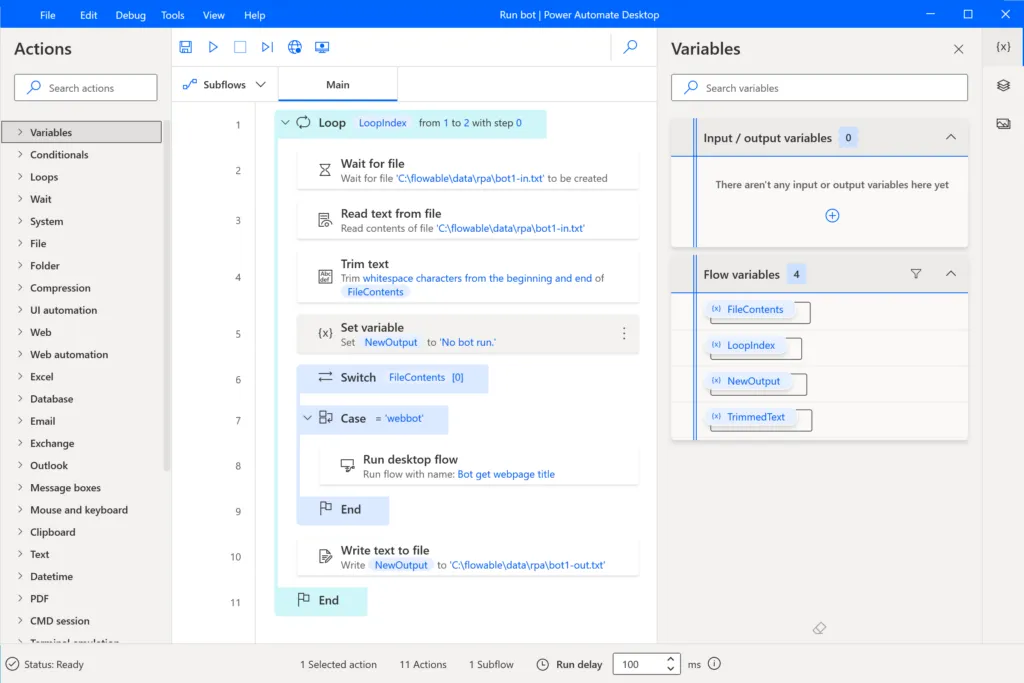
This bot has been made ready for you to add more callable bots in the future by switching the one called based on a line in the input file. Then create the bot that drives the browser and copy and paste the following:
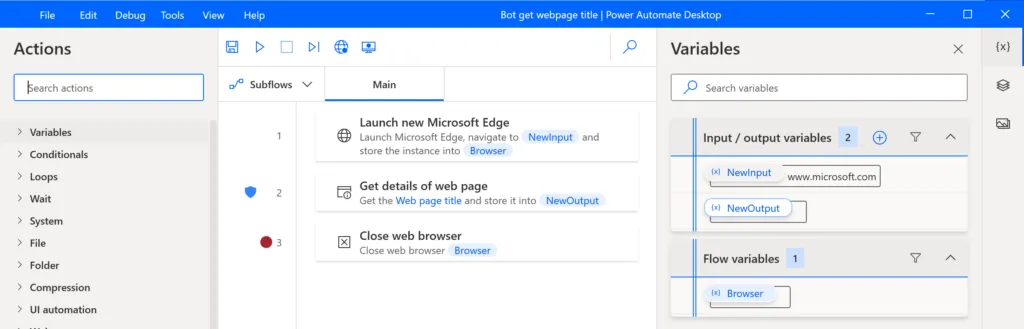
WebAutomation.LaunchEdge Url: NewInput WindowState: WebAutomation.BrowserWindowState.Normal ClearCache: False ClearCookies: False Timeout: 60 BrowserInstance=> Browser
WebAutomation.DataExtraction.GetDetailsOfWebPage BrowserInstance: Browser DetailsType: WebAutomation.DetailsType.Title Details=> NewOutput
ON ERROR

END
WebAutomation.CloseWebBrowser BrowserInstance: Browser
This too will get converted to the visual representation:
You should now have 2 bots. We can test them without running Flowable, as they are just triggered by files. The trigger bot has been configured to look for a file “bot1-in.txt” in the “C:flowabledatarpa” folder. This assumes you have Flowable installed in “C:flowable” and have created a subfolder “rpa” in the “data” folder. If you have Flowable installed elsewhere, you’ll need to tweak the bot or create the necessary folders. Start the trigger bot running in MPAD.
To trigger the bot, open Notepad and paste the following contents as the first 2 lines:
webbot
www.flowable.com
Save the file as bot1-in.txt in C:flowabledatarpa – which should immediately cause the bot to read the file contents, rename the file and then call the browser bot. When the browser has closed, an output file bot1-out.txt should have been created in the same folder. Open it to see the extracted title of the web page. If things don’t work as expected, then it should be straight-forward to work out what’s going wrong by stepping through the bot in MPAD and twiddling with the files.
Bringing in the business automation
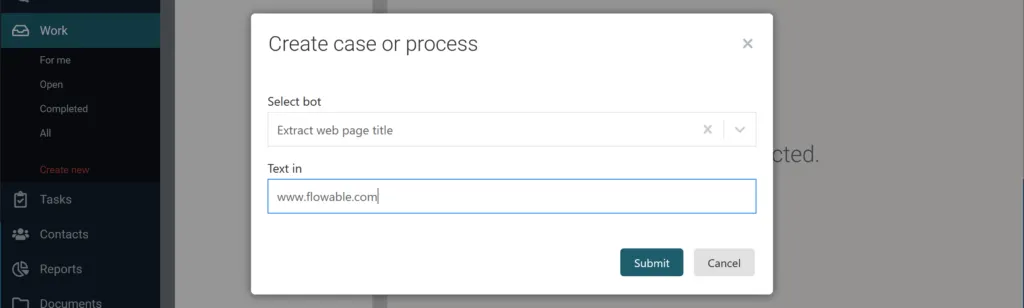
To drive this from Flowable, I’m going to use a script task to run the bot, followed by a user task to show the output in a form with a text field. Just a simple 2 step process with a start form in an app. The example app for Flowable Work can be downloaded from here, and the same example app for the open source Flowable can be downloaded from here.

The script task will create the necessary file and contents, then loop, sleeping every 2 seconds, waiting for the output file to be produced by the bot, before reading its contents into a process variable and deleting the output file. I’ve used the following Groovy script:
File inFile = new File('/flowable/data/rpa/bot1-in.txt').write(selectBot + "n" + textIn + "n")

outFile = new File('/flowable/data/rpa/bot1-out.txt')
while(!outFile.exists()) {
   sleep(2000)
}

String newContent = new File('/flowable/data/rpa/bot1-out.txt').text
outFile.delete()
execution.setVariable('bot1Out', newContent)
To run this, publish the app, then start a new instance of the process, making sure your trigger bot is still running in MPAD. You’ll be prompted for the bot to call (only one currently) and a website address for the bot to extract the page title.
You should then see the bot open the browser, then close it, soon followed by a new Flowable task being created that displays the extracted page title.

Summary
There we go – using Flowable to orchestrate a sophisticated RPA that didn’t cost a cent. To extend the example, you could make the file exchange more sophisticated, passing structured details in JSON, or making the input/output file location customizable. Alternatively, take the External Worker approach, and use REST calls to get and set inputs and outputs. Time to go and experiment!