
Event Driven Decisioning with AMQ Streams and Kogito
Blog: Drools & jBPM Blog
Kogito is a cloud-native business automation framework for building intelligent business applications. The project is based on battle-tested runtime components, and it allows the development of both business processes and rules as cloud-native applications for orchestrating distributed microservices and container-native applications. Kogito takes advantage of the many benefits of the container-native platforms as it was designed from the ground up for those platforms. Real-time decisioning is a powerful concept and has a lot of relevant use cases in the real world. Some common examples are Real Time Fraud detection and Personalized digital banking.
Kogito supports a methodology to allow for seamless integration for Kafka to create such a system. In this article we will take a look at how you can integrate Kogito decisions with Red Hat AMQ Streams on OpenShift.
For the purpose of this article, let us consider a simple real time transaction monitoring system. In an earlier article, I had written about how to create a complex transaction monitoring DMN model that can identify Fraud or AML activity.

Let us deploy this example using Kogito and integrate this with AMQ Streams. We will first create a new namespace on OpenShift kogito-event-driven-decisions.
Step 1: Deploy the AMQ Streams operator
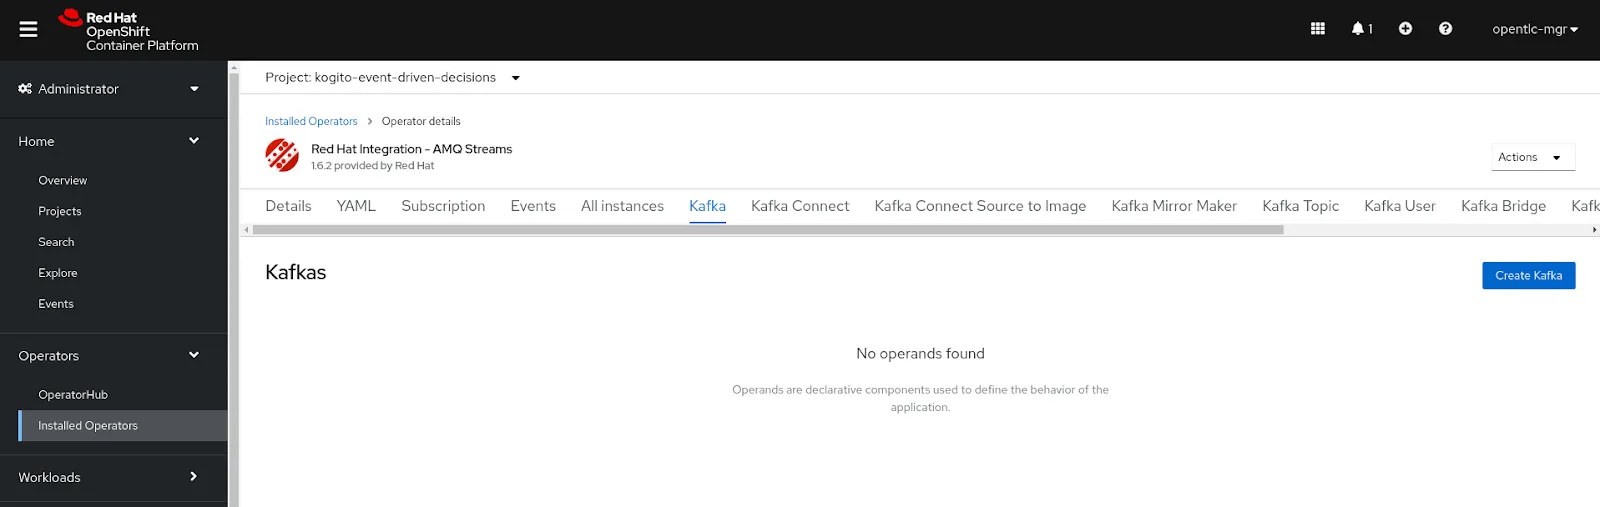
The Operator Hub is a collection of Operators from the Kubernetes community and Red Hat partners, curated by Red Hat. We will install the AMQ Streams operator.

Now that the operator is installed, we can now create a simple 3 node Kafka cluster. For this click on the Kafka tab and click on the Create Kafka button.
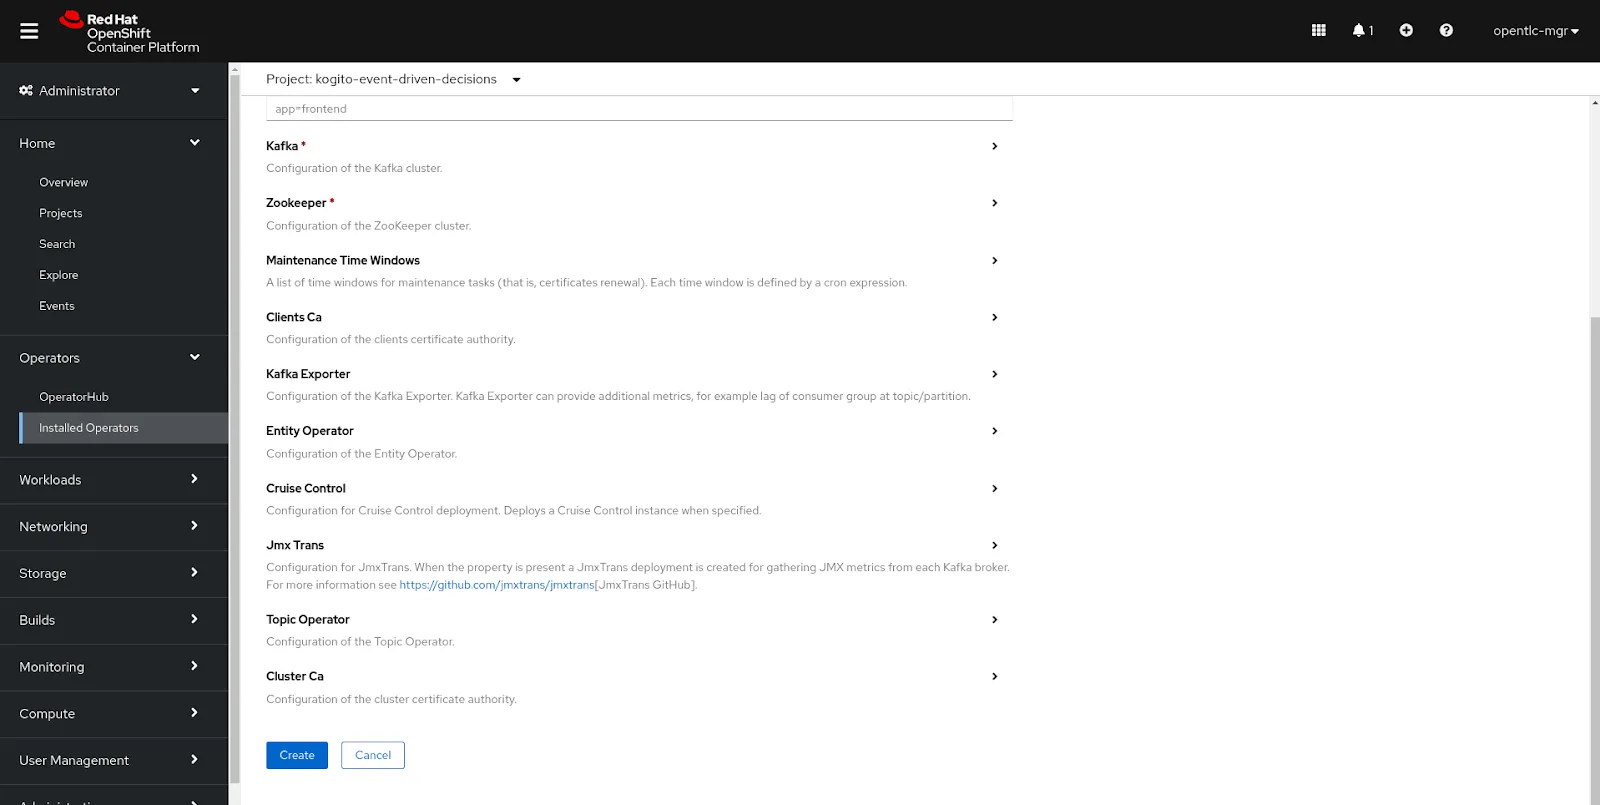
We will accept the defaults and create the Kafka cluster.
Step 2: Kogito Business Decisions
As a first step, let’s head over to https://code.quarkus.redhat.com/. We will create a starter project with Kogito – DMN capabilities.
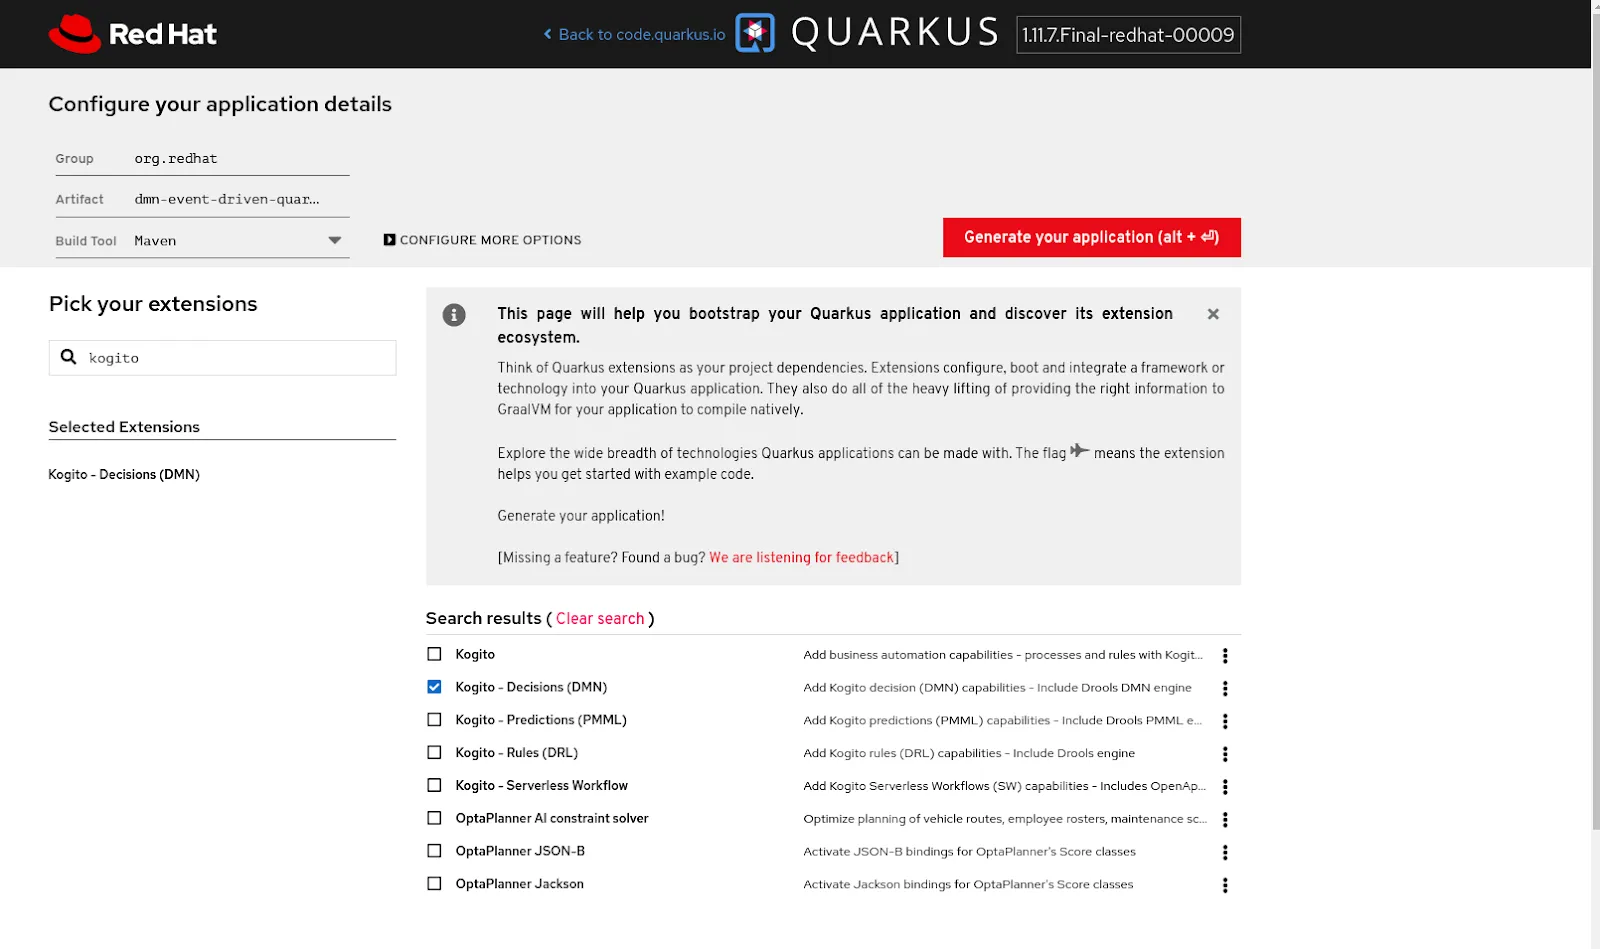
Download the application. We will now add two more dependencies, so that we can connect with the kafka broker.
<dependency> |
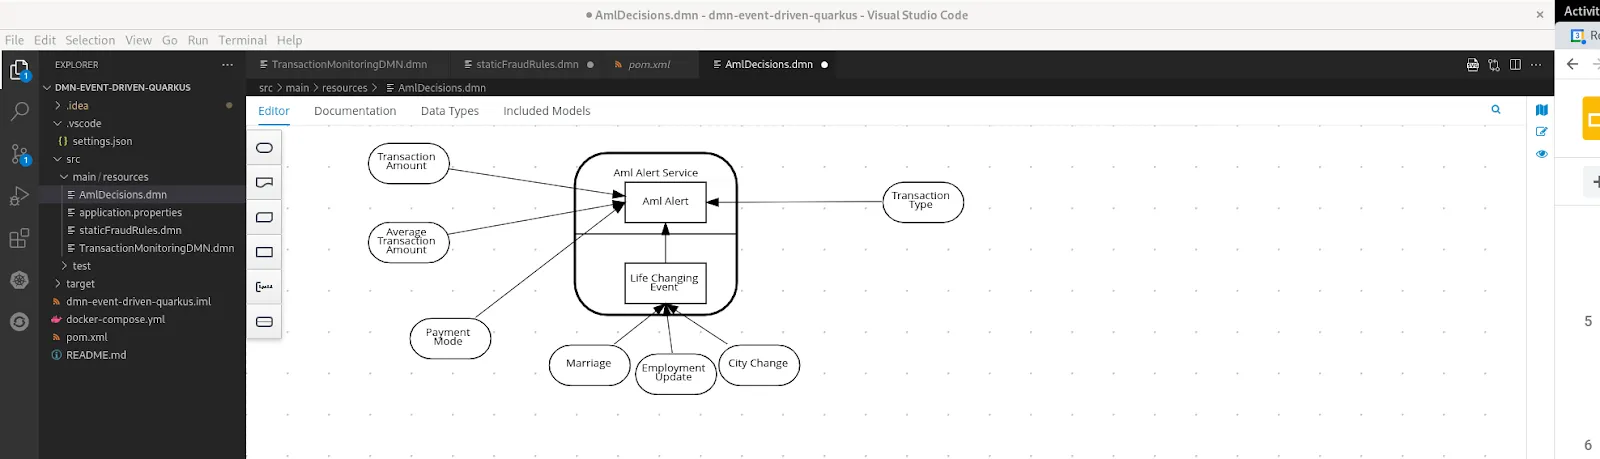
Now we will add the DMN models to the project structure. As you might recollect, we created a DMN called TransactionMonitoringDMN which included the logic from the FraudAlert model and the AMLAlert model. We will add all three of those DMNs to the kogito project.
We will now define some configuration information that will allow the Kogito application to connect to Kafka. Open the file src/main/resources/applications.properties and add the following configuration:
mp.messaging.incoming.kogito_incoming_stream.group.id=transaction-monitoringmp.messaging.incoming.kogito_incoming_stream.connector=smallrye-kafkamp.messaging.incoming.kogito_incoming_stream.topic=transaction-decision-requestmp.messaging.incoming.kogito_incoming_stream.value.deserializer=org.apache.kafka.common.serialization.StringDeserializer |
Notice that we have defined the bootstrap URL for the Kafka cluster and the topic properties for the incoming and outgoing topics. We will now check in the changes to a version control system like GitHub.
Step 3: Deploy the Kogito Application on Openshift
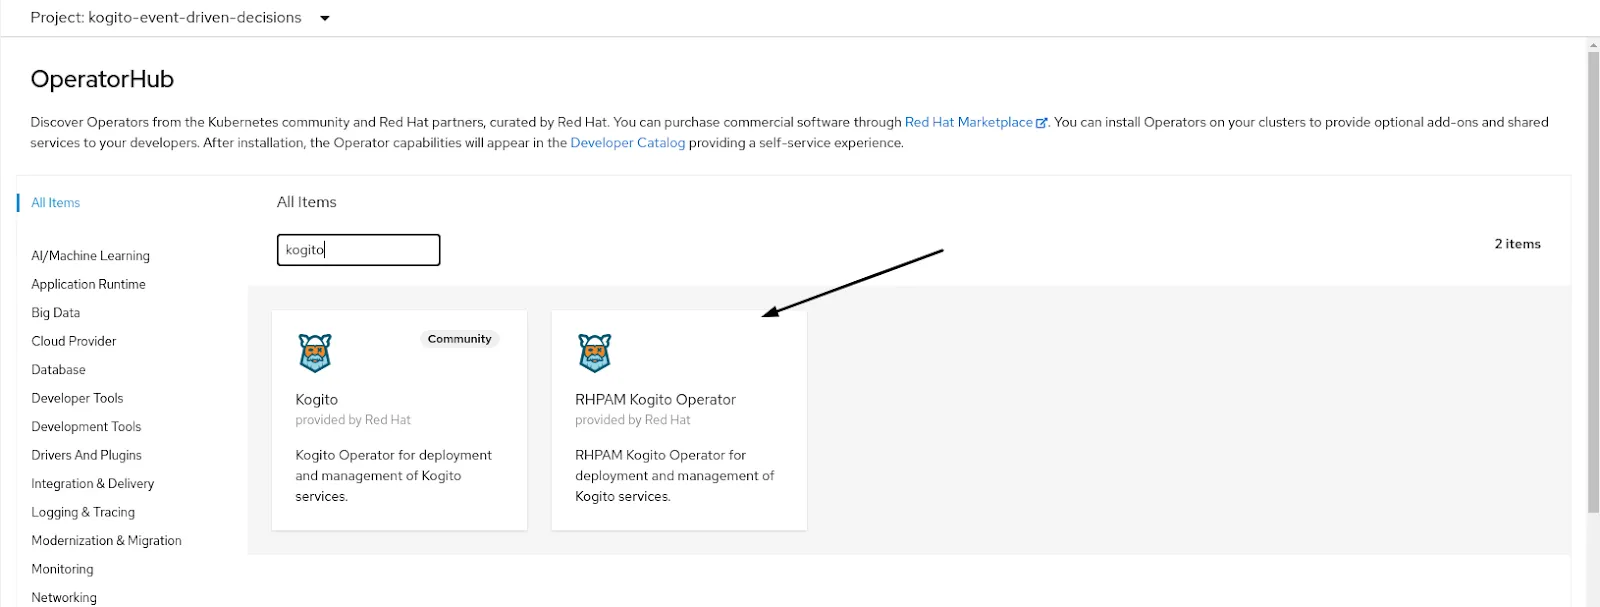
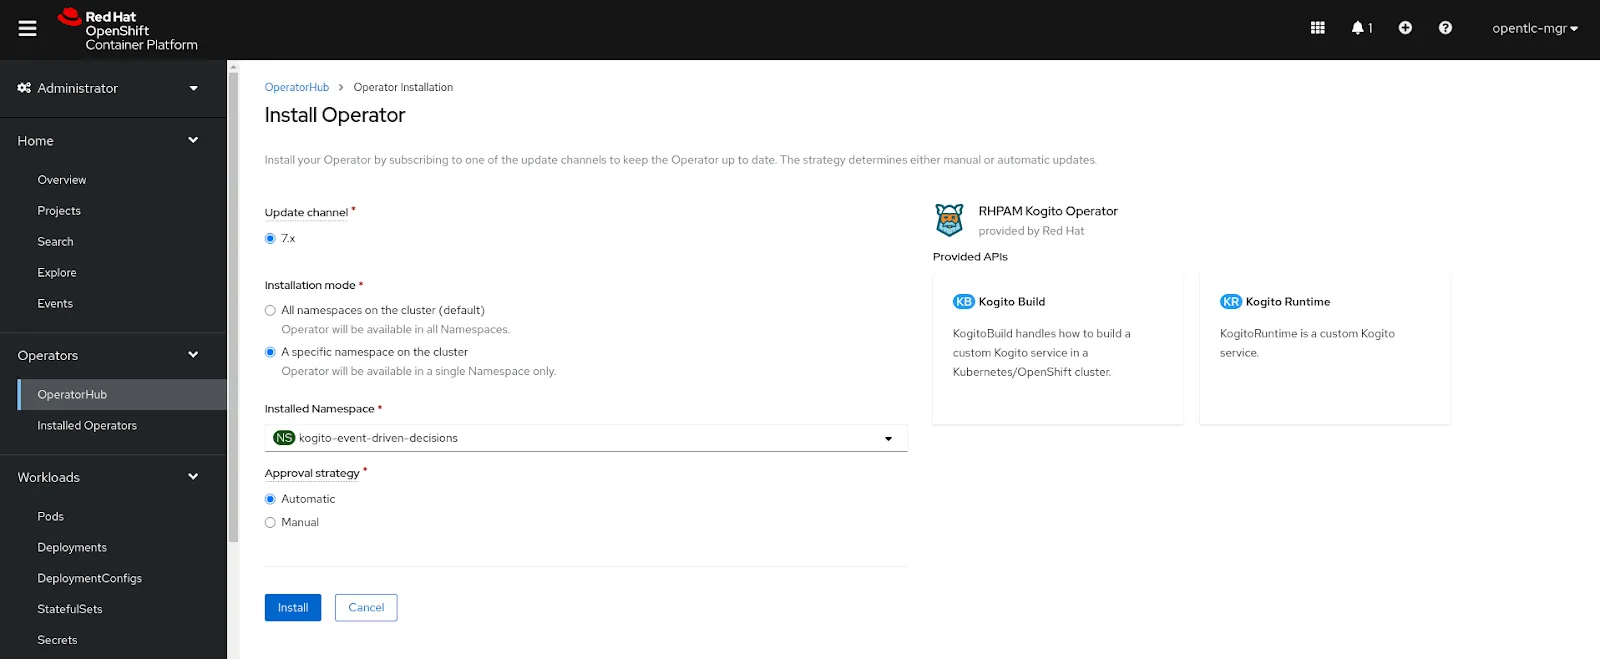
Let us now install the Kogito Operator on OpenShift. For this search for Kogito, choose the RHPAM Kogito operator and proceed.
We will install the operator in the same namespace (kogito-event-driven-decisions).
Now click on the tab Kogito Build, and click on Create Kogito Build. We will edit the name as transaction-monitor, and define the Git source from which it can build the kogito application.
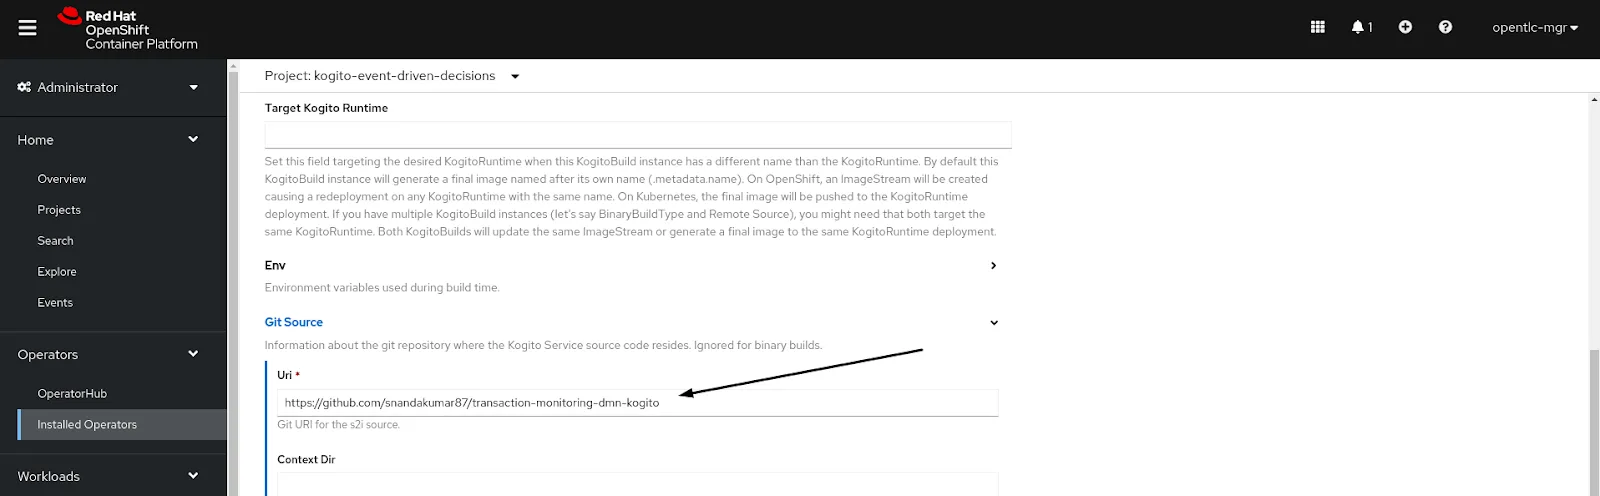
We will accept all the other defaults and submit. The Kogito Build can also be defined using a yaml. Check out the definition here.
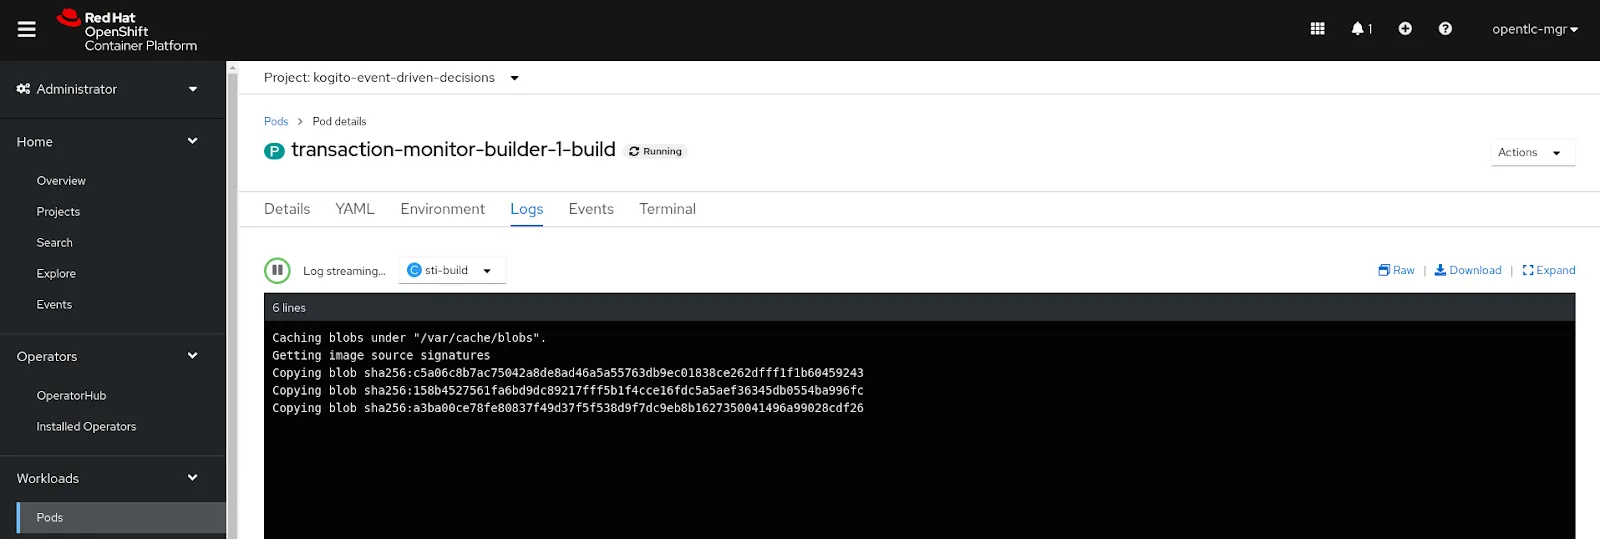
This should kick start a build in the namespace as below.
We will define a Kogito Runtime that will help deploy the changes. For this go back to the operator and click on tab as below

We will create a runtime, name it as transaction-monitor and submit. The Kogito Runtime can also be defined using a yaml. Check out the definition here.
Step 4: Testing the DMN decisions using Kafka
Let us now produce an event on the transaction-decision-request topic. For this we will use a simple python utility. This application generates events every few minutes. While logged in to the OpenShift environment via command line, we can use the following command:
oc new-app centos/python-36-centos7~https://github.com/snandakumar87/transaction-monitoring-emitter -e KAFKA_BROKERS=my-cluster-kafka-brokers:9092 -e KAFKA_TOPIC=transaction-decision-request -e RATE=1 --name=emitter |
The request sent to kogito should be in a CloudEvents format. This format provides a specification for defining event messages in a common way. A sample request message to the request topic would look like this:
{ |
Observe how the data section contains the payload details, or the facts, that are needed to be evaluated by the DMN decision.
Now that we have defined the emitter, let us install an open source Kafka UI (Kafdrop) to check out the decision response. For deploying this, we can use the following command.
| oc apply -f https://raw.githubusercontent.com/snandakumar87/transaction-monitoring-dmn-kogito/master/ocp-deploy/kafdrop.yml |
The yaml definition for installing Kafdrop can be found here.
Once the deployment is completed, we can access the route definition to open up the kafka UI.
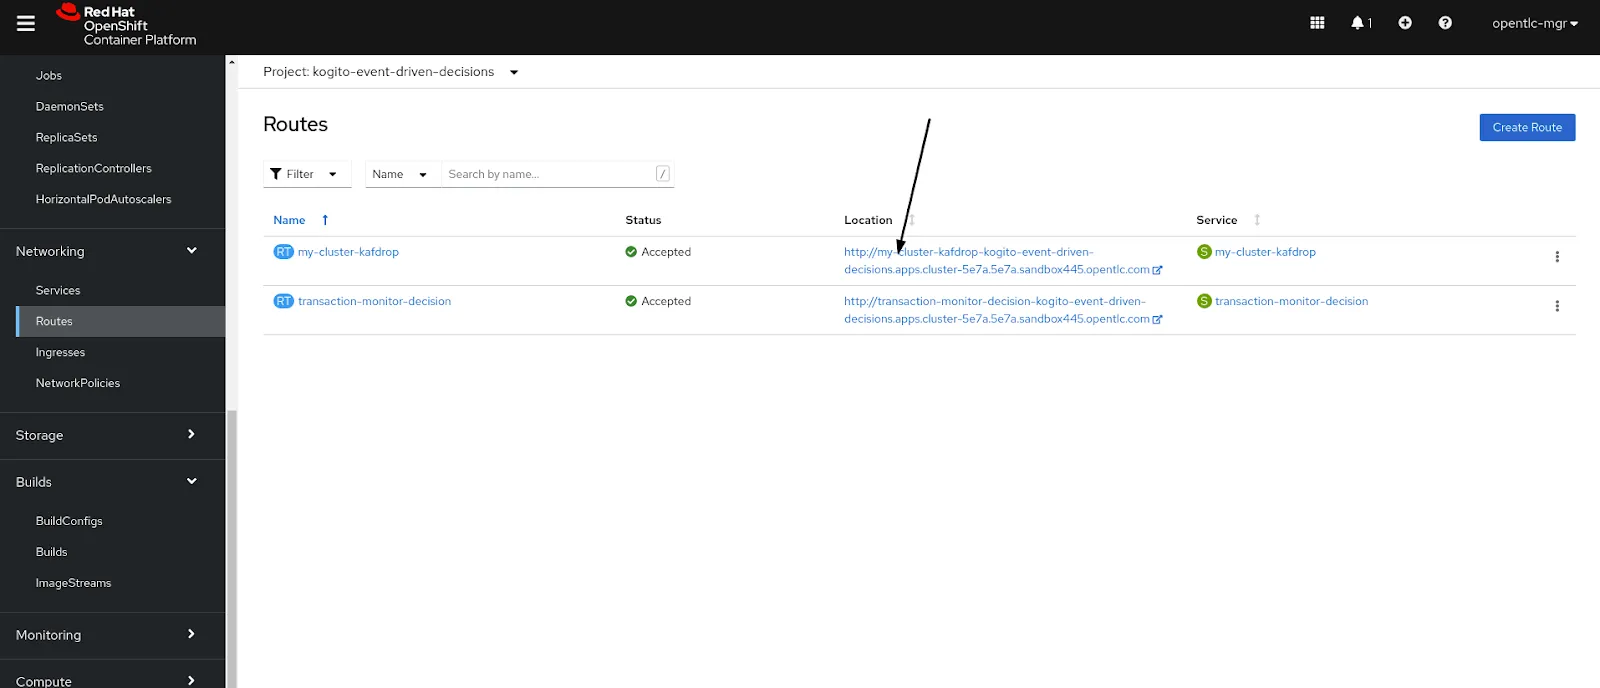
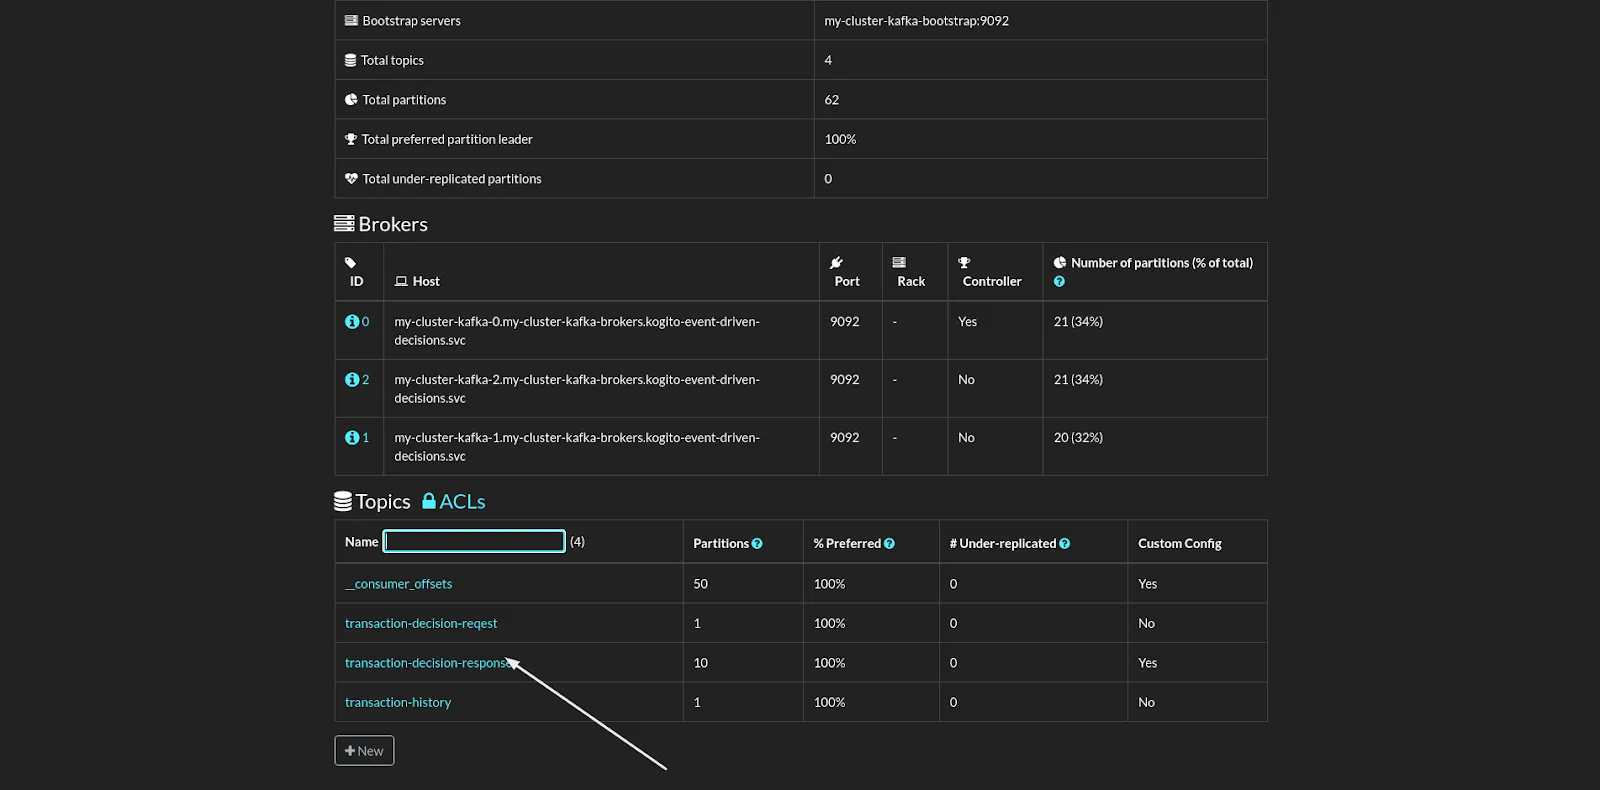
From the Kafdrop UI, choose the response topic.
Click on View Messages, you should see the response of the DMN decision as below.
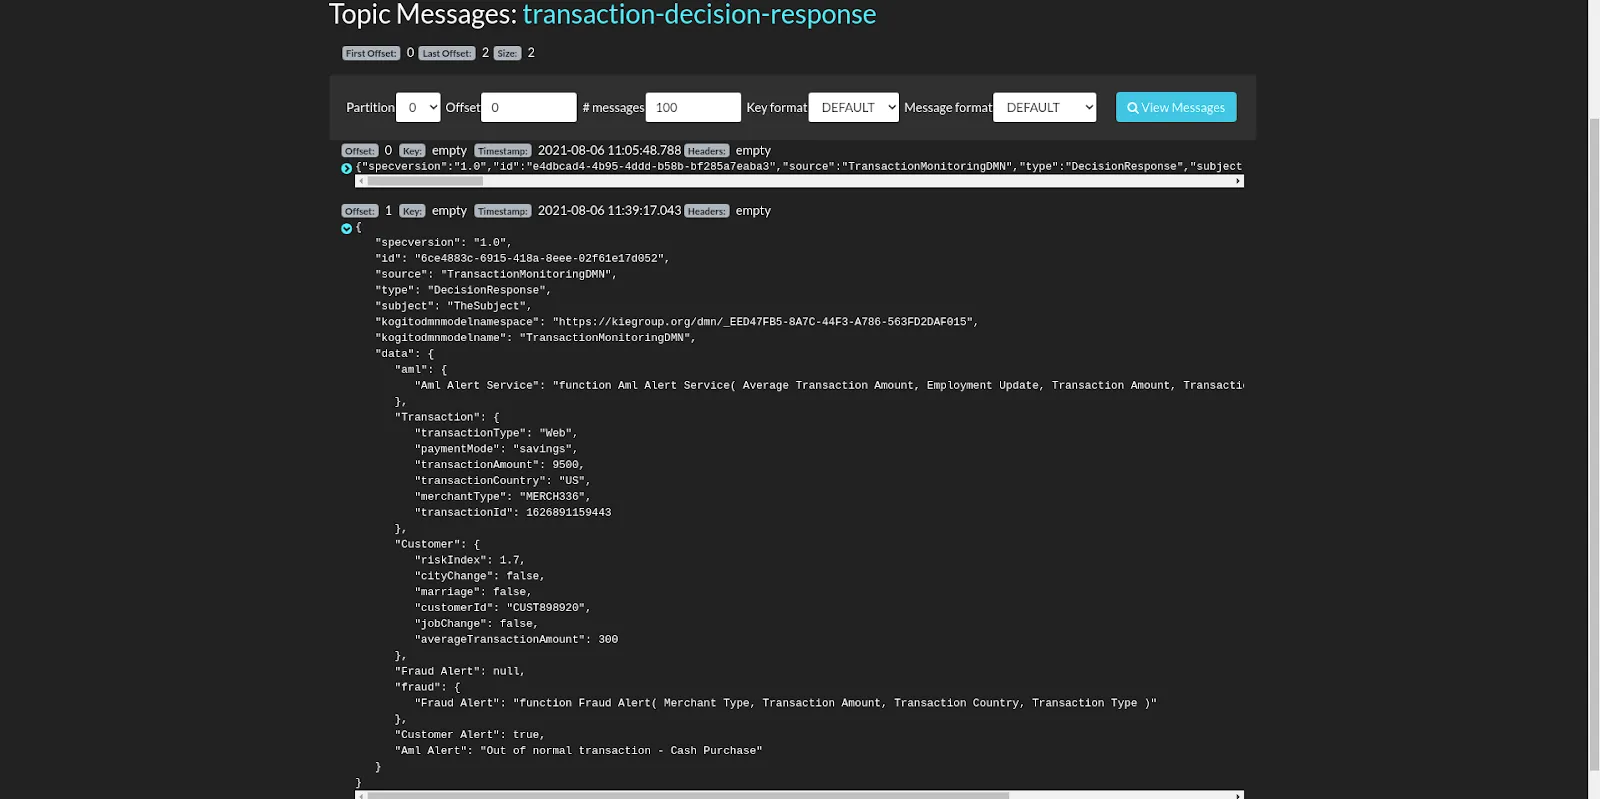
Notice how the response is also in the CloudEvents format. The data section contains the evaluated response of the decision execution.
Summary
As we called out earlier, Event Driven Decisioning is a powerful concept, and by externalizing the rules that drive the event behavior, we are able to make the overall process more transparent and agile. Kogito provides a simple and a robust way to implement such an architecture. Click here to learn more about Kogito.
The post Event Driven Decisioning with AMQ Streams and Kogito appeared first on KIE Community.