Enhanced Spotfire Maps using WMS Layers
Blog: The Tibco Blog
Problem Description:
Although the ability of Spotfire to import mapping layers from a Web Mapping Service (WMS) is not new, I am routinely surprised to learn that many Spotfire users are unaware that this feature even exists. Once I explain what a WMS layer is and demonstrate how simple they are to use in a Spotfire Map, people tend to become very excited about the possibilities and want more information on how to enhance visual analytics by taking advantage of publically available WMS server data.
My purpose is to outline the steps to importing a WMS layer into Spotfire, and then to provide a list of publically available WMS servers that you can use to enhance mapping visualizations in Spotfire.
How to import a WMS layer:
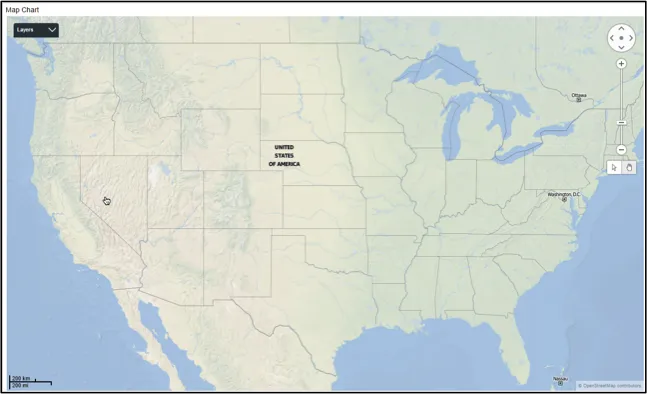
Step 1: Create a base map using the standard mapping features available in Spotfire. In this case, we will simply use a generic map of the USA.
Step 2: For the purposes of this example, let’s suppose that we want to display a layer that shows a geologic age map of rock layers superimposed over top of our base map of the United States. Fortunately, the US Geologic Survey provides a WMS service that has this exact layer information. The URL for the USGS WMS Server is http://mrdata.usgs.gov/services/kb?request=GetCapabilities&service=WMS&version=1.1.1. To add layers from the this WMS to our map, we begin by right clicking on the map and then selecting “Properties”.
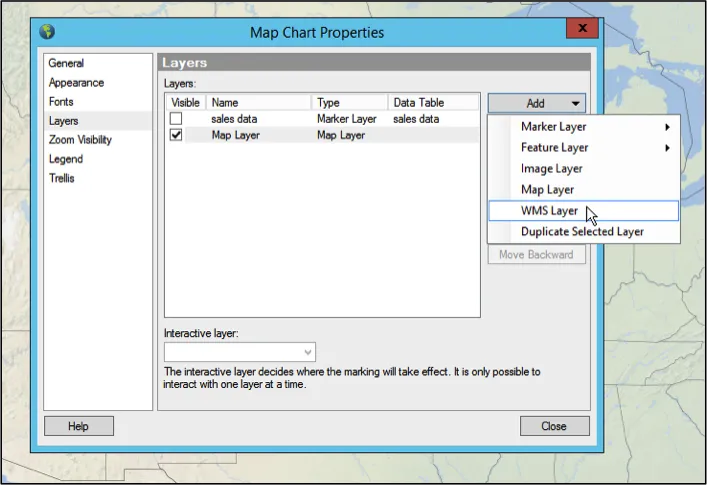
Step 3: Select “Layers” and then click on the “Add” button. Select “WMS Layer” from the pull down menu.
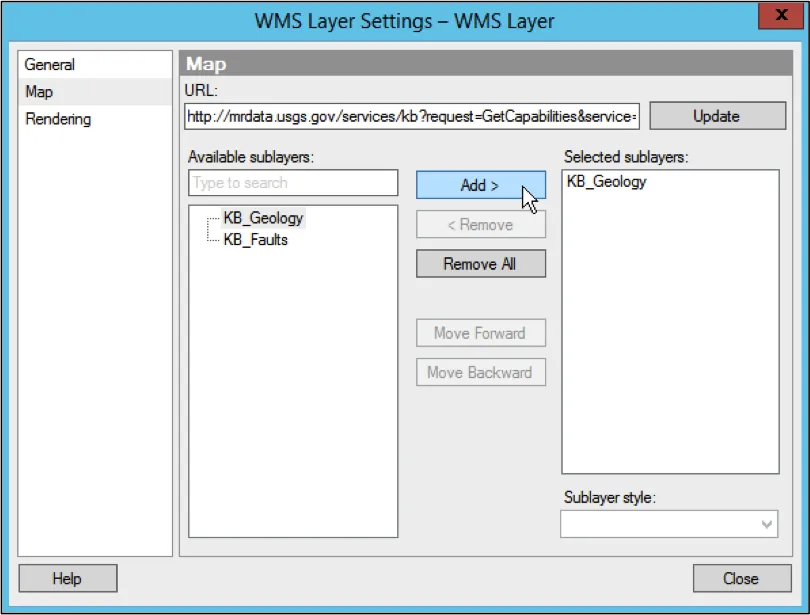
Step 4: Under the “Map” section, enter or paste in the URL of the WMS as shown below. Click the “Update” button. A list of available layers will be displayed in the “Available Sublayers” box, as shown below.
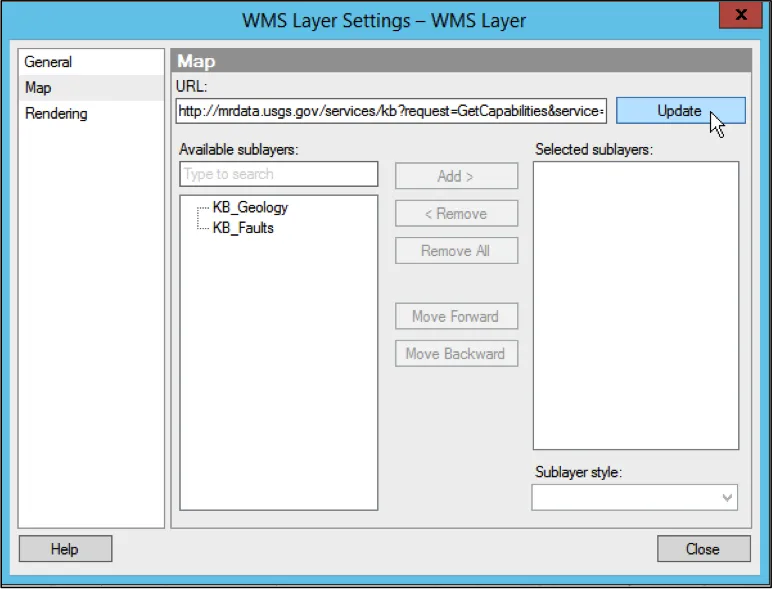
Step 5: Choose to include the “KB_Geology” layer.
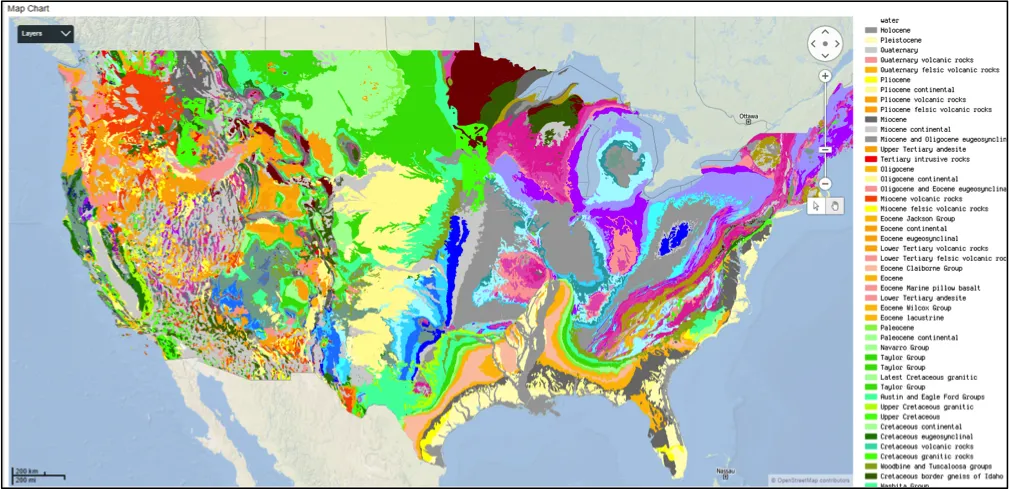
Step 6: As soon as we add the “KB_Geology” layer, we observe that a new layer named “WMS Layer” is created, and the new geologic age layer is displayed on our map.
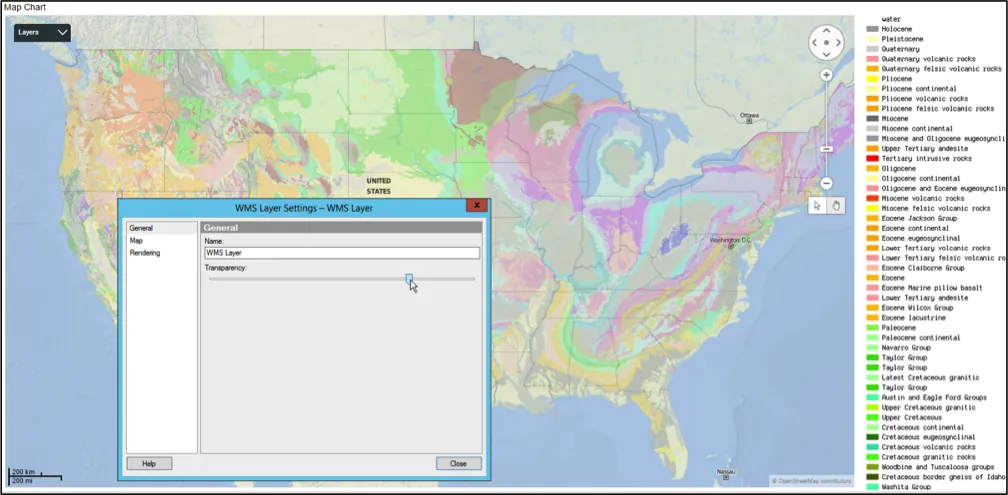
Step 7: We can view other layers or features below the new WMS layer by adding “Transparency” to the WMS layer using the slider bar under the “General” menu option for the WMS Layer.
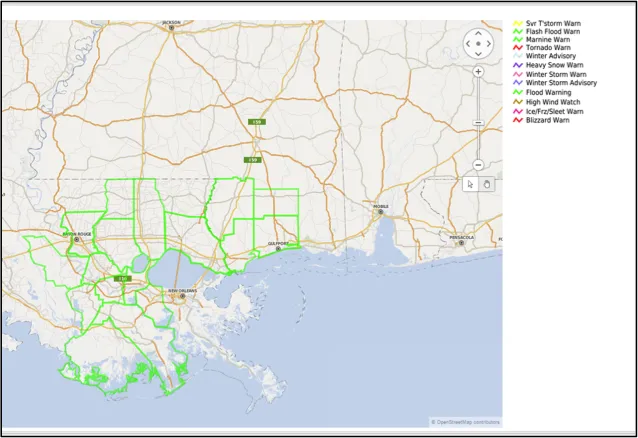
You can add other WMS layers, shape files, or actual data from your data table as desired. The possibilities are really quite endless when it comes to the use of WMS layers. Here is another example of a dynamic WMS layer provided by the National Weather Service. It displays counties in the USA where active weather warnings are currently issued. After adding the WMS server URL as a layer, I can see that at the time this paper was being written, there are active flood warnings issued from many counties in Louisiana and Mississippi.
Some corporations produce and support their own WMS servers where they keep customized map layer files available. However, there is also a treasure trove of WMS server data available on-line for anyone who knows how to use Google. To help you get started, here are a few of my favorite WMS server URLs that are publically available on the Web. This is by no means an all-inclusive list. These are just some of the URL’s I have found useful for the work I am personally involved in. I encourage you to explore this Spotfire capability and take full advantage of what it can do to help you create enhanced mapping visualizations that will WOW and amaze your viewing public.
Interested in checking out all of the customizable features in Spotfire? Give a free trial a shot, and find more information here.
WMS Server URLs:
http://mrdata.usgs.gov/services/kb?request=GetCapabilities&service=WMS&version=1.1.1
http://www.gebco.net/data_and_products/gebco_web_services/web_map_service/mapserv?
http://geo.weather.gc.ca/geomet/?lang=E&service=WMS&request=GetCapabilities
http://mesonet.agron.iastate.edu/cgi-bin/wms/us/wwa.cgi?
http://services.ogc.noaa.gov/geoserver/nhc_best_track_dynamic/wms