
This blog post is going to walk you through building and running a custom Nginx Docker image for a sample DashBuilder static application.
DashBuilder has a client bundle, which consists of the DashBuilder Webapp. The deployment is simply modifying setup.js to include user dashboards and then serving index.html.
In case you already have an image ready to deploy/publish on OpenShift Developer Sandbox, you can skip to the last section of this blog post. You can also use my image here.
Creating a custom Nginx Docker image
Normally, using Nginx with Docker, we would not install Nginx from the official image and then configure it manually. We will use the pre-configured Nginx Docker Image and all we need to do is start the container from those Nginx Docker images and use them.
In order to get started, we have to unpack an NPM package which contains the sample DashBuilder static application. Create a new folder and install the NPM package.
mkdir newfolder
cd newfolder
npm i @kie-tools/dashbuilder-client
Now we can get some sample YAML dashboards from this repository and copy them into the dist folder inside node_modules/@kie-tools/dashbuilder-client. Now we also have to tweak setup.js to include the dashboards. Just add dashboards: [“sample.dash.yml”] inside the dashbuilder object inside setup.js. You can choose to add multiple dashboards too. Just add them as comma-separated strings in dashboards inside the dashbuilder object inside setup.js.
In order to create an image, we need to know how an Nginx Docker image can be created. By default, Nginx looks in the /usr/share/nginx/html directory inside of the container for files to serve. We need to get our static files into this directory.
One of the simplest ways to do this is to copy our HTML files into the image by building a custom image.
To build a custom image, we’ll need to create a Dockerfile and add our commands to it.
In the newfolder directory which now contains the node_modules folder, create a file named Dockerfile and paste the below commands.
FROM nginxinc/nginx-unprivileged
COPY /node_modules/@kie-tools/dashbuilder-client/dist/ /usr/share/nginx/html/
Note: We are using the Docker NGINX unprivileged image since Openshift has limited permissions for Nginx and we may face errors like
<a class="au li" href="https://stackoverflow.com/questions/54360223/openshift-nginx-permission-problem-nginx-emerg-mkdir-var-cache-nginx-cli" target="_blank" rel="noopener ugc nofollow"><strong class="ki ll">Openshift Nginx permission problem [nginx: [emerg] mkdir() “/var/cache/nginx/client_temp” failed (13: Permission denied)]</strong></a>while deploying our image to Openshift Developer Sandbox. So, it’s necessary to run Nginx as a non-root user. Refer to the “Running Nginx as a non-root user” section of this guide for more information.
We start building our custom image by using a base image. The FROM command will pull the nginxinc/nginx-unprivileged image to our local machine and then build our custom image on top of it.
Next, we COPY the contents of the folder containing the static content into the /usr/share/nginx/html directory inside the container overwriting the default index.html file provided by nginxinc/nginx-unprivileged image.
You’ll notice that we did not add an ENTRYPOINT or a CMD to our Dockerfile. We will use the underlying ENTRYPOINT and CMD provided by the base Nginx image.
Make sure you have Docker installed in your system. Once you have Docker installed in your system, start Docker using the following command. You can also use Podman for the same:
sudo service docker start
Troubleshooting
Fresh install Docker
cgroupmountpoint does not exist. Just run the following command or refer to this thread:
sudo mkdir /sys/fs/cgroup/systemd
sudo mount -t cgroup -o none,name=systemd cgroup /sys/fs/cgroup/systemd
We now need to run the following command on a terminal inside the newfolder directory.
docker build -f Dockerfile -t dashbuilder .
You will see the following on your terminal on the successful execution of the above statement.
Note: Don’t forget to add the . at the end else you might get error like:
”docker build” requires exactly 1 argument.
See ‘docker build — help’.
Usage: docker build [OPTIONS] PATH | URL | -
Build an image from a Dockerfile
Time to run the image. To run the image, run the following command:
docker run -it — rm -d -p 8080:80 — name web dashbuilder
web is the container name and dashbuilder is the image name. Standard practice is to name your containers for the simple reason that it is easier to identify what is running in the container and what application or service it is associated with. Just like good naming conventions for variables in your code makes it simpler to read. So goes naming your containers. To name a container, we must pass the — name flag to the run command.
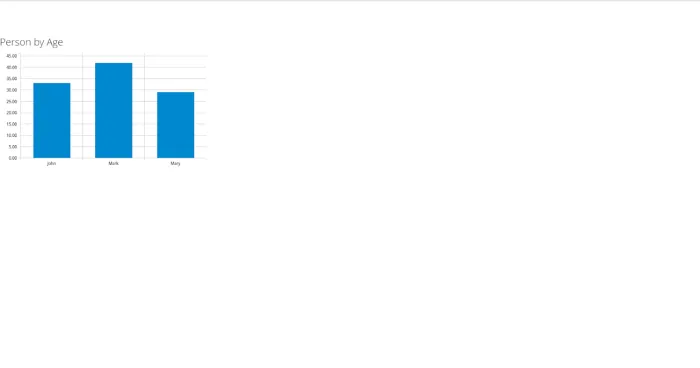
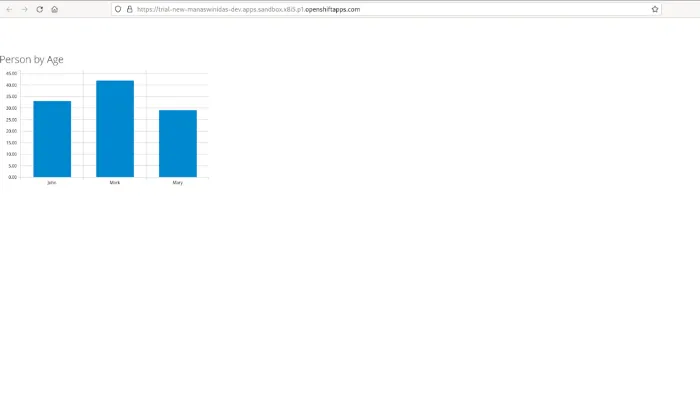
Open your browser and navigate to http://localhost:8080 to make sure our HTML page is being served correctly. This is what you will see on your browser.
Shipping your image
It’s time to publish the image on an image registry so that we can later deploy it in OpenShift Developer Sandbox. I’m using Docker Hub. You can sign-up for a free Docker account and receive free unlimited public repositories. You can also use Quay.
Sharing our images on Docker will help others on our team pull the images and run them locally. This is also a great way to share your application with others outside of your teams such as testers and business owners.
To push your images to Docker’s repository run the docker tag and then the docker push commands. You will first need to log in with your Docker ID.
$ docker login
$ docker tag dashbuilder <dockerid>/dashbuilder
$ docker push <dockerid>/dashbuilder
You can see the following output on your terminal on successful execution.
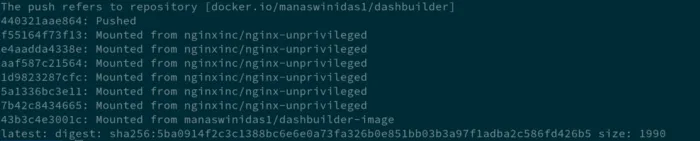
You will be able to see your repository on your Docker Hub account.

Deploy image on OpenShift Developer Sandbox
Refer to this guide to set up and start your OpenShift Developer Sandbox for free. Once you start using your sandbox, you can either use the CLI or the GUI to publish/deploy your image.
In case you are comfortable with using CLI, you can refer to this guide to deploy and expose your application.
Alternatively, you can use the GUI to deploy your image.
Click on the Hamburger button on the top left and click on the “+Add” button. You will see the following screen.
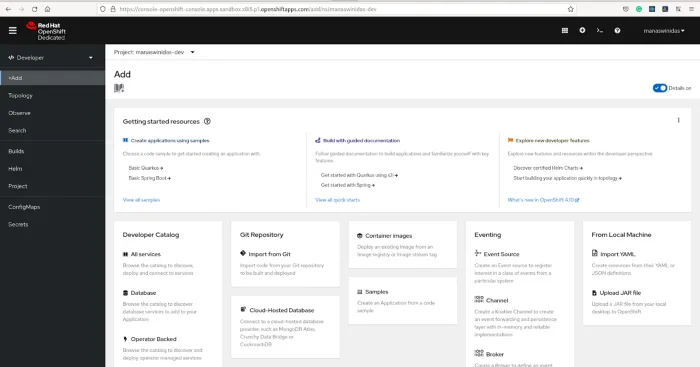
Select “Container Images” and start filling the Deploy image form as follows.
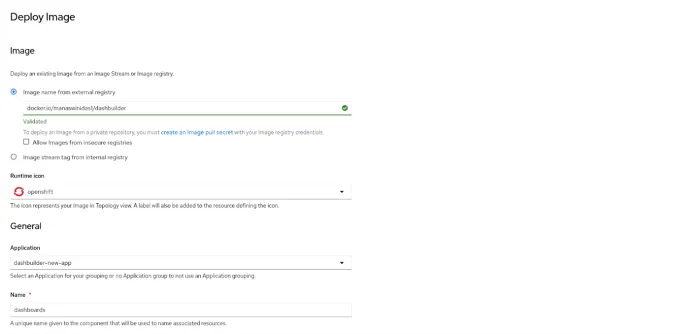
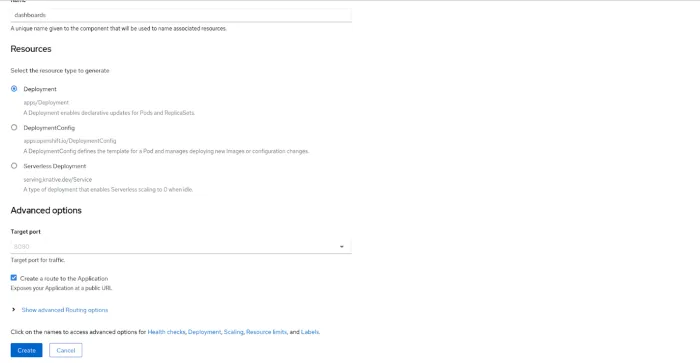
Now click on “Create”. This will immediately take you to the page corresponding to the Topology tab on your right menu.

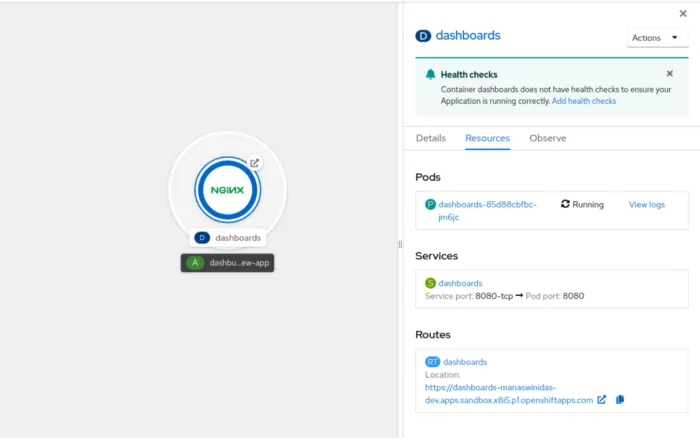
Click on the same and navigate to the “Resources” tab and you will be able to see a link in the “Routes” section. Click on the link and see your application running on another tab.
Great! You can now create an Nginx Docker image and deploy the image on OpenShift Developer Sandbox. Let us know whether you were able to get your DashBuilder static application to run successfully.