AWS Fundamentals: A Beginner's Guide
- What is AWS?
- Do you wonder who uses AWS?
- What are the services that AWS provides to its clients?
- How is AWS unique?
- Deploy Code to a Virtual Machine with AWS CodeDeploy
- Conclusion
Have a look at this video on AWS tutorial to learn more on AWS!
What is AWS?
AWS fundamentals would be incomplete without knowing what AWS is. Let us try to understand the definition of AWS through an example.
Imagine yourself as an entrepreneur having a website and services, and you have a modest amount of customers, let us say 20,000. What if suddenly the viral content on your website attracted a lot of traffic? What if 200,000 people visit your site at the same time? Is there not a possibility for the server to crash? Yes, it would indeed crash. But if you use AWS, this situation won’t happen.
AWS lets you scale up or down your services. What if you want to start your business in a new location but you don’t have enough capital? AWS has a solution for that as well. You can access a lot of services including infrastructure and software services, as well as computing power, scalability, durability, and secure database storage.
In simple terms, AWS is more like renting everything that is required for a business.
Amazon builds huge high-speed computers, storage devices, and other software and infrastructure tools. These can be accessed by all those having a proper internet connection through the website amazonwebservice.com
So, AWS is a cloud computing platform that allows you to create cloud-based applications. It provides a mix of infrastructure and software services as well as computational power, scalability, dependability, and secure database storage.
AWS is a good place to start when it comes to quality development because it has roughly 200 products and services available all around the world. It aids with identification, configuration, utilization, control, auditing, and management.
Do you wonder who uses AWS?
A wide range of clients including budding start-ups, elite companies, and government organizations use AWS.
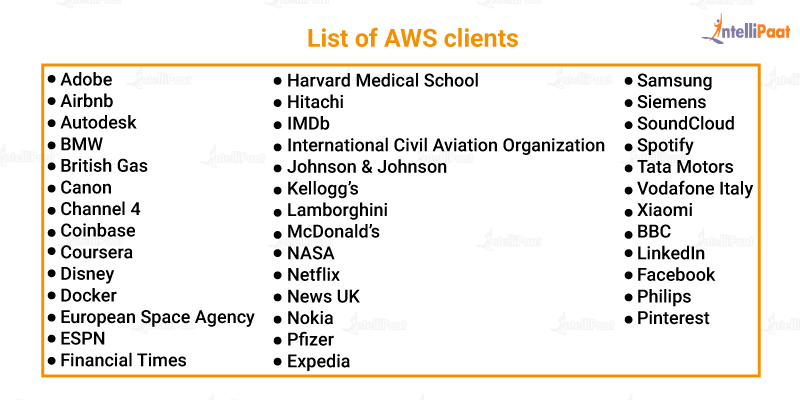
And the list continues. Does every client of AWS seem familiar to you? Let us explore what AWS provides to these companies.
What are the services that AWS provides to its clients?
The services offered by AWS are under various domains such as:

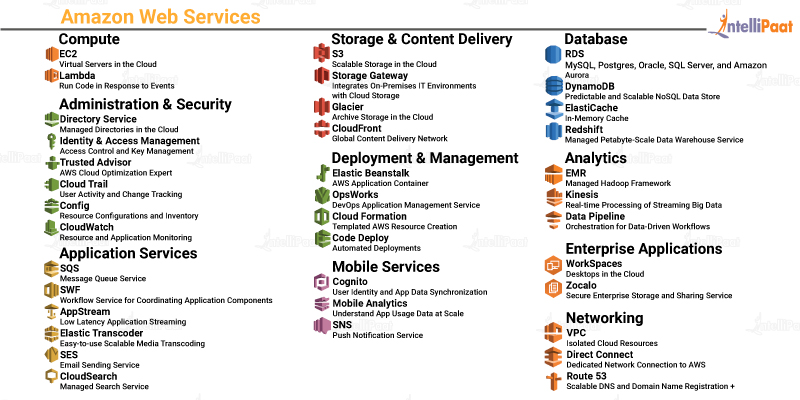
There are so many tools and services under each domain. In 2021, AWS has about 200+ products. Let us see what they are.
It is difficult to learn about all products, so let us focus on a few popular products.
Computing Products
- Amazon EC2
Amazon EC2 stands for Elastic Compute Cloud. It is one of the leading, popular products used for computing. It is a cloud computing service that offers safe, scalable compute power. It is intended to make web-scale cloud computing more accessible to programmers.The easy web service interface of Amazon EC2 allows you to quickly obtain and configure capacity. It gives you total command over your computing resources. Depending on the load that the company is dealing with, EC2 would increase or decrease the resources available.
- AWS Elastic Beanstalk
AWS Elastic Beanstalk is the quickest and most straightforward way to deploy web applications on AWS. Developers simply submit their code in any of the programming languages, such as Java, Python, and Ruby, and the service takes care of the rest including resource provisioning, load balancing, auto-scaling, and monitoring. Amazon EBS deals with code deployment after it is uploaded.
- Amazon Lightsail
Lightsail allows developers to create a virtual private server (VPS) to deploy and manage websites and web applications in the cloud by providing computation, storage, and networking capacity and capabilities. Lightsail comes with everything you will need to get your project up and running quickly, including virtual machines, containers, databases, content delivery network (CDN,) load balancers, and DNS administration.
- AWS Lambda
AWS Lambda is a serverless computing service that automatically maintains the underlying compute resources for you while running your code in response to events. You may use AWS Lambda to add custom logic to other AWS services or build your own back-end services that run on the AWS scale, performance, and security. AWS Lambda allows you to pay only for the time it takes to compute.
Our AWS Tutorial will help you understand more on this topic!
Storage Services
- Amazon S3
Amazon S3 is an object storage service with industry-leading scalability, data availability, security, and performance. Any customer, from any background and sector, can use it to store and safeguard any quantity of data for a variety of uses including data lakes, websites, mobile apps, backup and restore, archive, business applications, IoT device management, and big data analysis.
- Amazon S3 Glacier
Amazon S3 Glacier and S3 Glacier Deep Archive are highly secure, long-lasting, and cost-effective storage options. They are built to last for 99.999999999 percent of the time and come with complete security and compliance features that can help you to fulfill even the most demanding regulatory standards. Customers can store data for as little as one dollar per terabyte monthly, saving them a lot of money over on-premises alternatives.
- Amazon EBS
Amazon Elastic Block Store (EBS) is an efficient, easy-to-use block storage service developed for use with Amazon EC2 for both throughput and transaction-intensive workloads at any scalability. Relational and non-relational databases, business applications, containerized apps, big data analytics engines, and media work flow, and file systems are all examples of workloads that can be deployed by using Amazon EBS. Any operating infrastructure in the same availability zone can be linked to Amazon EBS.
- Amazon Elastic File System
Amazon Elastic File System (Amazon EFS) is a serverless, set-and-forget elastic file system that allows you to exchange files without having to deploy or manage storage. It works with both AWS cloud services and on-premises resources, and it is designed to expand up to petabytes on demand without affecting the applications.With Amazon EFS, you can automatically expand and contract your file systems as you add and delete files, reducing the need to plan and manage capacity to handle growth.

Database Services
- Amazon RDS
Amazon Relational Database Service (RDS) makes it simple to set up, run, and scale a relational database in the cloud. It offers scalable capacity at a low cost while automating time-consuming administrative operations including hardware provisioning, database setup, patching, and backups.Amazon RDS allows you to concentrate on your applications, ensuring that they have high performance, availability, security, and compatibility.
- Amazon Redshift
Amazon Redshift is a data warehouse that allows customers to utilize SQL and other BI tools to evaluate and analyze data. It is a data warehouse that is quick and well-managed. It also has advanced query optimizations that allow users to execute complicated analytical queries against structured data.
Network and Content Delivery Services
- Amazon Route 53
Route 53 is a cloud domain name system (DNS) web service that is highly accessible and scalable. Its purpose is to provide developers and companies with a highly stable, reliable, and cost-effective method of routing end users to internet applications by converting domain names such as www.example.com into numeric IP addresses such as 192.0.2.1, which computers use to communicate with one another.
- Elastic Load Balancing
By using Elastic Load Balancing, incoming application traffic is dynamically redistributed among various targets such as Amazon EC2 instances, containers, IP addresses, Lambda functions, and virtual appliances. Elastic Load Balancing can accommodate the fluctuating load of your application traffic in various zones. Elastic Load Balancing supports four different types of load balancers, each with the high availability, automated scaling, and comprehensive security that your applications require in order to be failure or error-tolerant.
Preparing for job interviews? Have a look at our blog on AWS Interview Questions and excel your hiring journey!
Let us also take a look at some other tools.
- AWS Application Discovery
AWS Application Discovery Service gathers information about on-premises data centers to assist corporate clients in planning migration activities.Thousands of workloads, many of which are highly interdependent, might be involved in data center migration planning. Data on server usage and dependency mapping are crucial early on in the transfer process.
To help you better understand your workloads, AWS Application Discovery Service collects and provides configuration, use, and behavior data from your servers.
Career Transition


- AWS Auto Scaling
AWS Auto Scaling continuously analyses your applications and changes the capacity as required to provide consistent, predictable performance at the lowest feasible cost. It is simple to build application scalability at a really quick pace for various resources across many services using AWS Auto Scaling. The powerful interface will let you plan a stable scale-up plan for various resources and it will always balance the cost and performance.
- AWS Identity and Access Management
You may use AWS Identity and Access Management (IAM) to protect the credentials of AWS services and resources. You may use IAM to establish and monitor AWS users and groups as well as to utilize permissions to grant or prohibit access to AWS services.IAM is absolutely free. You will be made to pay only if your members utilize other AWS services.
Enroll in our AWS Certification Course to become a Certified AWS Professional!
How is AWS unique?
Do you wonder why so many companies rely on AWS?
- AWS allows for services to be quickly deployed without much capital requirement.
- AWS gives the opportunity to use Amazon’s highly efficient hardware, which can solve the issue of high maintenance. This will save the time and cost required for maintenance. As you can upgrade our infrastructure anytime, it saves you from a lack of competent services from the existing hardware during peak hours.
- The scalability as well as adaptability of AWS makes it easy for any business to begin from scratch and grow to any level.

- The low cost of migration is another feature that attracts businesses toward AWS.
- AWS offers a secure and long-lasting platform to store data, which respects data privacy.
- The flexibility of AWS allows the use of any operating system, language, database, or other services as needed.
- AWS is simple; starting an AWS account is as simple as starting a Facebook account.

- The economic feasibility that AWS gives is immense. While using AWS, you only have to pay for the computing power storage and the resources that you use and nothing else.
- You can always rely on AWS data because it stores backups at multiple points and there is less chance of data loss.
- It is easy to monitor your data and users. AWS can help any business to provide an excellent customer experience.
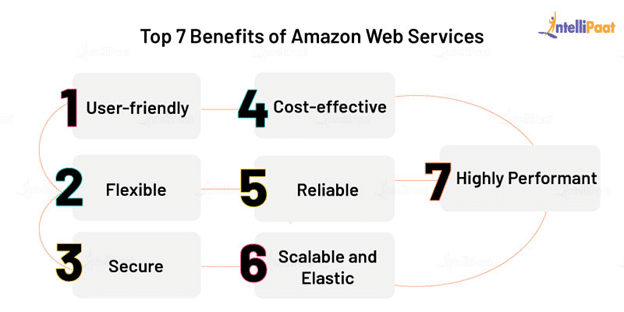
Let us conclude the top seven benefits of AWS in the form of an image:
Deploy Code to a Virtual Machine with AWS CodeDeploy
Application code deployment to an AWS VM is covered in this section. You will deploy code to virtual machines that you build and administer with Amazon EC2 using AWS CodeDeploy, a tool that automates code deployments to AWS or on-premises servers.
Let’s move on to the tutorial.
Step 1:
To access your virtual machine using Amazon EC2, you must first generate a key pair. Go straight to Step 2 if you have a key pair.
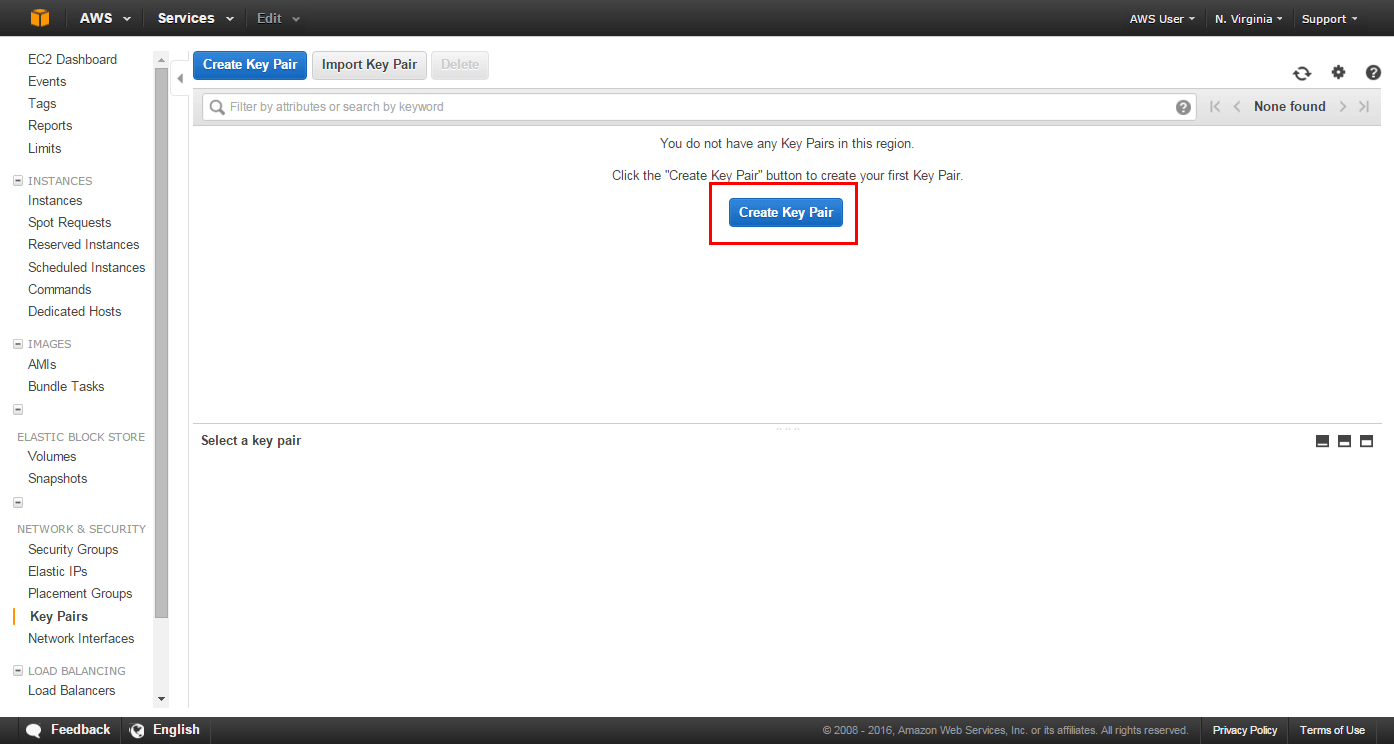
Step 2:
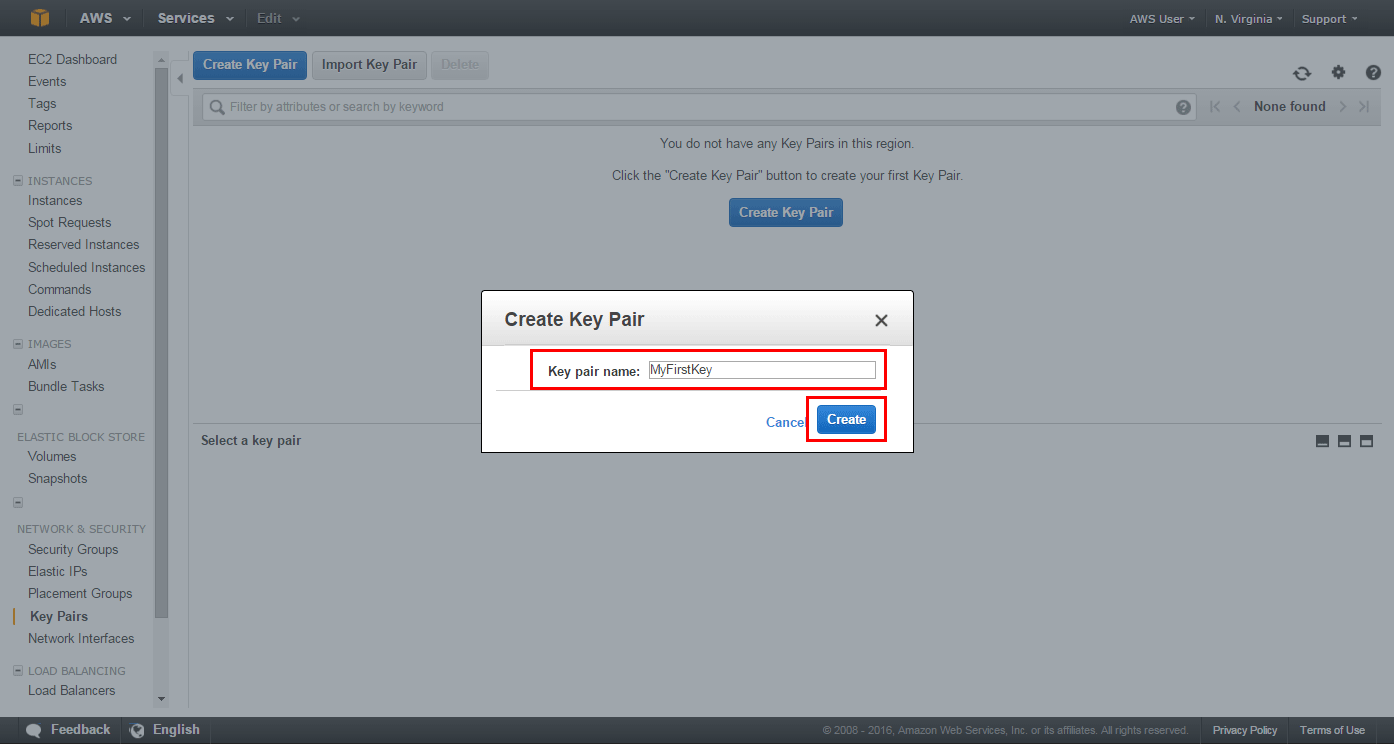
Open AWS Management Console, Click Create Key Pair.
Courses you may like
Step 3:
Choose a name for your key pair. We’ll be using MyFirstKey for this lesson. Click the Create button.
Step 4:
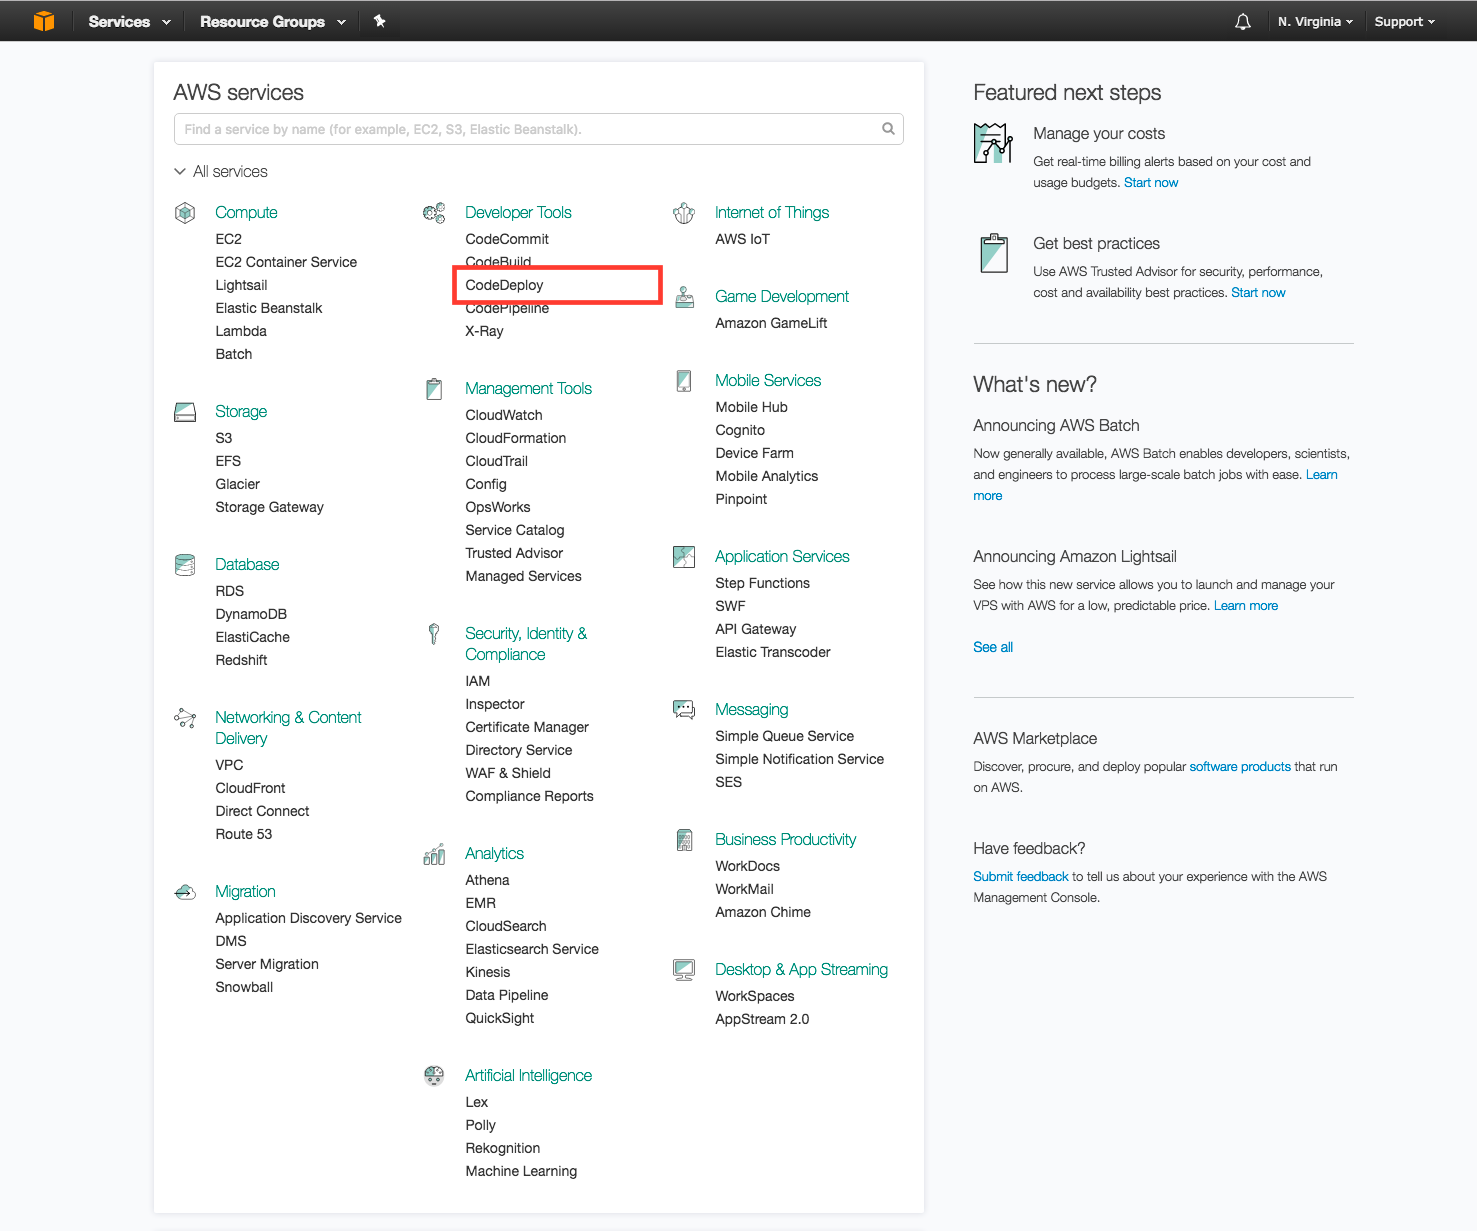
Enter the CodeDeploy Console.
- In the top left corner of the AWS Management Console, click the home icon. Locate CodeDeploy in the Developer Tools section and click to launch the AWS CodeDeploy console.
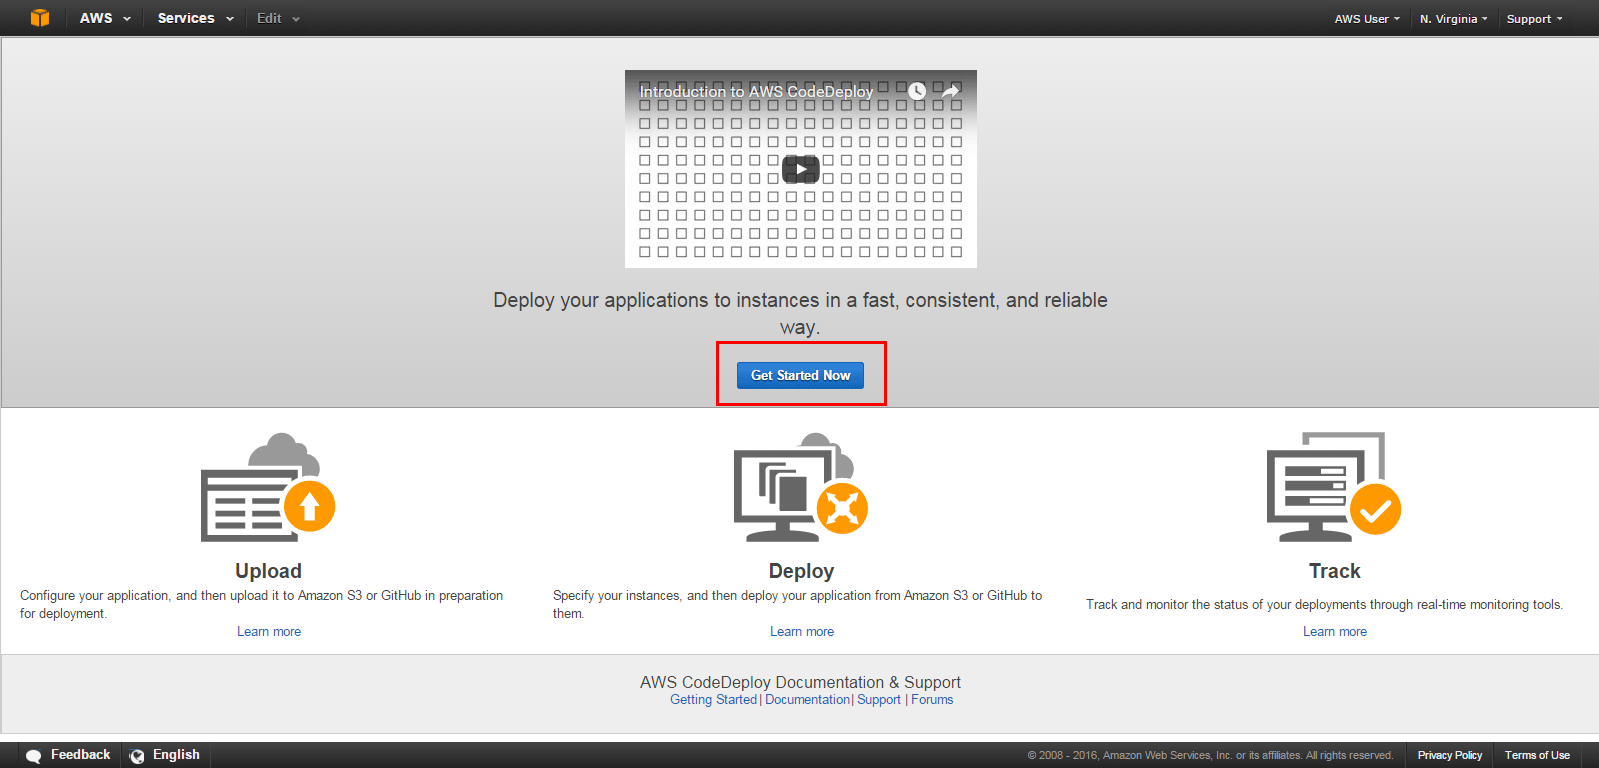
- Click Get Started Now in the AWS CodeDeploy console.
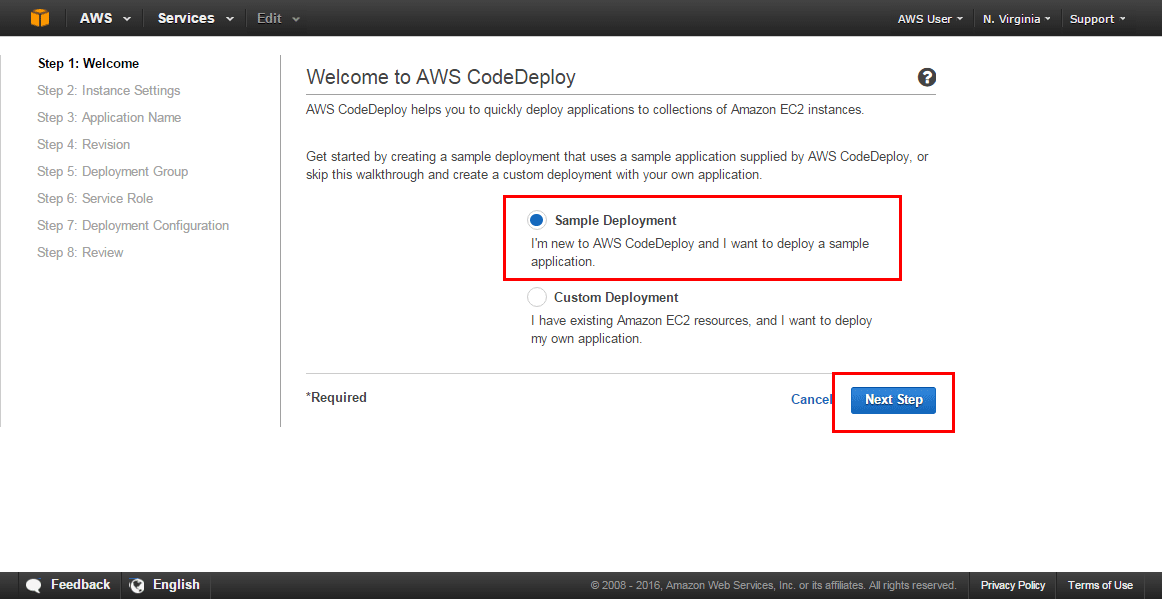
- Click Next after selecting Sample Deployment.
Step 5:
Launch a Virtual Machine
To deploy your code, you will need to launch an AWS virtual machine. Amazon EC2 instances, or just ‘instances’ for short, are the term given to AWS virtual machines. In this phase, we will use a pre-configured EC2 template to start three EC2 instances.
- In the top left corner of the AWS Management Console, click the home icon. Locate CodeDeploy in the Developer Tools section and click to launch the AWS CodeDeploy console.

- The following settings will be used to configure your instance settings:
Operating System: You have the option of selecting the operating system for your EC2 instance. We’ll be using Amazon Linux for this lesson.
To keep within the free tier, the t1.micro instance type was chosen as the default setting for this tutorial. Amazon EC2 offers a diverse set of instance types that are tailored to certain use cases. Instance types provide different combinations of CPU, memory, storage, and networking capabilities, giving you the freedom to select the best resource mix for your applications.
Key Pair Name: To connect to the Amazon EC2 instances, select the Amazon EC2 instance key pair you generated in step 1, MyFirstKey, from the drop-down list. You can also use a key pair that you already own.
Tag Key and Value: During deployments, AWS CodeDeploy will utilize this tag key and value to find the instances. You may leave the default settings alone.
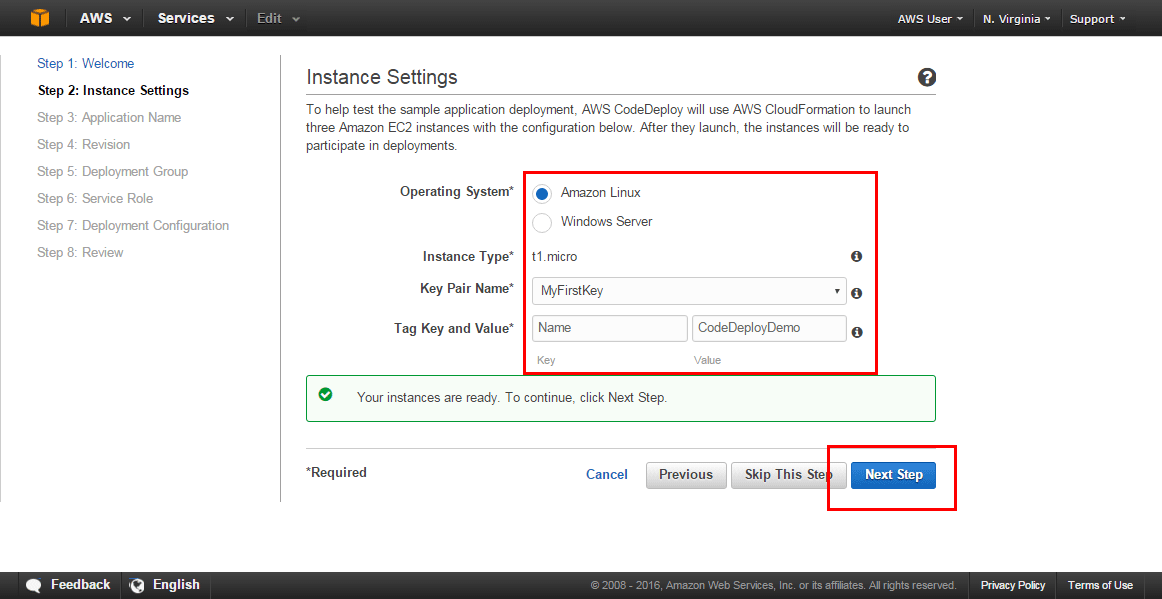
Click Launch Instances.

Step 6:
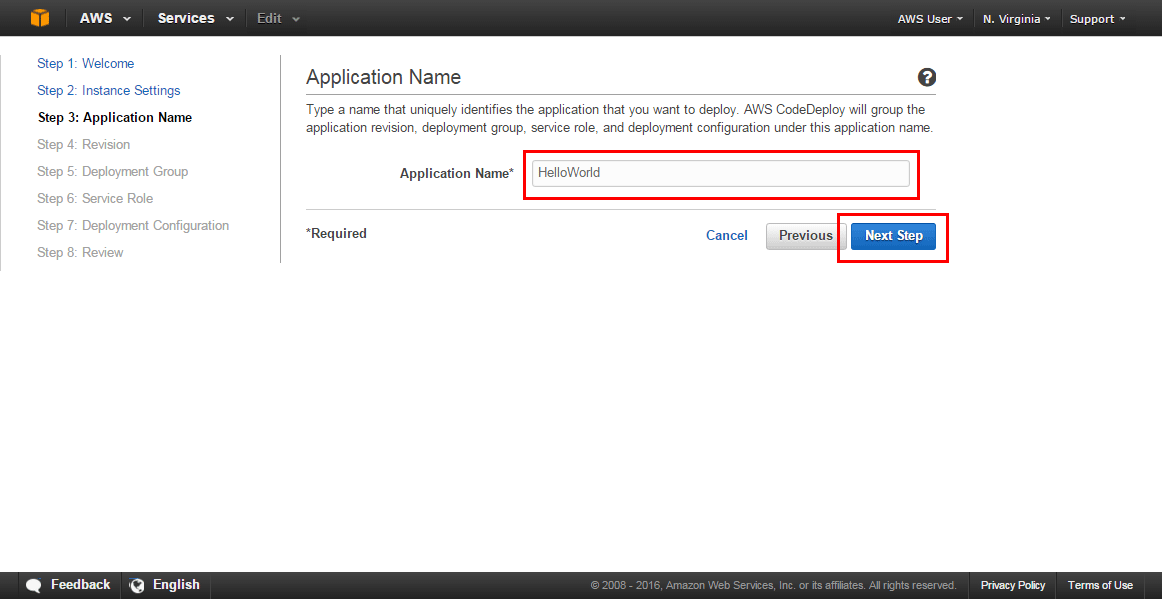
Name Your Application and Go Over Your Revisions
During code deployments, AWS CodeDeploy utilizes application names to ensure that it is referencing the right deployment components, such as the deployment group, deployment settings, and application revision.
- Enter HelloWorld as the name for your sample application in the Application Name field and click Next Step.
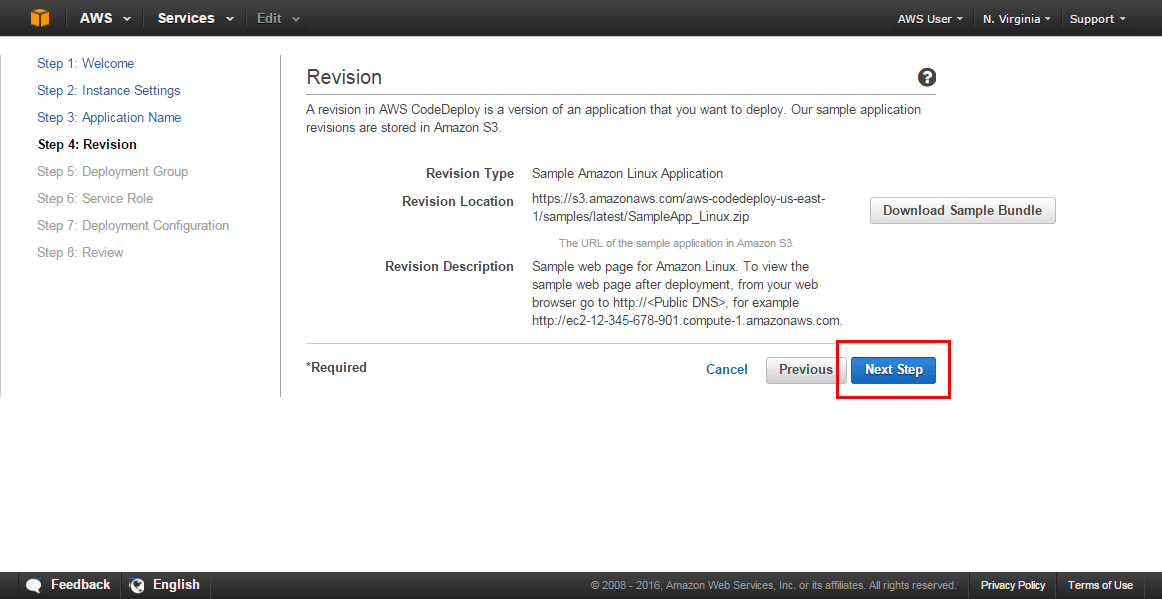
- Examine the details of your application revision, such as its location and description.
Please keep in mind that you have the option of downloading the sample package. You may evaluate details about the application revision you want to deploy to EC2 in this view. An application revision is an archive file that contains source code, web pages, executable files, and deployment scripts, as well as an application specification file (AppSpec file). The AppSpec file assists CodeDeploy in mapping the source files in your version to their destinations and running scripts at different phases of the deployment.
Click the Next Step button.
Step 7:
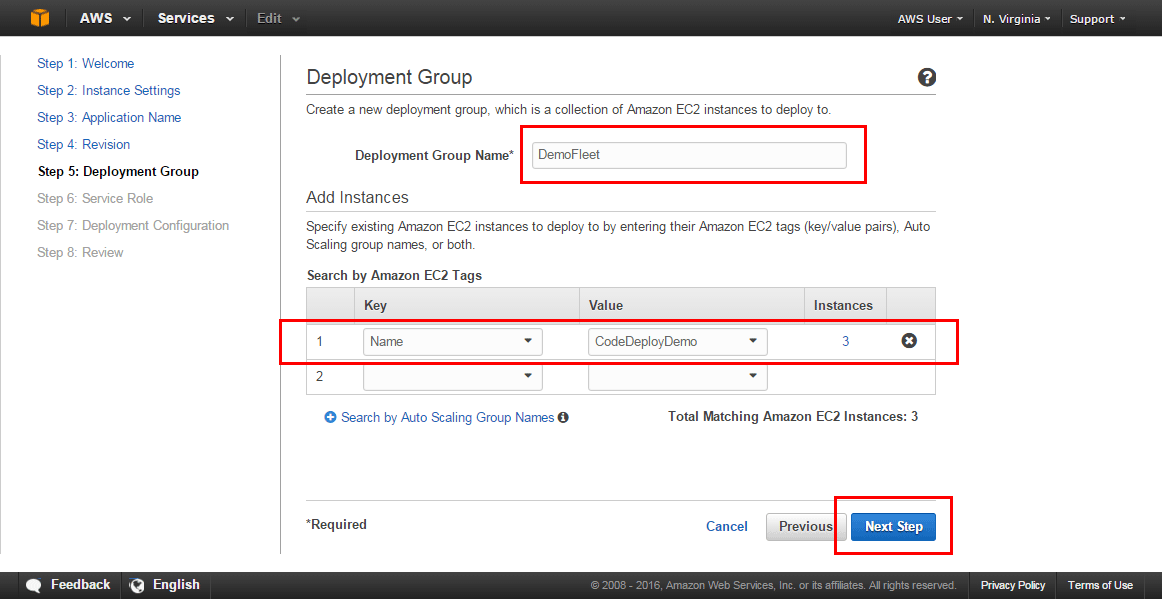
Create a Deployment Group
A deployment group is a collection of individual Amazon EC2 instances to which CodeDeploy delivers updates. A deployment group comprises instances that have been individually tagged, Amazon EC2 instances in Auto Scaling groups, or both.
Leave the suggested deployment group name (DemoFleet) in the Deployment Group Name field alone.
The Amazon EC2 instances to deploy will then be specified by providing the key-value pair in the Seach by Amazon EC2 Tags section:
The data from Step 3 should be auto-populated in the Key and Value fields.
The number of EC2 instances to which you will deploy code is displayed in the Instances column. We have deployed and pre-configured three EC2 instances for this tutorial, and these instances have already been tagged together as a deployment group.
Select the Next Step option.
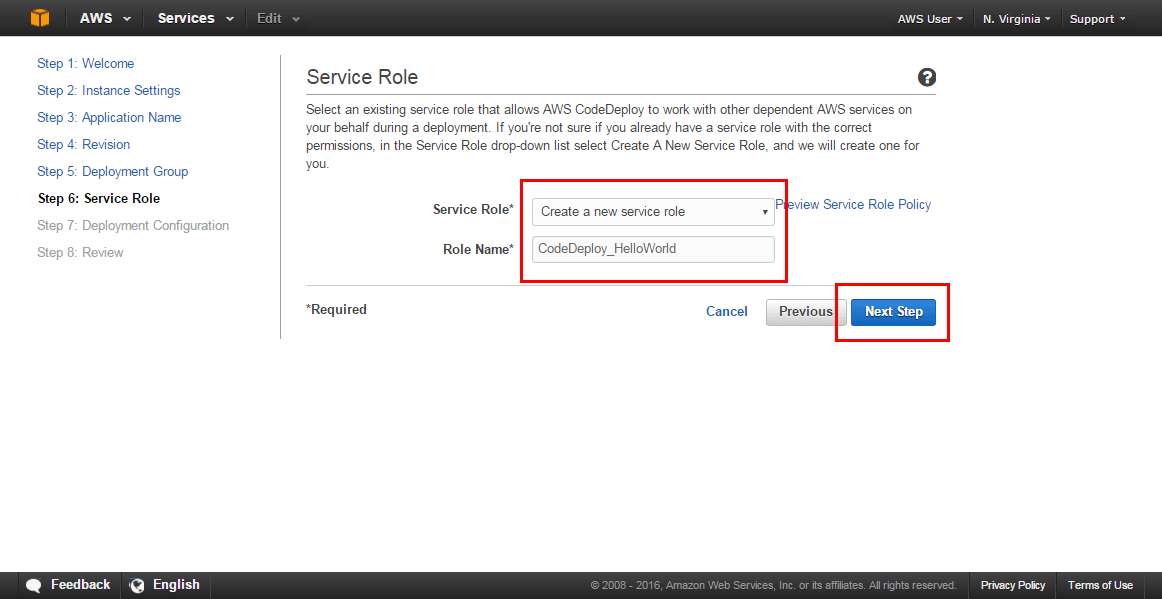
Step 8:
Create a Service Role
In this step, you will authorize AWS CodeDeploy to deploy to your instances. When you wish to provide rights to an AWS service, such as Amazon EC2 or AWS CodeDeploy, you establish a role for it. Because these services have access to AWS resources, you must define a role to specify what the service is permitted to do with those resources.
Make a new service role for yourself. You can pick whether you already have a service role. Make use of an existing service role.
You can accept the default value of CodeDeploy HelloWorld for the role name. Choose an existing service role from the Role Name drop-down list if you are utilizing it.
Next, click the Next button.

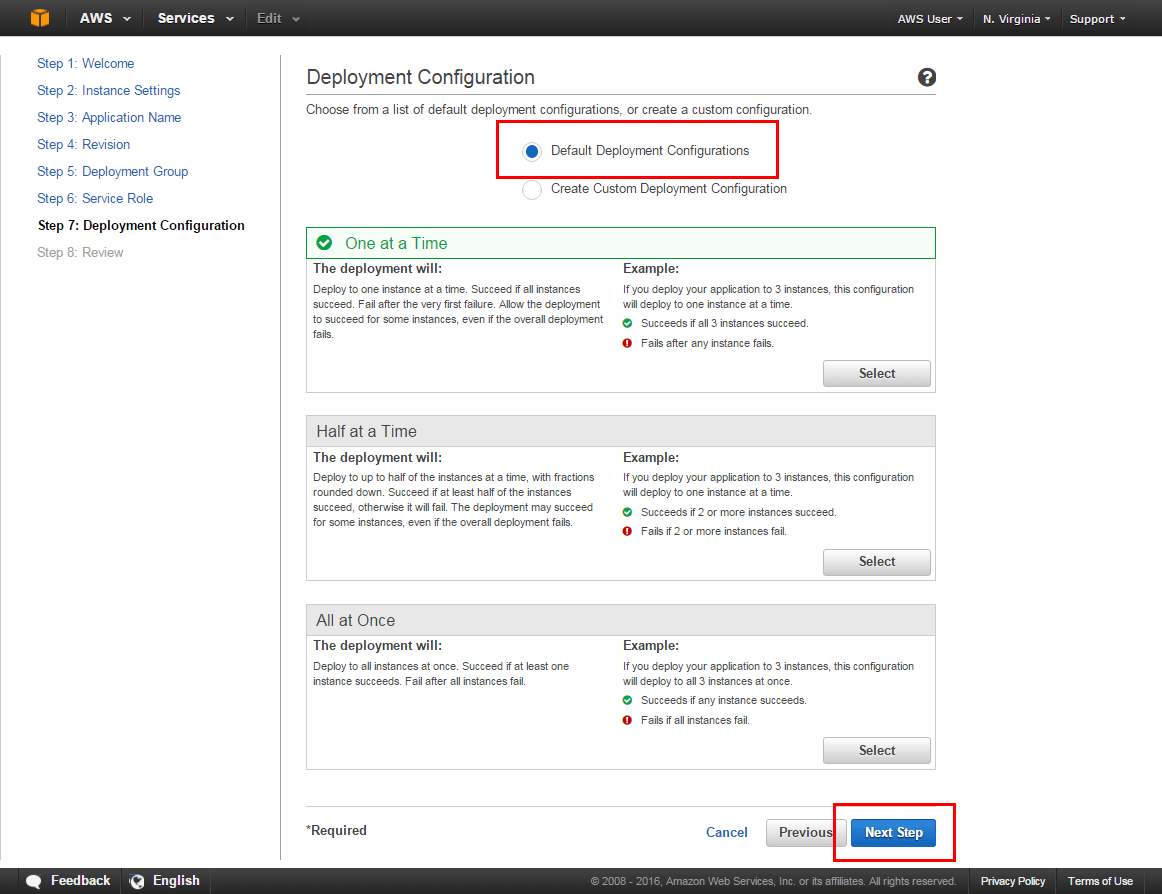
Step 9:
Deploy Your Application
In this phase, we’ll choose a deployment configuration and then launch the deployment to our three EC2 machines. We will have successfully launched a live and working website that we can access online by the conclusion of this phase.
- The deployment configuration specifies how many instances to deploy your application versions to at the same time and explains the deployment’s success and failure circumstances. For example, if you deploy your application to three instances and choose the default configuration (“One at a Time”), this setup will deploy to one instance at a time.
Accept the Default Deployment Configuration and press the Next Step button.
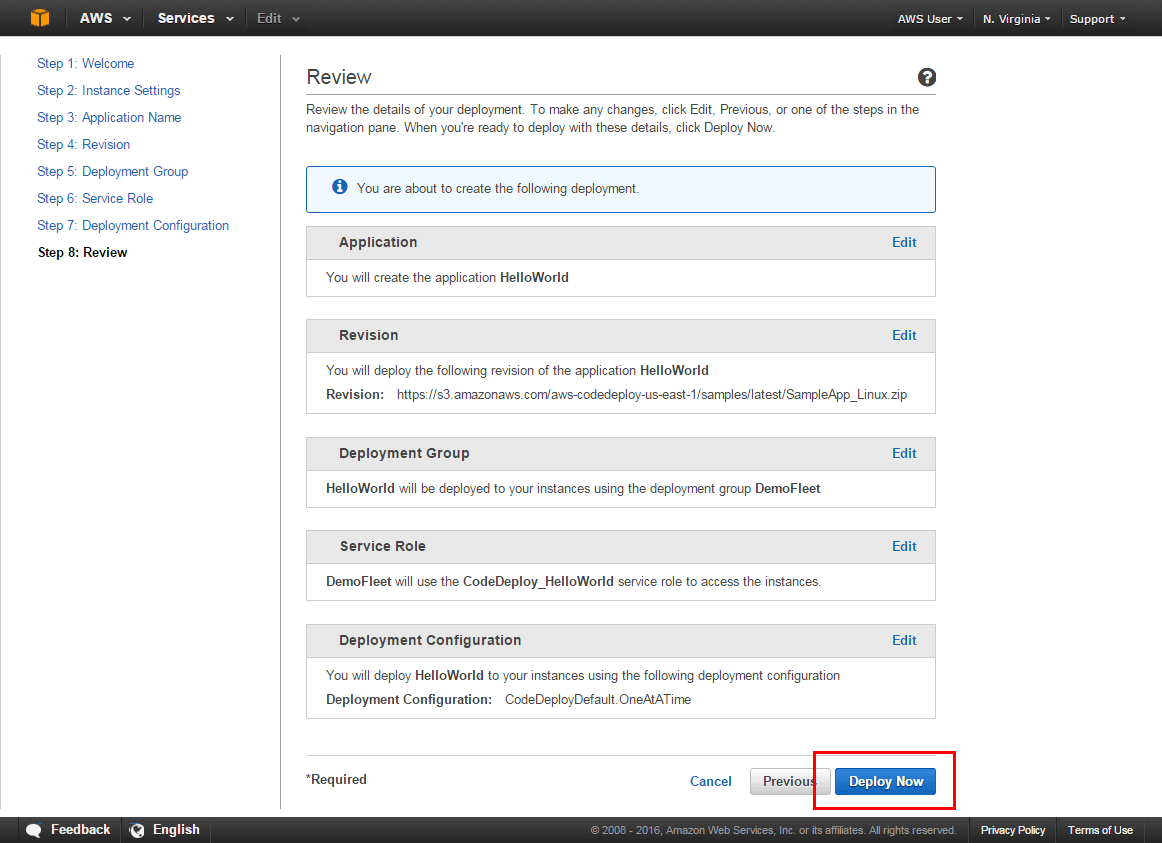
- Examine the deployment details and then click Deploy Now.
Please keep in mind that this may take a few minutes to finish.
- Each instance receives a single web page in our sample revision. When you’ve finished all three instances, click View All Instances.

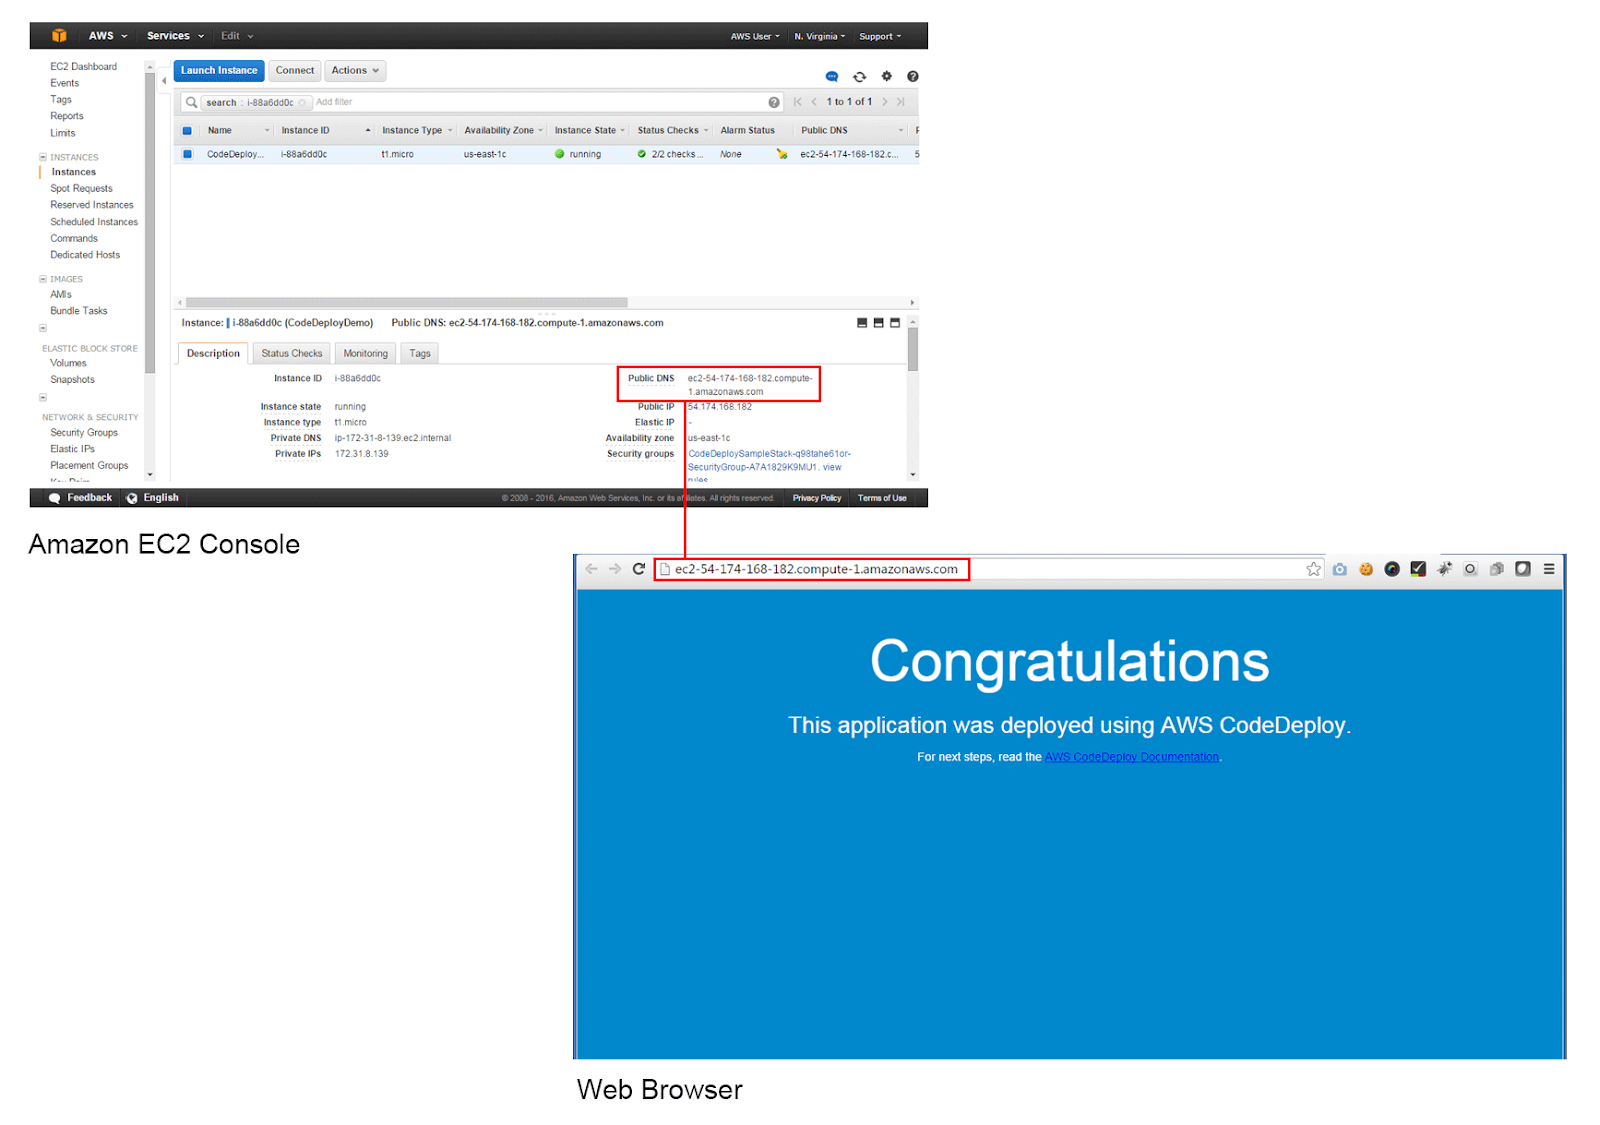
- Click the instance ID of one of the instances to which you deployed. This will take you to the EC2 dashboard, where you can see the instance you just started.
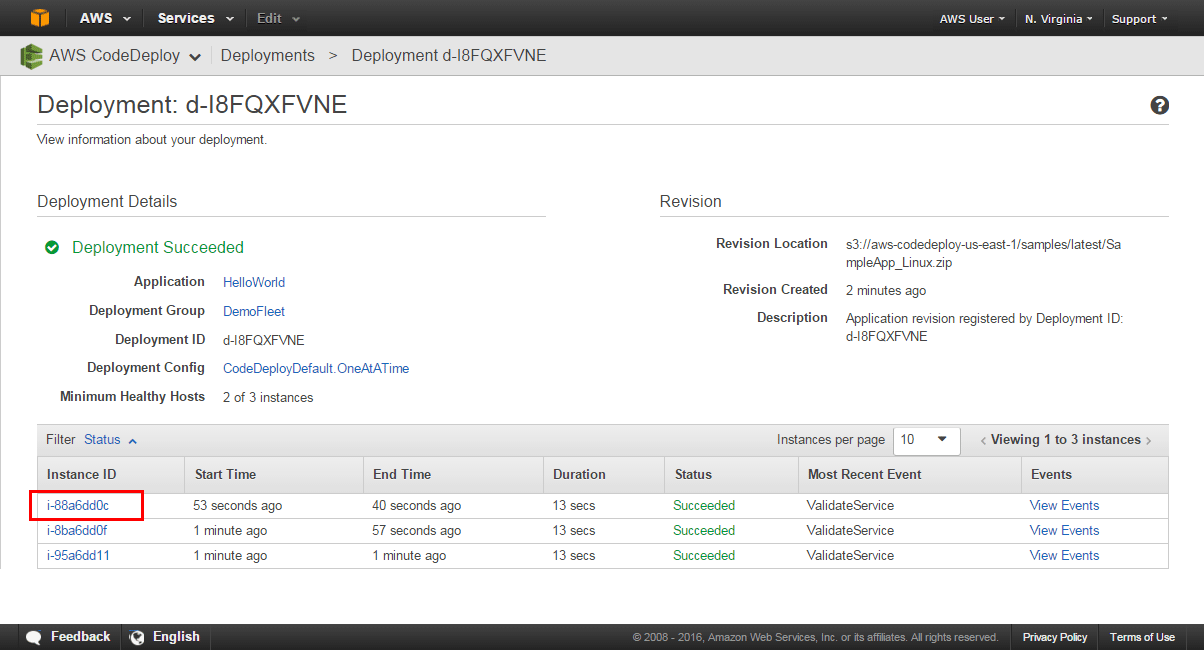
- To test if your sample application was properly deployed, copy the address from the Public DNS box in the bottom panel, put it into your browser, and you will see your live web page.
Step 10:
Clean up your instances
You must clear up the materials used in this lesson to avoid future costs. Unless you remove them, the EC2 instances you launched for this tutorial will continue to operate.
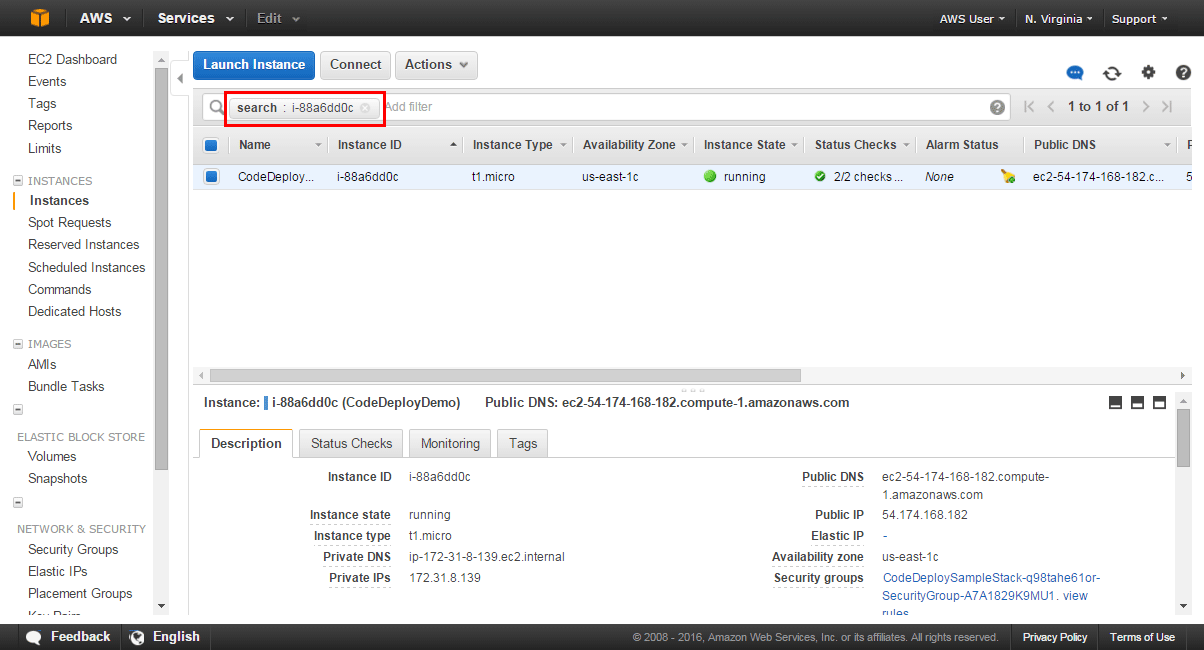
- The search box in the EC2 interface is pre-populated with a search filter for the Instance ID. If you remove this filter, you will see all of the instances launched by CodeDeploy.
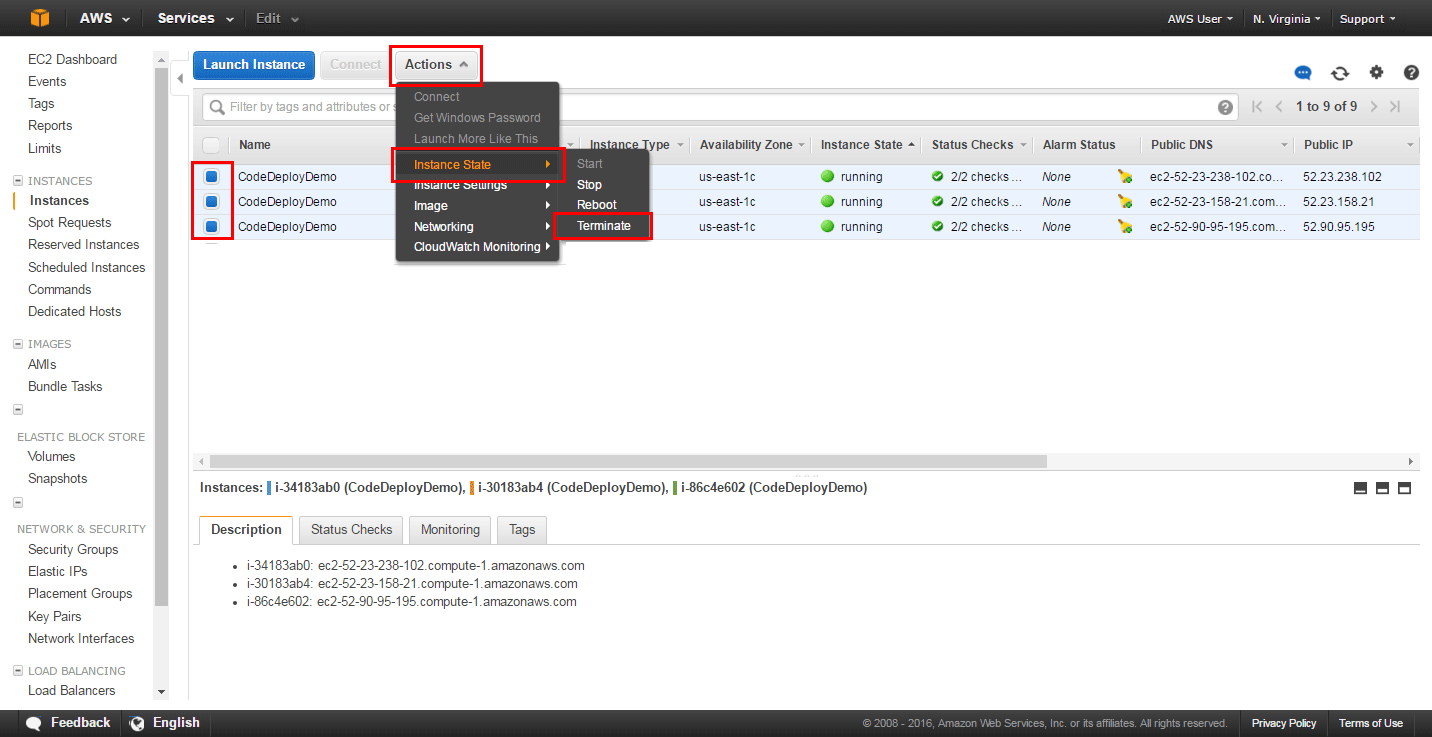
- To terminate an Amazon EC2 instance, check the boxes next to each of its boxes. Choose Actions, Instance State, and then click Terminate.
If asked, choose Yes, Terminate.
Here, AWS CodeDeploy was used to generate and finish your first code deployment to Amazon EC2 instances. You began by launching three instances that were pre-configured with the appropriate tags and installed with the agent required to use AWS CodeDeploy, using a template provided. Finally, you configured your application for deployment, authorized CodeDeploy to deploy to your instances, and successfully deployed your code.
Conclusion
Any business or organization can speed up its growth when it incorporates technologies such as cloud computing and AWS into its system. In no time, the inclusion of sophisticated technology into more sectors of the economy, such as the financial sector, health sector, educational sector, and other industrial sectors, has been witnessed.
AWS, along with other technologies, has been undergoing consistent development. These changes make it capable of solving modern challenges. Thus, AWS has a promising future ahead of it.
Caught up with doubts? Have a look at our AWS Community right now!
The post AWS Fundamentals: A Beginner's Guide appeared first on Intellipaat Blog.
Blog: Intellipaat - Blog
Leave a Comment
You must be logged in to post a comment.