Assigning due dates to tasks
Blog: Flokzu
One of the many advantages of using a BPMS is being able to manage deadlines and ensure that tasks are completed in a timely manner.
In Flokzu there are two ways of assigning deadlines to tasks:
- Configuring timers
- Assigning due dates to tasks
The main difference is that when using timers, if the deadline is reached the task is canceled and the workflow continues down another path (see how to set timers here). Due dates, on the other hand, works as a guide for the person who has to complete the task. If the time is exceeded, the task is not canceled but will be marked as overdue in the Inbox and reports.
Defining a due date
The due date of the task is configured when modeling the workflow. It is optional and specific to each task (different tasks in the same workflow can have different due dates).
To configure it, double-click the desired task and go to the ‘Due Date’ tab.
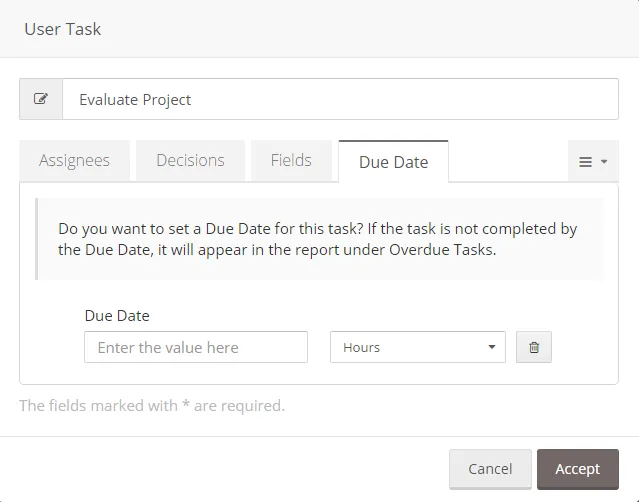
You can set the due date using years, months, days, hours or minutes. The due date is calculated since that task is assigned. Every day of the week is counted.
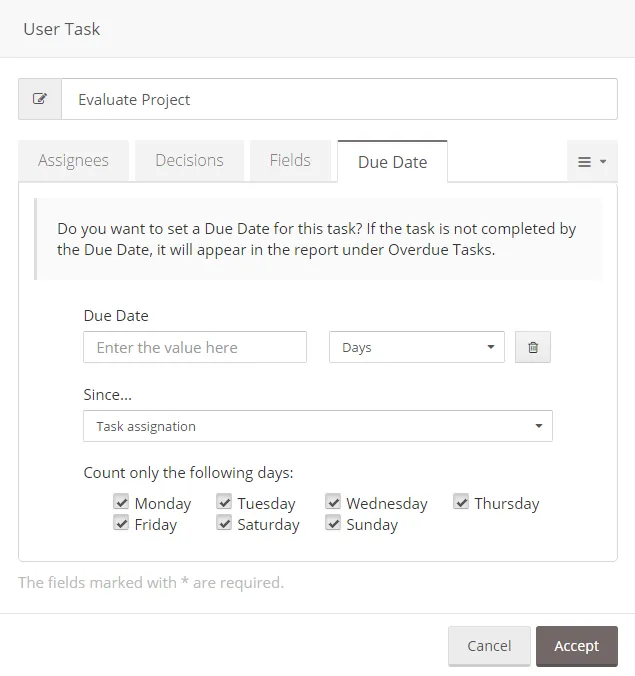
If you define the due date using days, you can define since when should the elapsed time be counted (task assignation or process launch) and which days count:
Once the due date is set, users will see in their Inbox exactly how much time they have left to complete the task. If the time is more than 24 hrs, it will be displayed in green. If it’s less, in yellow. If the time has already elapsed, it will appear in red:


The post Assigning due dates to tasks appeared first on Flokzu.