

ADF Autogeneration from Oracle BPM Human Tasks
Blog: BPM Blog Avio Consulting

Something we typically have to learn on our own is how to (1) auto-generate an ADF form and project from an Oracle BPM project and (2) how to reuse the ADF project when subsequently generating more ADF forms.
This has changed slightly in 12.2.1, and this provides step-by-step instructions on how to do this. This is an excerpt from Lesson 3 of AVIO’s new Oracle BPM Developer Training for 12.2.1.
Create an ADF Project and Form from a Human Task
Because human tasks in Oracle BPM projects are associated with the interactive activities, ADF forms can be automatically generated from the information flowing into and out of the human tasks.
1. Inside the Applications tab, expand the SOA folder -> expand the Human Tasks folder. 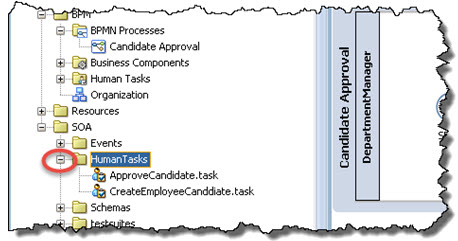
2. Double click ApproveCandidate.task.
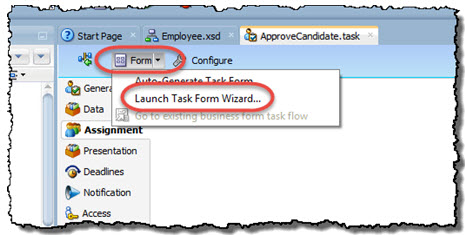
3. As shown below, click the Form dropdown -> Launch Task Form Wizard.
4. Give the new ADF project a name.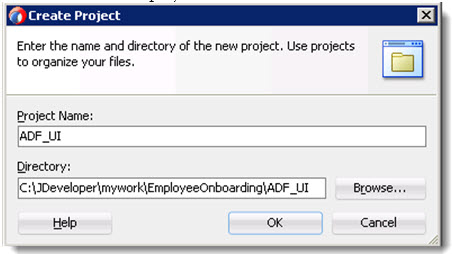
Be patient as the ADF wizard is working. The speed that it is created depends on the speed of the machine you are using and its available memory. This might take anywhere from just a minute to over 3 minutes.
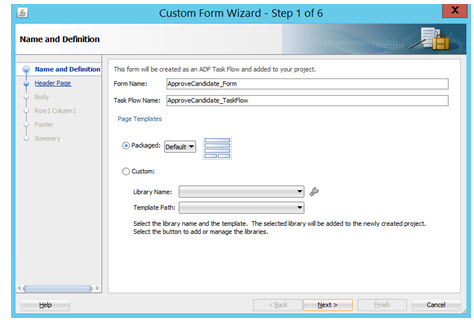
5. For step 1 of the wizard, leave the dialog set to the default values -> click Next.
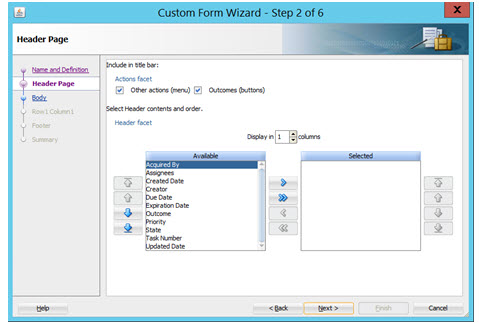
6. For step 2, leave the defaults set to the default values. Once the form is created, the Other actions (menu) and Outcomes checkbox selections will become apparent -> click Next.
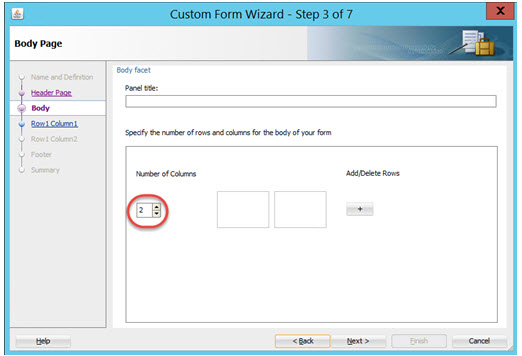
7. For step 3, change the number of columns to 2 to display the fields on the form in multiple columns -> click Next.
8. Step 4 defines the fields that will be on the left column (assuming 2 columns were selected previously) of the generated user interface. Select the root element in the left panel (or the individual fields) -> click the > button.
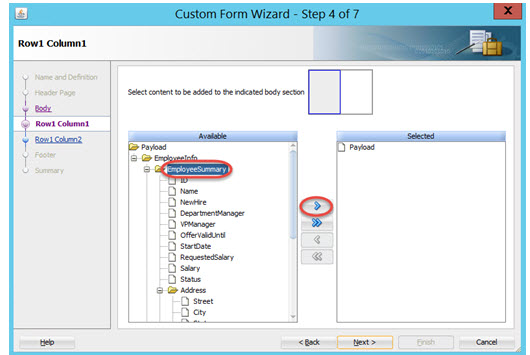
Click Next.
9. Step 5 defines the fields that will be on the right side of the generated user interface.
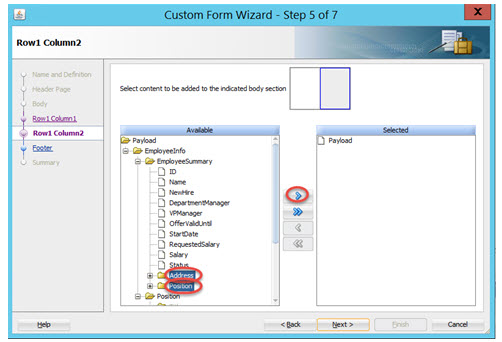
Click the > button to add them to the second column in the form in the next step -> click Next.
10. For step 6, leave the Comments, Attachments, and History checkboxes checked and click Next.
11. Click Finish. Wait a few minutes for the generated form to appear.
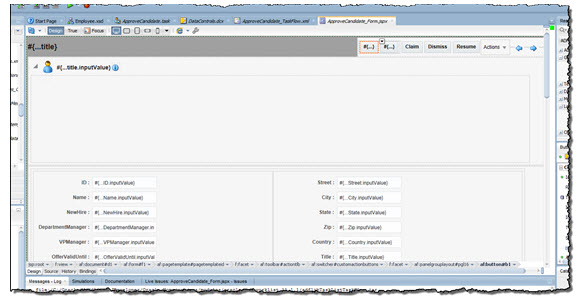
Due to the selections made in the wizard, note the fields in the two columns, and the buttons in the upper right corner. Scroll down in the form and note the Comment, History and Related Link (attachment) sections.
12. Save your application.
Add an ADF Form and Task Flow into an Existing ADF Project
A new ADF project was just created and an ADF form was automatically generated at the same time. Here you will see how a new ADF form can be created and placed inside the existing ADF project using another human task in a BPM project. While this was useful to create the ADF project and to create ADF user interface form very quickly and easily, this task steps you through the common requirement to simplify the application’s structure by having several ADF forms and their task flows reside in a single project.
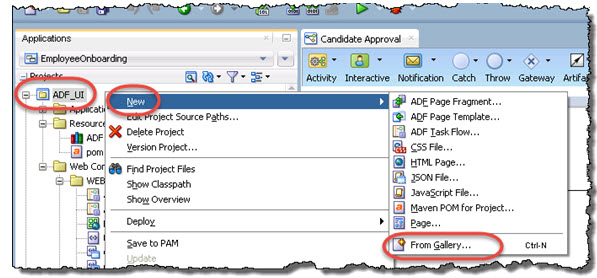
1. Right mouse click the ADF project that was just created in the Application Navigator tab -> click New -> From Gallery.
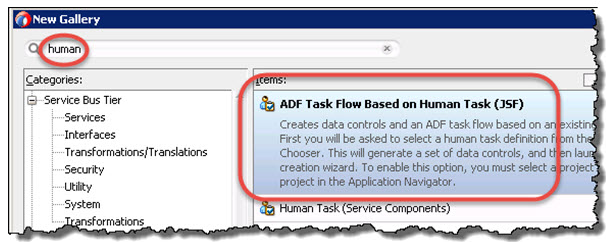
2. Type “human” in the search tab -> select ADF Task Flow Based on Human Task (JSF) -> OK.
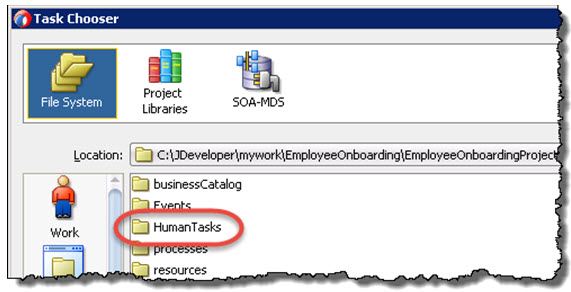
3. As shown below, open the HumanTasks folder under the SOA folder in the EmployeeOnboardingProject composite project under the EmployeeOnboarding application (click the up folder icon in the dialog’s toolbar -> double click the existing BPM project’s folder -> double click the -> SOA folder).
Double click the HumanTasks folder. If the correct directory has been selected, the BPM composite project’s two human tasks should be listed.
As shown above, select the human task -> click OK.
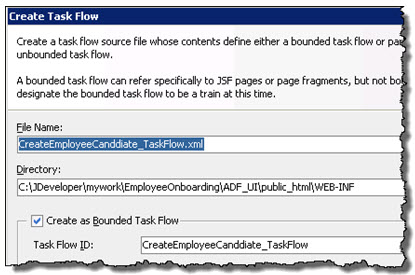
4. Wait a minute for the next dialog to appear. In the Create Task Flow dialog, leave the default entries settings as they are and simply click OK.
Having done this, the generated task flow should now appear. Before creating the new Create Candidate form, give the automatically created view activity in the task flow a more meaningful name by scrolling down in the diagram and right mouse clicking the jspx activity in the task flow -> Refactor -> Rename.
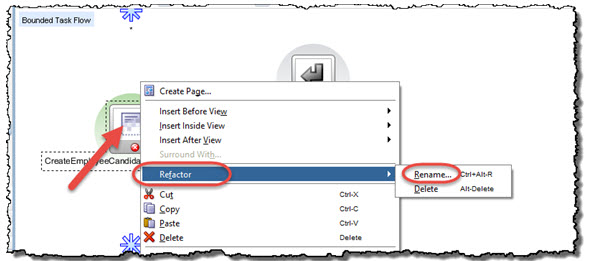
Rename the view to a more accurate name -> OK.
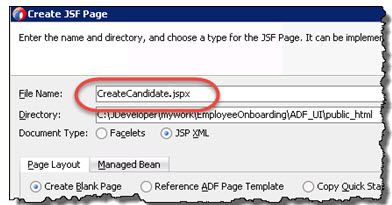
13. Create the new user interface page by double clicking jspx view that was just renamed -> name the JSF page form -> OK.
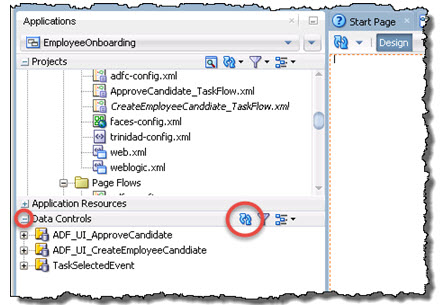
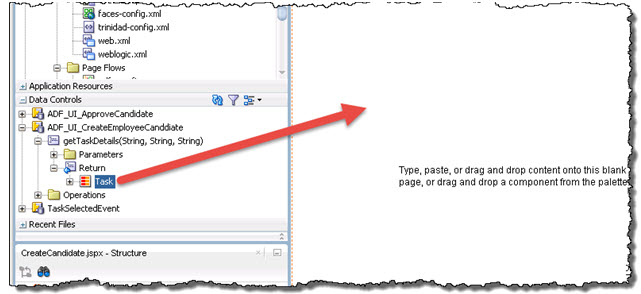
14. An empty form is now created and opened. Add the buttons and input fields into the empty form by first expanding the Data Controls accordion tab in the Applications tab on the left -> initially the tab will be empty so to refresh the tab, click the refresh icon as shown below.
15. Expand the ADF project in the data control tab -> expand getTaskDetails… -> expand Return.
To populate the form, drag Task into the form.
From the popup, select Human Task -> Complete Task with Payload.

Click OK. Give JDeveloper a few minutes to generate the form.
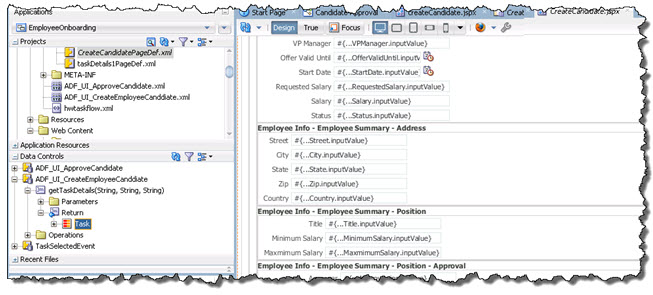
Having done this, the default auto-generated form based on the human task has been created.
16. Save the project and application.
There are two bugs in Oracle BPM 12.2.1 automatic ADF form generation that today require manually editing the source. The ADF forms automatically generated based on human tasks should be able to be created without having to edit the source of the jspx file in the ADF project each time as shown below. Until this issue is corrected, continue to edit the jspx files generated after creating them. How to correct these issues is described in this blog post Oracle BPM 12.2.1 ADF Auto-Generation Issue Solutions.
Leave a Comment
You must be logged in to post a comment.


Join the Conversation